3D Printing: A Huge Opportunity from Donors Choose and Makerbot

MakerBot News (MakerBotNews) on TwitterThose of you who know me know that I’ve been wanting a 3D printer in our library for awhile.  It seems that just when I think we’re about to get one, something happens that puts a barrier in our way.  This isn’t just about having cutting edge technology.  This is about allowing kids to experience another level of creating.  It’s about allowing kids to explore a technology that is possibly a piece of technology that we will all eventually have in our homes.  It’s about giving kids the power to dream something up, design it, print it, and  hold it in their hands.  It’s about bringing STEAM education to life for our students.  For these reasons, I haven’t given up hope that we will have a 3D printer in our library.  Recently, we started a conversation with UGA to partner with them and use the 3D printers that they have.  We are very grateful for this opportunity, but we know that if we truly want to have a 3D printer as a part of our daily resources available to students, then we need to have one in our building all the time.

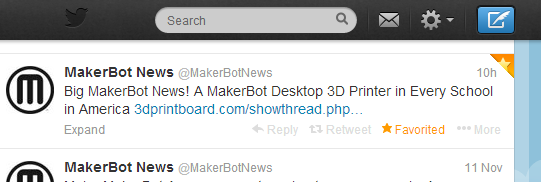
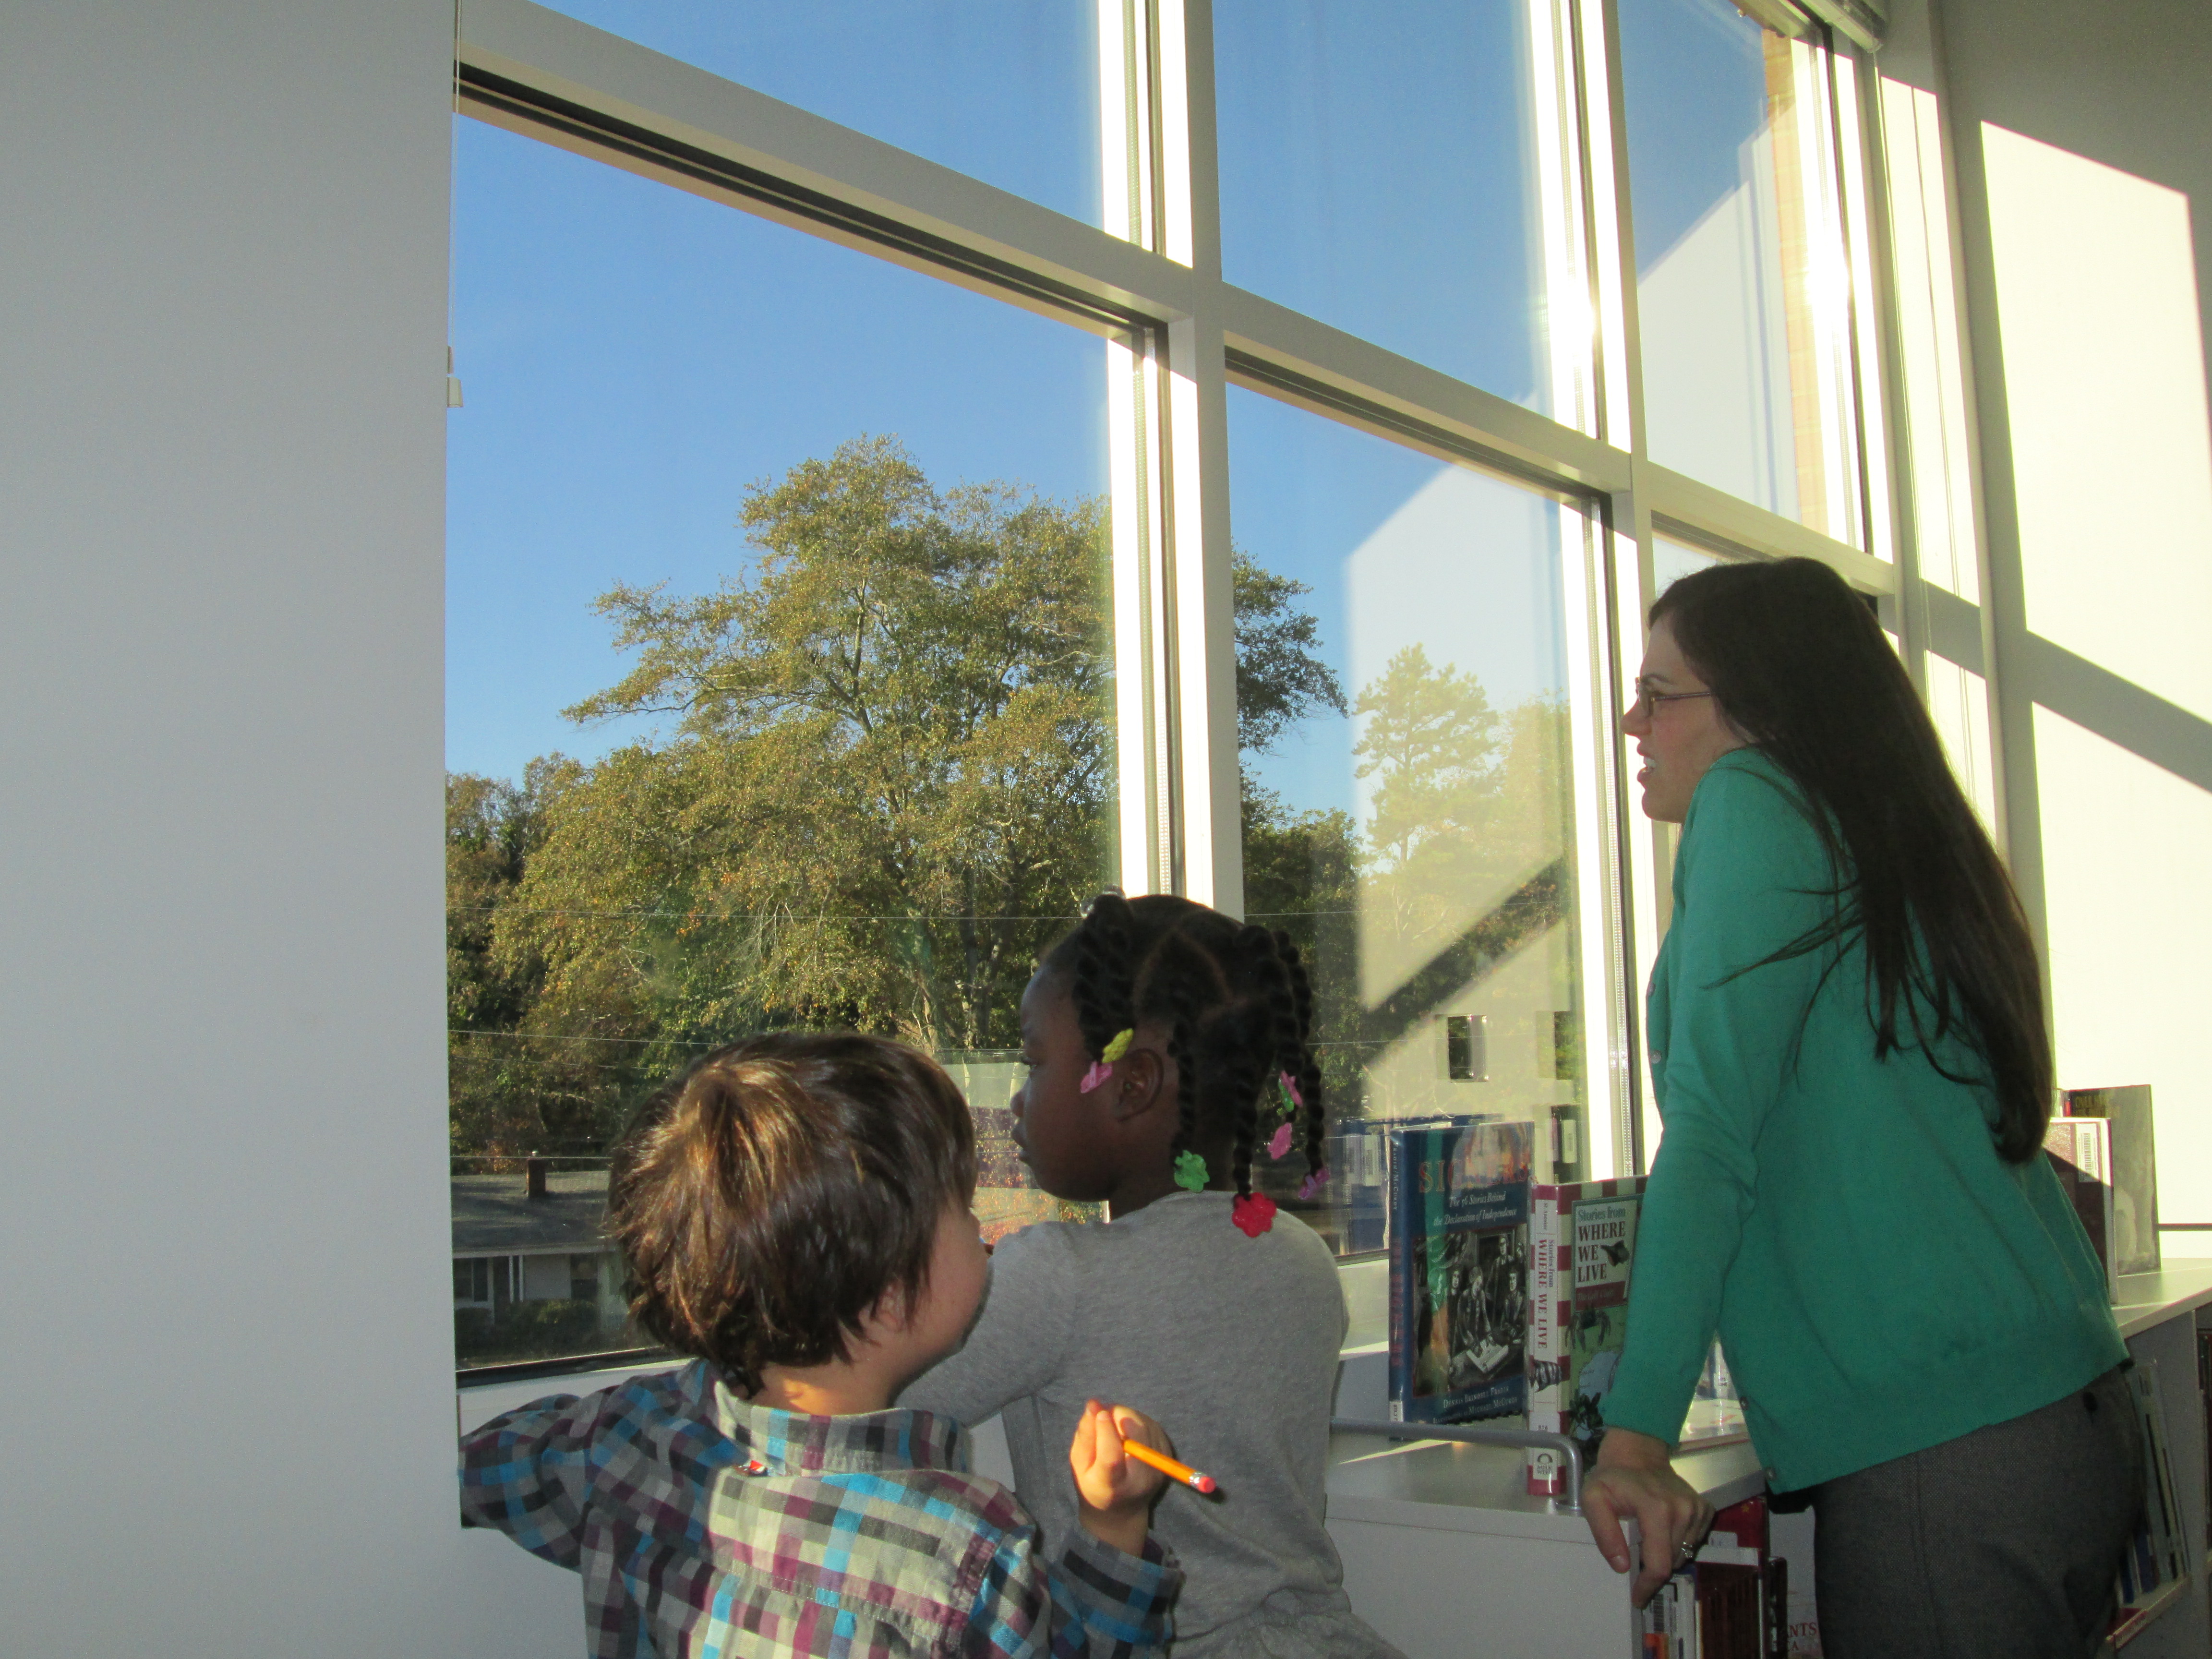
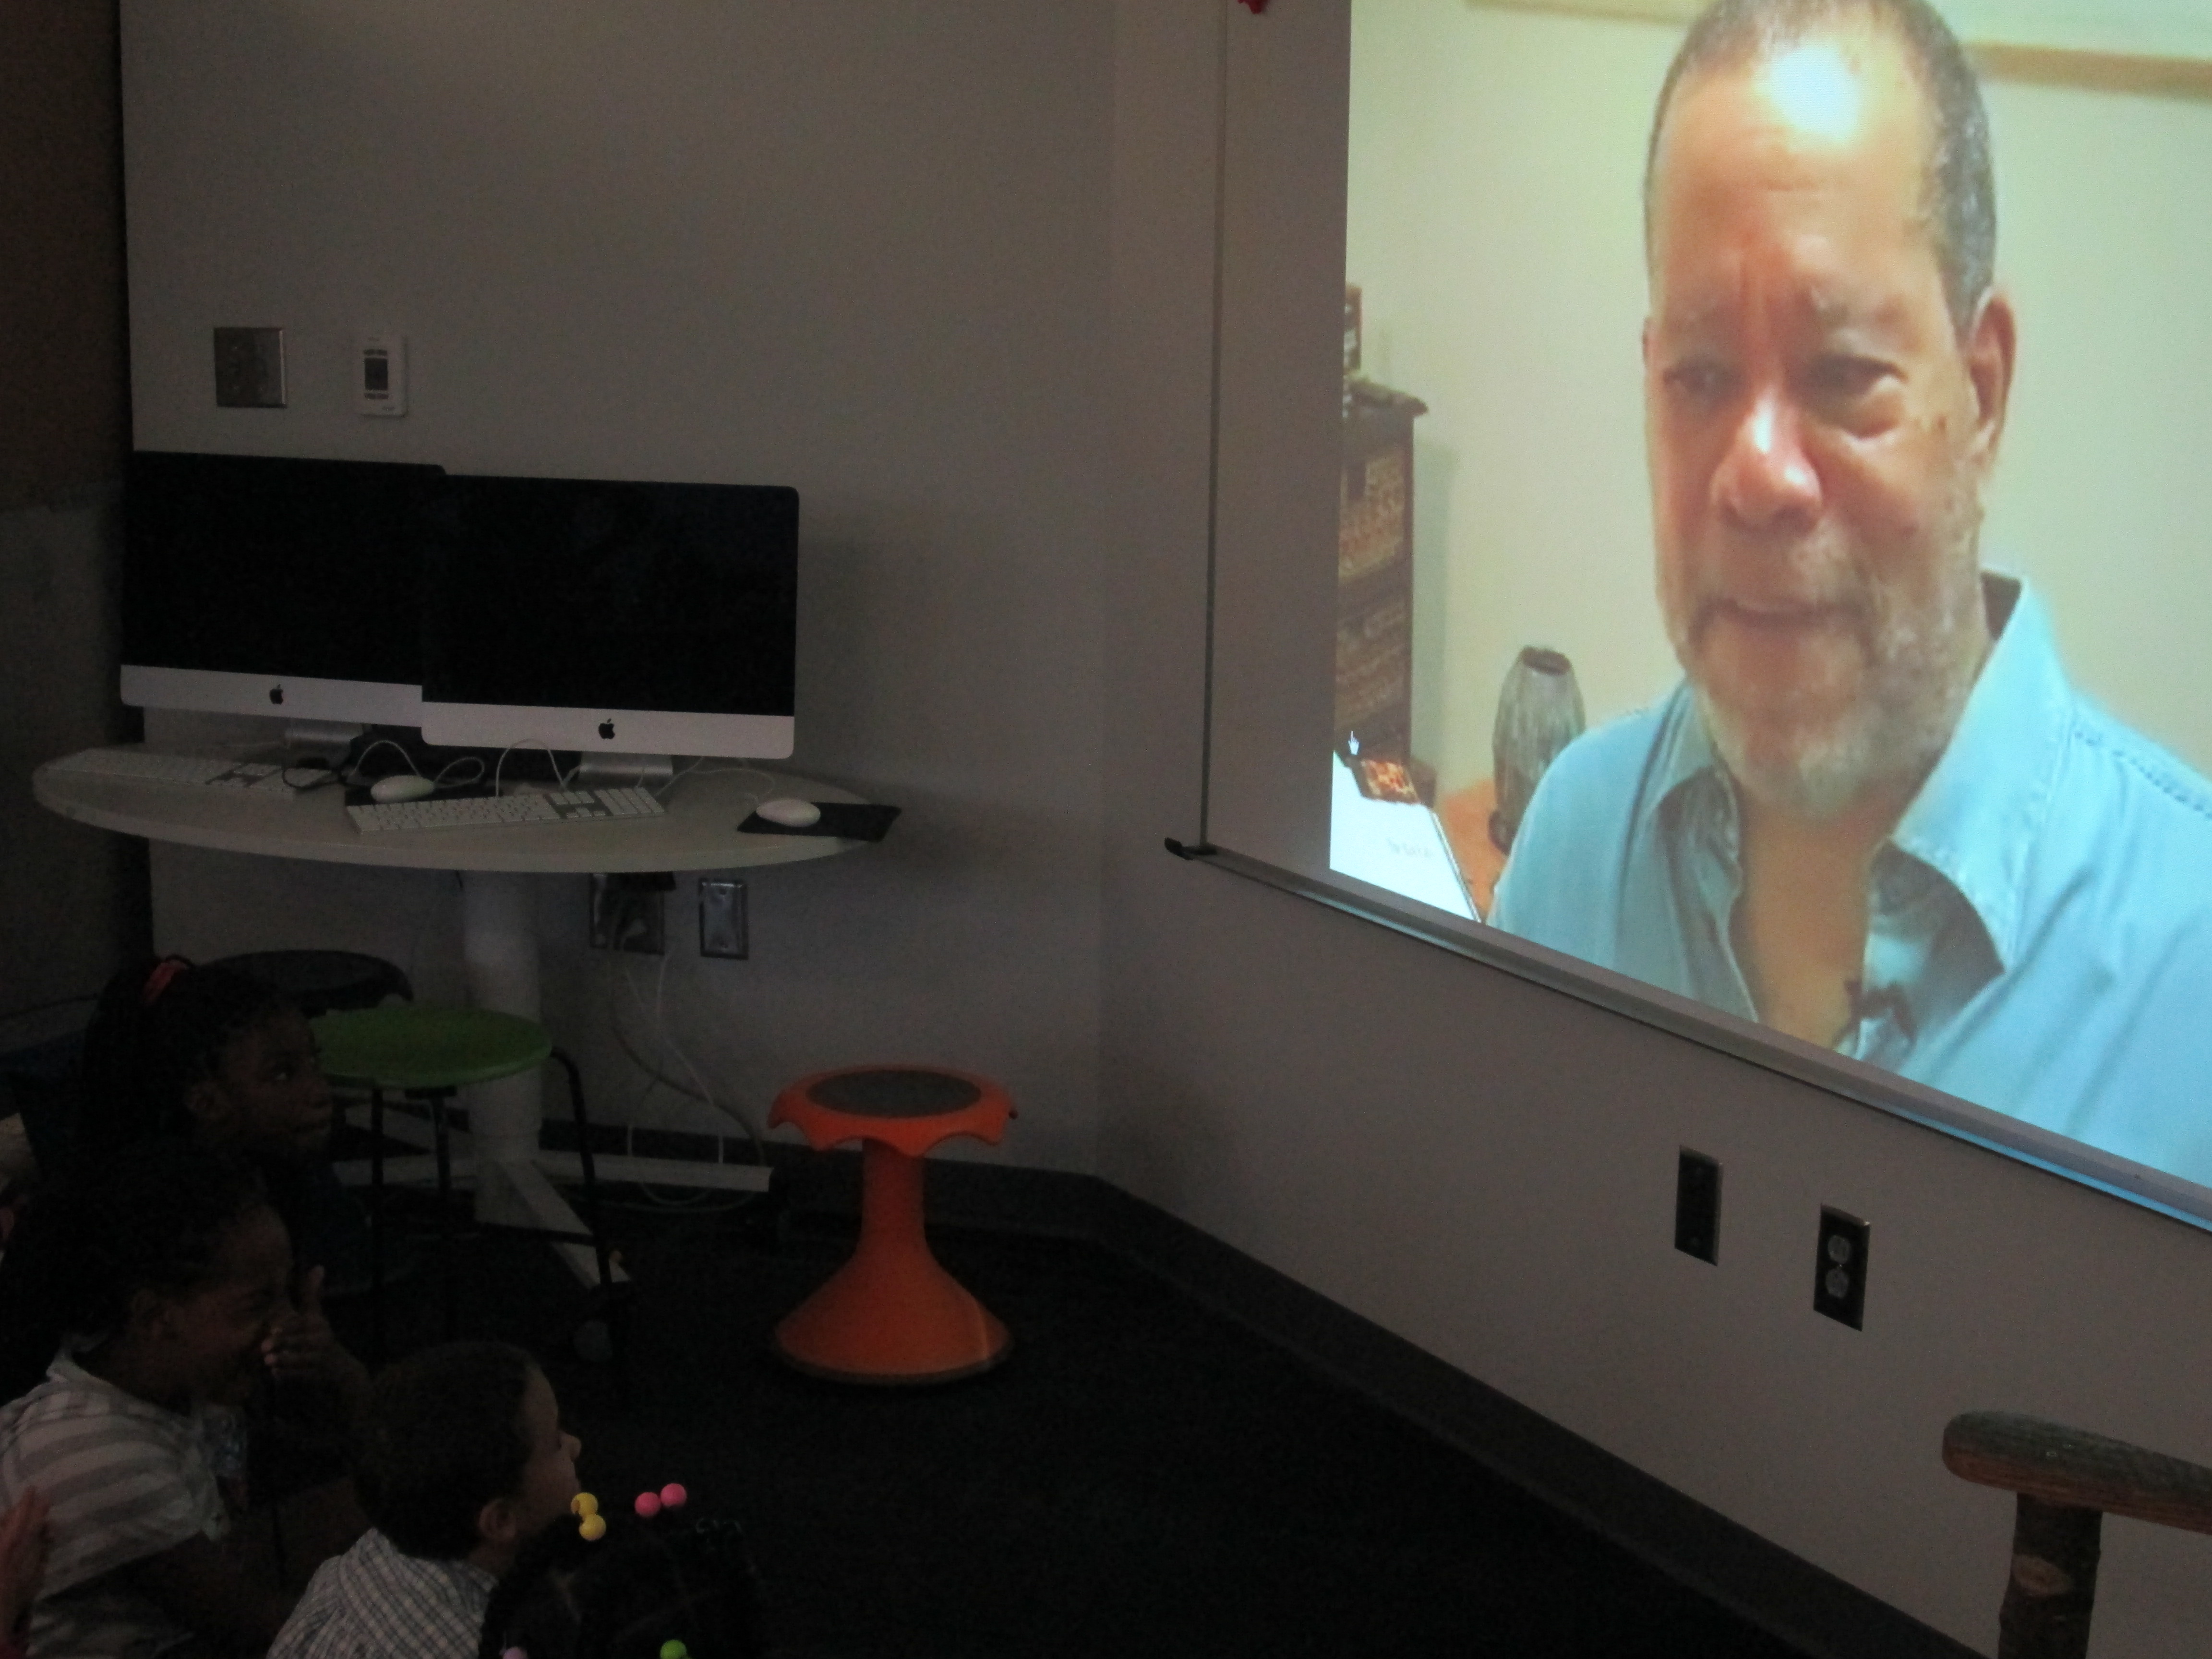
Today, Makerbot announced a partnership with Donors Choose to put a 3D printer in every classroom.  This is a bold claim, but it is a step toward thinking that 3D printers aren’t just for colleges, public libraries, or industry.  Each time I’ve mentioned putting a 3D printer in an elementary library, I’ve been met with the “why” questions.  I’ve also been met by the “I can’t see elementary students doing that…” statements.  My philosophy that I have embraced since reading Flora and Ulysses by Kate DiCamillo is to “Expect the Miraculous”.  I have faith that if students have access to a cutting edge tool such as a 3D printer paired with expertise from mentors over Skype & Google Hangouts paired with expertise from our community who already use 3D printers, then miraculous things will happen for students.  I don’t have all of the answers of what this should look like in an elementary school, but someone has to be willing to step up and walk into the unknown and trust that students and multiple experts will learn together, figure things out, and shape how this technology can support what we do and hope to do in schools.

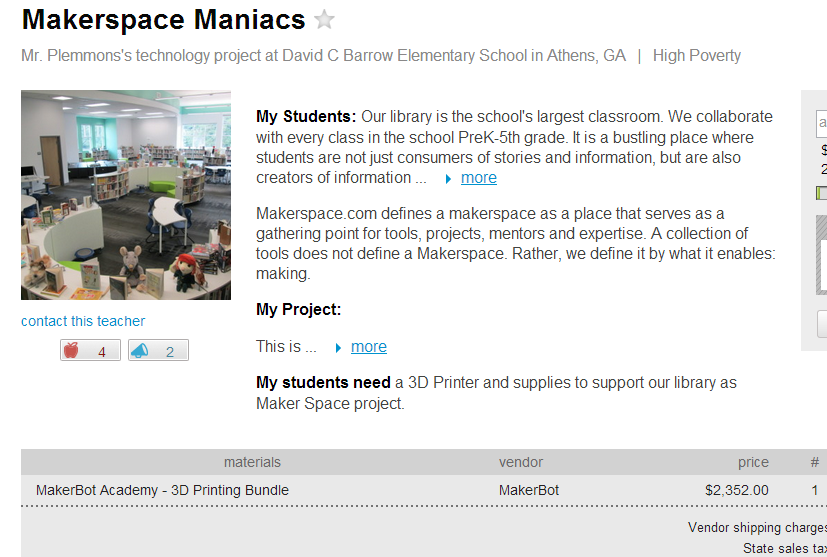
As soon as I saw the Donors Choose opportunity, I submitted a project.  By the end of the day, our project was approved and we already had a matching grant.  This match brought our project down to approximately $1500.  If what Makerbot says is true, as more donors donate to the project, other business and private donor contributions will fulfill this project.  Once again, I’m taking a leap of faith that this project will be filled for our school and we can begin exploring and leading the way for 3D printing in schools.   

Two donors have already contributed to our project along with our matching donation.  I invite you all to take a look at our project, consider donating, or at the very least, consider sharing our project with your circles.  Giving kids the opportunity to create, share, and contribute to the current conversation on 3D printing in education is a great gift to give, especially this time of year.

Makerspace Maniacs


Observing the Day & Night Sky with Kindergarten

IMG_1377Kindergarten is working on observing the day and night sky in science, and they want to use technology to document their observations.  They are working on the following standards:

ELACCKW6 digital tools help writers write and share their stories.

ELACCKW7 writers work in groups.

SKE1 Students describe time pattterns (such as day to night and night to day) and objects in the day and night sky.

Classes came for 2 separate lessons.  During our 1st session, we used Capstone’s Pebble Go to read about day and night.

PebbleGo - Capstone Digital

Then, we read the book Sun Up, Sun Down: The Story of Day and Night by Jacqui Bailey.  During our reading of both Pebble Go and the book, students discussed the scientific reasons we have day and night.  We setup the idea of starting to “notice” things about the sky and how it changes during the day and night.

IMG_1376For our 2nd session, I opened up the blinds on our massive library windows and setup observation areas for students.  We started our time together on the floor and shared some observations we had already made at recess or at home.  We practiced saying aloud what we would write on our clipboards at the windows.  Next, the teacher paired the students together, gave them a clipboard with paper and pencil, and I placed groups in front our our windows.  The teacher, parapro, and I walked around and talked with kids about what they saw.  We encouraged them to write and sketch.  We also helped them make connections to the information that we had learned from Pebble Go and our book.  For example, the sun was blinding us in the windows on he left side of the media center but on the right side of the media center it was shady.  We remembered that the sun is at different positions in the sky throughout the day due to the Earth rotating.

Day & Night Sky Observations

At the end, we split the class in half at our 2 projection areas.  Student groups shared what they observed and we used Padlet to capture the observations.  I tweeted the link to our padlet and later in the day Margaret Powers, Mrs. Keating, and Mrs. Bolster and their students added to the wall from Pennsylvania.  It was interesting to hear about the cloud-filled sky there compared to our cloudless sky in Georgia.

Now, the Kindergarten teachers will share this link with families and encourage them to add notes to the Padlet from home.  This will allow students to make some observations of the night sky.  Please feel free to leave some comments on the Padlet about what the sky looks like where you are!

Using KidBlog with 2nd Grade

kidblog (8)

Last year our 2nd grade teachers collaborated with me on a blogging project using KidBlog.  Our blog was  a way to connect our students with students in Van Meter, Iowa while at the same time showcasing different kinds of writing.  This year, the teachers wanted to start blogging much earlier in the year.

kidblog (3)Each teacher setup her students on KidBlog by uploading a simple excel spreadsheet with names and passwords.  In class, students wrote out their first “post”.  This post was very simple.  Students have been studying important people from Georgia’s history so each student wrote one sentence about one of these Georgians on an index card.  They brought these cards with them to the library to learn about blogging and do their first post.

During our mini lesson, I asked students how many had heard of a blog, and all hands went up.  Then, I ask them who could define what a blog is, and almost all hands went down.  Our first question of exploration was “What is a blog?”  We watched a common craft video on blogging.  I paused along the way and asked students what news they might report on as a 2nd graders.  They mentioned things like:

  • what we do in our classroom
  • math problems that people could solve
  • what we did on vacation
  • books that we are reading
  • and more

Next, I showed them the media center blog.  We looked at the map of readers, tags, how posts are from most recent to oldest, and talked about my audience.

Finally, I showed them Kidblog and how they would login to do their posts.  I stressed the idea that once you click “publish”, your work is instantly connected with an audience.  Students brainstormed what they might need to do before clicking publish.  They said things like:

  • triple check your work
  • check spelling
  • revise and edit
  • read for understanding
  • ask an adult to check your work
  • make sure you said things the way you wanted to say them
  • check that it’s appropriate

Students dispersed to iPads and laptops and began logging in.  Adults circulated and helped students as needed, but students also helped one another to find buttons, login, and any other technical questions they had.  In about an hour, most students were able to learn about blogs & their purpose, make their first post, and go back to class very eager to write more.  The report back from the teachers was that these students are already asking when they will be able to post again.

You can see the beginnings of their work at the following links:

http://kidblog.org/MrsYawnsClassBlog/

http://kidblog.org/MrsRamseyersClassBlog/

http://kidblog.org/MrsWrightsClassBlog/

http://kidblog.org/MrsBrinksClassBlog/

Exploring Georgia Habitats with 3rd Grade

IMG_1351Each of our 3rd grade classes have booked time in the media center to research the habitats of Georgia.  Here’s what they need to know:

S3L1. Students will investigate the habitats of different organisms and the dependence of
organisms on their habitat.
a. Differentiate between habitats of Georgia (mountains, marsh/swamp, coast,
Piedmont, Atlantic Ocean) and the organisms that live there.
b. Identify features of green plants that allow them to live and thrive in different regions
of Georgia.
c. Identify features of animals that allow them to live and thrive in different regions of
Georgia.
d. Explain what will happen to an organism if the habitat is changed.

S3L2. Students will recognize the effects of pollution and humans on the environment.
a. Explain the effects of pollution (such as littering) to the habitats of plants and
animals.
b. Identify ways to protect the environment.
• Conservation of resources
• Recycling of materials

During their library time, I set the stage by doing a brief mini-lesson.  We looked at the standard and talked about the word “feature”.  We tied this to the word “adaptation” and looked up the definition online.

a change or the process of change by which an organism or species becomes better suited to its environment.

Then we looked at a National Geographic video on owls.  We didn’t watch the entire video, but we paused each time a new feature of the owl was mentioned:  its satellite head, its huge eyes, its large wings, etc.  We tied this back to the word “feature” an the word “adaptation” so that students would know the kinds of things they were looking for in their research.

Next, I posed the question:  Why does all of this matter to us?  why do we need to learn about animals, plants, and their habitats?  Before they answered, we watched a news clip that aired this morning.  It was a perfect fit to our topic because it showed a black bear roaming around near an elementary school’s dumpster in Hall County.  IMG_1346

http://www.wsbtv.com/videos/news/hall-county-schools-cancels-after-hours-activities/vCHZXM/

After watching this clip, I posed the question again.  Students said things like:

  • If we know about plants and animals, then we’ll know how to take care of them.
  • If we know about habitats, then we’ll know how to not pollute them.
  • We’ll know how to keep animals alive and where they belong.
  • and more.

I was really glad that I watched the news this morning at the gym instead of rushing in to school because that clip really set the stage for our research.

For about 30 minutes, students used a graphic organizer to gather information about the habitats, plants, and animals of Georgia in a variety of ways.  They could freely float between 3 different areas in the library.

  • Books:  I used the State Standards Publishing series for regions, rivers, and habitats of Georgia.
  • Posters:  These posters featured different kinds of animals along with a map of where they were found in Georgia.  Students had to identify an animal, look at what region of Georgia it was found in, and then think about what habitat that would fall under on their graphic organizer.
  • Websites:  Students had access to a Sqworl site that had songs, informational sites, and games about the habitats and regions of Georgia.  http://sqworl.com/uo3kud IMG_1352

As usual, it was interesting to see where students chose to go.  Some went directly to games.  Others went to posters.  Other chose books.  It really said a lot about what kinds of media our students need access to in order to match their needs as learners.  Some students stayed at the same station or site for the entire 30 minutes while others moved to several stations.  During this time, the teacher, student teacher, special education teacher, and I were able to walk around and facilitate learning.  We asked questions to nudge students thinking or spent time showing students how they might pay close attention to a game and gather facts while still maintaining momentum in their game.  As usual, it was very freeing and individualized.  This has come to be one of my favorite models for gathering information.  My regret is that we don’t have more day scheduled to find information.  Now, the students will use their 1 to 1 netbooks to continue to explore the Sqworl site on their own.

4th Grade Blogging

IMG_1341All of our 4th grade classes are starting blogs.  After meeting with the teachers and discussing their goals for blogging, we chose to use Kid Blog as our tool of choice.  We chose this tool because it gives teachers the options to set several privacy settings, monitor posts & comments, and also simultaneously creates a class blog as well as individual blogs for all students.  I showed the teachers how to quickly import their students into KidBlog and setup accounts.  They each setup their own class.

Our 4th grade classrooms are all trying out a special time in their day called Heart Time.  During this time, each student has a specified amount of time to work on something that truly matters to them.  Some construct masks.  Others explore drum making.  Some spend time writing.  The possibilities for this time are endless.  There are many pieces to this time.  One piece is for students to begin to learn about what matters to one another and spend time sharing and connecting with one another.  The teachers’ hope is that these classroom discussions can be documented through blogging so that they document the process but also impact a larger audience than just the classroom.  Other classrooms could learn from what these students are exploring.  Also, members of the community might make a connection with a student and be able to share their own expertise with a student if they know what that student is exploring.

IMG_1340

We held a kickoff to the blogging project.  During the kickoff, all of the 4th grade classes rotated through 3 centers.  With me, students learned a bit of history about blogging.  We learned that in 1999 there was less than 100 blogs and today there’s well over 100 million blogs.  We looked at this blog, and I explained how blogging has a purpose.  Students were wowed when they saw the map of where people are reading the media center blog.

IMG_1343With Vicki Michaelis, a parent, students learned about how blogging is used in careers.  Vicki does sports blogging through her career at UGA, so she was able to show students how she uses blogs to reach her audience.IMG_1345

With Heather Carlson, 4th grade gifted teacher, students explored blogging ethics and the importance of proofreading and deciding what to post or not post online.

Next, students will begin exploring their blogs in class and using this new tool to document their learning throughout the year.  I can’t wait to read what they write!

2013 Picture Book Month Shelf Challenge

November is Picture Book Month.  It’s a month to study the fine art of picture books and their importance in our lives no matter what our age.  We’e been celebrating Picture Book Month since its creation 3 years ago by author Dianne de Las Casas.  Each year, she rounds up a month-long celebration with posts by numerous authors each describing the importance of picture books in our lives.

Each year our own celebration grows.  This year, we are holding a shelf challenge.  Last year, Matthew Winner (aka The Busy Librarian) did a shelf challenge for School Library Month, so we are borrowing his model and modifying it for Picture Book Month.    Here are our “rules”:

Who can participate:

  • Any students, teachers, or families at Barrow!


Where to find picture books:

  • Any book in the Everybody section

  • Any book in 398.2 or 811

  • Any book in the holiday section

  • Any book where the story is told through pictures or pictures & text.


What to do:

  • Set a goal for yourself.  Examples:  Read every book in the Everybody section A’s.  Choose a shelf and read every book on that shelf.  Set a specific number of picture books to read.  The possibilities are endless!

  • Write your goal on the back of this sheet and keep track of your progress.  Add sheets if you need to.

  • Turn your sheet in to Mr. Plemmons on December 2nd.


If you finish your challenge, you will get:

  • A certificate

  • A bookmark

  • A chance to win a hardcover picture book such as Pete the Cat and His Magic Sunglasses, Bugs in My Hair, That is Not a Good Idea, Green, and A Ball for Daisy.  (Many thanks to Edie Crook for donating 2 of these books for our contest!)


In addition to our shelf challenge, we are recording students and teachers for our morning broadcast talking about their challenge goal and a favorite picture book they have read for the challenge.

We are also planning some connections with other libraries to share favorite picture books as well.  I love to see how this celebration grows each year.  I hope that this year we set our own record for the number of picture books checked out in November.

Storybook Celebration 2013

Storybook RouteStorybook Parade has been a Barrow tradition for many years.  Over the past couple of years, we transistioned from a morning parade to a day-long event.  Our schedule now looks something like this:

  • 8:00 Guest readers in every classroom.  These readers are parents, family members, community members, and local celebrities.
  • 8:30 Classrooms prep for an assembly where we get to see all of the great costumes.  Every child dresses as a character from a book.
  • 9:00 Assembly.  All classes walk across the stage to be seen.
  • 10:00 Parade.  We march in a single file line out of the front doors of the school and parade down the sidewalks surrounding the UGA Athletic Department, UGA practice fields, and the UGA track.
  • 10:30-2:30 Classes continue to hold literature-related activities and sign up for special classes offered throughout the school.

I organize most of the day’s events,  but it couldn’t all be done alone.  There are just too many pieces to do by myself.  This year for guest readers, I created a Signup Genius.  I emailed all of our volunteers and former readers, shared the link on Facebook and Twitter, and put it in my newsletter.  Camilla Bracewell, Barrow grandparent, also made some phone calls and emails to recruite readers.  It didn’t take very long to schedule enough readers for every class, but as usual, during the days leading up to the event, we started getting cancellations.  Rather than scramble to find more readers, I had our administrators and specials teachers on standby to read in the event that we needed them.

storybook (32)For the assembly, I wanted to speed up every class walking across the stage.  In the past, every class has written a blurb about their class for me to read.  Some classes write a short blurb while others feel the need to describe every costume.  This year, Mimi Elliot-Gower, our family engagement specialist, had an idea to use quotes about reading.  I made a Google doc of reading quotes and let teachers sign up for a quote that represented her class.  I read these quotes as classes went across the stage and we tried to keep a constant flow of traffic.

For the parade, we changed our route this year.  We used to parade up to Five Points and back, but Lumpkin Street has gotten so busy that we wanted to move most of the parade to some streets that were a bit less congested.  Our 5th graders got to make a special stop at the Georgia Center for Continuing Education and have some hot chocolate.  Our family engagement specialist, Mimi Elliot-Gower and counselor, Lauren McElhannon, setup this special treat.

storybook (10)Back at Barrow, teachers had lots of options for what their classes might do the rest of the day.  Every specials, EIP, special education, and gifted teacher offered sessions for classes to sign up for.  I created a Google spreadsheet schedule and teachers could sign up for up to 2 thirty minute sessions.  Examples included:

It was a fantastic day with so many books represented.  Each year this day grows a little more and includes a few new ideas.  Who knows where it will go next year.

storybook (51)We would like to thank all of our guest readers who came out today to celebrate with us:

  • Brenda Moon
  • Dr. Lanoue
  • Kim Ness
  • Ralph Stephens
  • Alicia Battle
  • Paula Shilton
  • Carol Williams
  • Denise Sims
  • Selby Merritt & Isabel
  • Bryn Adamson
  • Leslye Queen
  • Debra Lassiter
  • Terry Nestor
  • Paul Lee
  • Matt Winston
  • Chis Stutz
  • Josh Miles
  • Gail Schrader
  • David Meyers
  • Kathy Hoard
  • Ken Mauldin
  • Robert Miles
  • Alex Patterson
  • Utevia Tolbert


2nd Grade Monster Stories

Brink Every year our 2nd graders write monster stories leading up to the end of October and a PACT time called Monster Mash where families come into the classrooms to engage in what students are learning.

The project has many hands involved.  In art, Ms. Foretich works with the students to create their own monsters.  She then takes digital photographs or scans of those monsters and prints out mini versions of each student’s monster.

In class, students create scenes where their monster might live, where they might terrorize, or where they might go on an adventure.  They use their monster and scene to write a story.  Through several writing workshops, students develop their pieces, revise/edit, and publish.

IMG_1251In the media center, students come to me to film their monster story with our iPads.  Some students come with one scene and one monster, while others come with multiple scenes, multiple monsters, and pages and pages of story.  This year, we created a huge recording schedule that was quite ambitious.  Over almost 2 weeks, I would have 3 students every 15 minutes during a 90 minute time frame.  During this 15 minute window, we had to film the movie, upload it to an iMac, check the volume, add a title slide, and export the movie to a flash drive for Youtube uploading at a later time.  It took quite a while to get a flow going, but by the final few days, we were getting really efficient in our 15 minute window.  With a few students at the beginning, we made an opening slide with footsteps and a creaking door.  This same slide was used for every student, so we just had to change the title and author each time.  I set this up on 2 iMacs so that we could double up on uploads.  Some students filmed by themselves by using the iPad on a tripod.  Other students were filmed by Ms. Maher, a gifted teacher, or Mrs. McGee, a grad assistant.  If enough students were available and ready, students filmed for each other.  My role was to walk students through the steps of creating the video.  With every student, I talked through what we were doing on the screen.  Students approved the volume on their videos, added their title, and stayed with me through the export process.  I uploaded the video to Youtube after they left.

Teachers showed the videos during the Monster Mash PACT time.  To make sharing and viewing the videos easy, the teachers took all of the links to student videos and put them on a Thinglink.  To make these, we put all of the student monsters on a table, took a picture of them, uploaded the picture to thinglink, and attached each student video to his/her monster.  Now, when parents ask how to get to the videos, it is very easy to just share the thinglink with them.

RamseyerNext year, I want to think about how to give students even more ownership in the process.  Because of the tight time frame, it was hard to let students do all of the work of filming and uploading, but I know there has to be another way.  I’m going to reflect on that and suggest some improvement for next year.  For now, we can enjoy the amazing creations of these students in art, the classroom, and the media center.

Brink

Ramseyer

Wright

Yawn 

A Visit to the High Museum of Art: Witness…The Art of Jerry Pinkney

high museum (31)Today was step 2 of our 3rd grade folktale project, and it was a big step.  We traveled to the High Museum of Art to see the exhibit Witness: The Art of Jerry Pinkney.  Prior to going, we spent time exploring all of Pinkney’s books in our library collection.  Mrs. Foretich, the art teacher, also did a lesson on museum etiquette.

On the way to the High, students explored Pinkney’s books some more.  As we neared our destination, I asked a few students to think about what they might like to tweet about the books or their excitement for the exhibit.  bus convo Our plan was to use twitter throughout the trip to document some of the things we saw and the things we learned.  We used our school hashtag #barrowbuddies to tag our posts.

After arriving, our groups  split in half.  Some toured the exhibit, whiles other ate lunch.  Then we switched.  Some of us were also able to explore some of the permanent collection before our tour began.

The tour of Witness: The Art of Jerry Pinkney was done by a docent.  We received a brief history of the museum before entering the exhibit.  Our docent had us sit in front of collections of paintings and told us about the stories that the paintings came from.  We saw paintings from historical books such as Minty and Black Cowboy Wild Horses, folktales such as Three Little KittensRikki Tikki Tavi, Little Red Riding Hood, and The Little Match Girl, and biblical stories such as Noah’s Ark.  Our docent had the kids work together to retell some of the familiar folktales as she pointed out things in the paintings.  We noticed how Pinkney set The Little Match Girl in New York City rather than in Europe where the tale came from.  We noticed how Pinkney set Little Red Riding Hood in a wintry woods so that it made sense for her to wear the kind of cloak she was wearing.  Along the way, we also learned about Pinkney’s childhood and how he always had access to a pencil and art supplies.  As we studied the watercolor paintings, we were reminded of the difficulty of working with this medium and the need to work quickly before the colors run together.  At the close of the exhibit, we looked at The Lion and the Mouse.  Along with looking at the paintings, students got to do some impromptu storytelling of their own using puppets.

The finale of our visit was getting to hear some of Pinkney’s folktales come to life through the storytelling talents of a rambler from the Wren’s Nest.  We heard 2 folktales, and the students were heavily involved in the performance.  He had them hanging on every word.

Our field trip allowed us time to do a brief second stop at the Georgia State Capitol rotunda.  Although students didn’t get to tour the entire Capitol, they at least got a frame of reference for the Capitol as we study it back at school.  We plan to use the Georgia Capitol Tour App on our iPads to do a more in-depth look at this landmark.

Once again on the way home, students took another look at Pinkney’s books with a new appreciation for the artwork that spans the pages of this books.  It was truly awesome to stand in a room surrounded by the collective work of Pinkney.  We did not have enough time to truly appreciate the years of work that went into this collection, but we will return to our school with a new appreciation of his art.

Our next steps will be to:

  • Continue reading folktales and studying their elements
  • Identify one folktale for each class to read without seeing the illustrations
  • Create the illustrations for the folktale in art
  • Put illustrations and text together with our iPads

Studying Illustrations with Jerry Pinkey

Pinkey art (8)Third grade is beginning a folktale project that is a collaboration between classroom teachers, the art teacher, and the media center.  This week, we kicked the project off with a lesson in the media center to explore the artwork of Jerry Pinkney, who writes and illustrates many folktales.

Students came to the library during art.  The purpose of this time was to get familiar with Pinkney’s illustrations before students take a field trip to the High Museum of Art  in Atlanta to see an exhibit of Jerry Pinkney’s art.  We wanted students to think about 2 questions.

  • What clues does the illustrator give us about the setting of the story?
  • What clues does the illustrator give us about what the characters are doing in the story?

We started with this video of Jerry Pinkney discussing The Lion and the Mouse.

After the video, I asked the students how Jerry Pinkney started working on the book and what he realized once he made those first steps.  This took our conversation to focus on the importance of illustrations and how they can tell the whole story or how they can work with the text to tell the story.

Next, we looked at this slideshare that showed Caldecott honor and medal winners along with the criteria used to decide the winners.

The purpose of this part was to highlight the many ways you can look at an illustration and how it interacts with the text or tells the story.  Jerry Pinkney has received several Caldecott Honor Awards along with the Caldecott Medal.

Pinkey art (10)Finally, we modeled how someone might study one illustration in a book very carefully and consider our 2 focusing questions.  I used We Give Books to display the book Big Red Lollipop.  Students in each class noticed things such as the red cross as a symbol for a hospital, an envelope on the side of a building to show a post office, the number of buildings close together to show a town, etc.  They also noticed how the character’s hair was blowing in the wind and how her leg was lifted high to show that she was running.  They noticed how she was carrying a letter and smiling to indicate that she was probably going home to show her family something she was excited about.

For the last part of the lesson, students split into groups of 4-5 students.  Each group received 4-5 books by Jerry Pinkney to examine.  Their job was to study the illustrations using the 2 questions just like we did in our model illustration.  As groups talked, the art teacher, art student teacher, and I walked around and chatted with students about what they saw in the illustrations.  We then asked groups to choose one illustration that they wanted to show to another group and discuss.  They used iPads to take a photograph of the illustration.  When they shared with another group, they could zoom in and out of the illustration on the iPads to show the fine details.

In art, students will now have a lesson on museum etiquette  where they will practice the skills it will take to visit a fine art museum.

On the trip to the High on October 23, we will tweet our observations using the hashtag #barrowbuddies.

Next steps will include:

  • Learning elements of folktales.
  • Reading multiple folktales and using a Google form to track the most common elements.
  • Choosing a folktale to read in class without seeing the illustrations.
  • In Art, developing illustrations for that folktale.
  • In the media center, put the illustrations and folktale version together with technology.
  • Share the new creation with the world

We can’t wait to see how this project develops and how Jerry Pinkney’s art inspires what the students create.