Everything Awesome About Dinosaurs: A Visit with Mike Lowery

Our students are always crazy about dinosaurs. If you visit the dinosaur section of the library, you usually see a pretty empty shelf. We were so excited that we had the chance to welcome author/illustrator, Mike Lowery, to our school to share his newest book Everything Awesome About Dinosaurs and Other Prehistoric Beasts with our 2nd-4th grades.  Mike’s visit was thanks to his publisher, Scholastic, and our local independent bookstore, Avid Bookshop.

Ahead of his visit, I shared his book on our morning broadcast and sent home pre-order forms.  We also held a design-a-dinosaur contest for all grades. Students could design any type of dinosaur (real or made up).  Little did I know how well this would connect with the actual content of Mike’s visit.  My student support technician, Ms. Allie, and I sorted through the entries and had a very hard time narrowing down to 10 final winners.  Students were so creative and funny. Each of these winners received a copy of Mike’s book.  All entries were displayed in the windows of our library along with a dino welcome sign.

Our 3rd graders also studied Mike Lowery’s books in art and created projects that were inspired by his art style.  These pieces of art were displayed at the entrance to our school.

Mike is a super funny guy and he hooked the kids’ attention with lots of random facts. One of his favorite things is to collect weird facts and illustrate them, which developed into his Random Illustrated Facts book.  He of course connected this to where authors & illustrators get their ideas (their brains). Even though it was humorous, it was a good reminder to all of us that we are perfectly capable of coming up with great ideas when we put our minds to it.

Mike launched us into his dinosaur book with lots of super cool facts about dinosaurs along with his humorous illustrations. He introduced some dinosaurs along with some dinosaur awards.  I loved how he engaged the audience by having them predict what dino might be coming up next, and how he wove in his humor along the way.  (I won’t give away any of his punch lines).

The final part of Mike’s presentation was extremely fun and a direct connection to our design-a-dino contest. Mike had the students name several pieces of clothing that a dinosaur might be wearing. Then, on his projected iPad, he drew the dino wearing all of the clothes.  Students saw their ideas magically come to life on the screen with a dino wearing pants that said “short arms rule”, a dress, rain boots that were also elf shoes, and a fez.  They could also see a bit of Mike’s drawing process and how he could edit or manipulate the image on his iPad to fix or fine tune details.

Next, Mike had students name some careers and he drew a dino with one of those careers. In this case, it was a scientist, and Mike made it a female scientist with a scrunchy (of course).

Mike took lots of questions from the audience, so we got to learn about his educational path, what he would does when he isn’t drawing (eat tacos), and whether raptors can actually open doors like in Jurassic Park.

Mike signed lots of books for students.  Thanks to our PTA every class got a copy of the book for their classroom library too.  Immediately after Mike’s visit, every one of his books was checked out from the library.  More evidence of the power of an author visit.

Thank you, Mike Lowery, for sharing your talents with all of us. As I delivered signed books, I already saw students hard at work creating writing and illustrations inspired by your work.


Visual Literacy with Wordless Books

I’ve been meeting with a group of students from 3rd & 4th grade to talk about our reading lives. The purpose of these groups, which are facilitated by 2 of our gifted-certified teachers, is to have a space for students to read books of their own choosing and spend time talking about those books together and sharing them with the larger reading community. We’ve been trying many different things to support students in having meaningful discussion together. For this session, we decided to focus on divergent thinking using images from wordless books. We wanted students to practice moving through an “I see….I think…..I wonder” sequence to discover many possibilities from one or two visual stimuli from each book.

To start, we looked at an image from Christian Robinson’s book Another. Students shared things that they saw without assigning any opinions or interpretations. They quickly realized that this was harder than it sounded because I followed up most observations with questions.

Common noticings were “there’s a girl walking down stairs” or “there’s a cat chasing another”.  I asked them to describe what they saw that made them think the image was a girl or a cat.  This took several tries until they really got to a point of describing without interpretation.

Then, we moved to “I think” and “I wonder”. This was a chance for them to make interpretations about what they saw in the image as well as wonder about the possibilities of what might happen in the future of the book.

What we’ve noticed in student discussions of their books with text is they often stay at the surface of their book. They give a summary or name the characters/setting. They aren’t always naturally thinking of how the story sends their mind in many different directions. Our hope for this visual exercise was to practice this divergent thinking in a small way.

Ahead of our lesson, I took photographs of 1-2 pages from 20 different wordless books and put the images on separate slides. As students left the carpet, the teachers emailed the presentation to the students and I turned on editing rights. I also assigned each student a number.  They found their corresponding slide and used the notes section of the slide to practice their “I see….I think….I wonder”.  The teachers and I rotated around to talk to students about their noticings and wonderings.  Some of our conversations weren’t ever documented in the notes section, but the most important piece was the conversation that was happening.

Many students quickly discovered that seeing just 1 or 2 images gives you a unique perspective on a book. You don’t have the context of the rest of the story. They wanted to see the rest of the book, so at the end of our time together, students had a chance to read the rest of the book to see how their assigned image fit in with the rest of the story.

The teachers plan to revisit some of these slides in the future and make connections to the other books students are reading to hopefully have them think beyond just what is happening in the text to think about many possibilities and wonderings for their stories.


Exploring Georgia Habitats with Third Grade

Our 3rd grade is currently learning about the plants, animals, and habitats in the 5 regions of Georgia. The teachers wanted students to have an opportunity to gather some background knowledge prior to their lessons in the classroom, so I worked on a series of centers for students to rotate through and experience these standards in a variety of formats.

S3L1. Obtain, evaluate, and communicate information about the similarities and differences between plants, animals, and habitats found within geographic regions (Blue Ridge Mountains, Piedmont, Coastal Plains, Valley and Ridge, and Appalachian Plateau) of Georgia.

  • a. Ask questions to differentiate between plants, animals, and habitats found within Georgia’s geographic regions.
  • b. Construct an explanation of how external features and adaptations (camouflage, hibernation, migration, mimicry) of animals allow them to survive in their habitat.
  • c. Use evidence to construct an explanation of why some organisms can thrive in one habitat and not in another.

S3E2. Obtain, evaluate, and communicate information on how fossils provide evidence of past organisms.

  • a. Construct an argument from observations of fossils (authentic or reproductions) to communicate how they serve as evidence of past organisms and  the environments in which they lived.
  • b. Develop a model to describe the sequence and conditions required for an organism to become fossilized. (Clarification statement: Types of fossils  (cast, mold, trace, and true) are not addressed in this standard.)

To make instructions easy to access, I put everything on a Google doc with a short link. As each class arrived to the library, I split the class into groups of 3-4 students by having them sit on color dots on the floor. We briefly talked about the main goal of the standards being to compare and contrast the plants, animals, and habitats of the 5 regions of Georgia, and then I sent color dot groups to centers. I kept a timer on my phone for 8-10 minutes per center and students rotated to the next center in number sequence.

Center 1

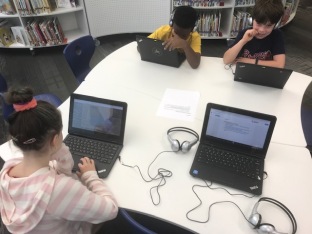
Georgia Public Broadcasting has an amazing set of virtual tours on a whole range of science and social studies standards. For this center, students explored the physical features of Georgia including the Okefenokee Swamp, fall line, various mountains, Providence Canyon, and the Barrier Islands.  The purpose of this center was for students to explore the physical features through pictures, maps, text, and video and think about what adaptations plants and animals might need in order to live in these areas of Georgia.

Center 2

In addition to regions, students learn about fossils and how those fossils tell us about the past. At this station, I wanted students to see that fossils aren’t just about dinosaurs and that we have fossil discoveries right her in Georgia. Students visited a Georgia fossil site which includes a map of where fossils have been found and what time period they are from.

The site also included lots of text to skim and scan for details about what was learned from the fossils. Students also had access to several books from our library about fossils and how they teach us about the past.

Center 3

This center featured another GPB virtual tour. This one focused on the 5 regions of Georgia. Students could visit as many regions as time allowed and read the text, look at pictures, and watch videos to identify animals and plants that live in each region.  Students could also look at the land and see the possible habitats in each region.


Center 4

Since a piece of the standard is about comparing and contrasting, this book featured print books about the regions and habitats of Georgia. Students chose 2 books, which were about 2 different areas of Georgia.

As they read and looked at photographs, they thought about what was the same and different about the 2 regions.

Center 5

This center had the most pieces but the most popular part of this center was looking at various posters that featured groups of animals in Georgia.  There was a poster for bats, snakes, salamanders, dragonflies, lizards, and butterflies as well as a poster of plants.

On the back of the poster, students could see a highlighted map for each plant or animal that showed where it could be found in Georgia. Students identified plants and animals found in specific regions as well as ones that could be found in all regions. If students found a particular animal they were interested, they could use the computer to research more info on that animal. I included links for various animal groups to get them started.

    1. Butterflies/Moths https://www.butterfliesandmoths.org
    2. Dragonflies https://www.insectidentification.org/
    3. Lizards https://srelherp.uga.edu/lizards/index.htm
    4. Salamanders https://srelherp.uga.edu/salamanders/index.htm
    5. Snakes https://georgiawildlife.com/georgiasnakes

I also included some books about animal adaptations such as camouflage, hibernation, and migration.


Teacher Role

In each session, the teachers and I rotated around to all the centers to have conversations with individuals or groups of students. We helped students focus on the question of each center and asked follow up questions as needed. I loved seeing what each student was discovering and having me plus a couple of teachers helped us have many conversations. This format had structure, but it also gave students freedom to choose what interested them at each center to spend the most time on. The timing was also fast-paced so there was no time to be bored or be “done”.

When students finished visiting all 5 centers, we came back together on the carpet and students had a chance to share some of the most interesting things that they discovered. Overall, this format served its purpose of gathering background information and it held closely to the wording of the standards. I loved that students were able to explore the standards in a variety of formats and there was variety from one center to the next. This is something I would definitely repeat, but I do wonder about what might be added to help students remember some of the interesting nuggets of information they learned along the way. I wouldn’t want to add too much writing because that slows down the gathering of background knowledge, but it would be nice to have some means for remembering a few facts.

If you have ideas or you try this and add something new, please leave a comment.

Studying the Art of Mike Lowery (Plus a Contest)


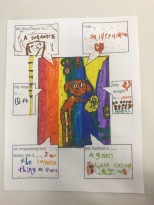
We are eagerly awaiting a visit from author/illustrator Mike Lowery on October 24th to celebrate his new book Everything Awesome About Dinosaurs and Other Prehistoric Beasts. For the past couple of weeks, we’ve held a design-a-dino contest. Interested students picked up a blank design sheet from the library.  They could design a new type of dino and list out it’s many features in the style of Mike Lowery’s new book or they could research an actual dino and include true facts.  This was a very popular contest with students and we had to make additional copies of the entry form on numerous occasions.

It has been really fun seeing the student creativity in each grade level. Most students chose to create new dinosaurs and some of the designs and “facts” have been pretty humorous.

It’s going to be a hard decision as we choose 10 winners to receive an autographed copy of Mike Lowery’s dinosaur book.  Every design will be displayed in our library windows at Mike’s visit. Take a look at just a few of the entries.


The art teacher and I are also collaborating together with our 3rd graders. Each 3rd grade class came to the library during art time for a cartoon study.

We started out by learning a bit about Mike Lowery and his new book through these two videos.

We watched this video up to the point where Mike talks about the new book:

Then we switched to this video to learn about the new book:

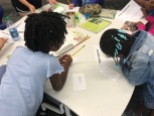
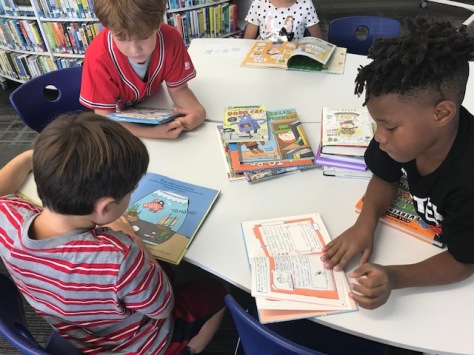
Then we set students up for their work session.  Students were split between 3 tables.  One table had books written and/or illustrated by Mike Lowery.

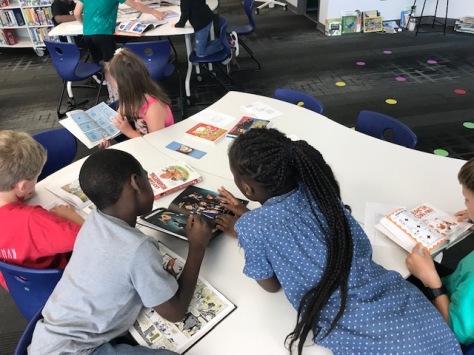
The other 2 tables had a variety of graphic novels from different authors and illustrators. At each table, students were supposed to see what they noticed about line, shape, color, simplification, and how text was incorporated.

As students looked at books and talked, Ms. Foretich and I rotated to each table and had conversations with students about their noticings.

If a table was having trouble picking out observations, we offered some models.  For example, we noticed that many of Mike Lowery’s illustrations use dots for eyes and lines on eyebrows or mouths to create expression.

After students rotated to each table, we collected books and introduced a project. Students got to choose from 4 final products based on their observations from the tables.  They could:

  • Create an informational poster in the style of Mike Lowery
  • Create a character and book cover for a comic in the style of Mike Lowery
  • Create a self portrait in the style of Mike Lowery
  • Create a one page comic

For this first session, students had time to select the project they were most interested and then create some initial sketches, notes, or story lines in their artist sketchbooks.

Now, students will begin working on their final project in art class and the final products will be displayed on the walls of our school during Mike Lowery’s visit.  We can’t wait to meet Mike Lowery.  Look for a post at the end of October about our visit.

Movie Makerspace: Exploring Green Screen & Stop Motion

September has come to an end and our 1st month of makerspace is complete.  We hold an open makerspace every Tuesday and Thursday. Students choose to come to makerspace as an alternative to their recess time.  We weave makerspace projects into the curriculum throughout the year, but this Tuesday/Thursday time is more open-ended. Our makerspace is also a collaboration with Gretchen Thomas and her students at the University of Georgia.  This class evolved organically out of some very small collaborations a few years ago. Now, 8 UGA students visit our library every Tuesday & Thursday from 10:45-12:15. Students sign up with their teacher via a Google Doc after watching an introductory video to the month’s topic. Each teacher is allotted a certain number of spots.  If they don’t use all their spots, another teacher can claim them. We have a staggered schedule: 3rd grade 10:45-11:15, 4th grade 11:00-11:30, 1st grade 11:20-11:50, and 5th grade 11:45-12:15.

For September & the first week of October, we focused on making movies. For week 1, students rotated to three stations to tinker. They used Stop Motion Studio on the iPad along with our library Legos to tinker with stop motion animation.  They used Do Ink green screen app on the iPads to experiment with green screen. This included using green gloves, green string, green plates, and the green cushions in our library to create small green screens and green screen effects.  At the final station, students explored iMovie trailers for making regular movies as well as editing movies made in other apps.

During the 2nd week, we asked students to commit to what type of movie they wanted to make.  This could be done alone or in a group. Before students jumped right into filming, we wanted them to storyboard or create a quick script. Most students chose stop motion with just a few choosing green screen.

For the stop motion students, we took a quick look at a new book from Capstone Publishers called Create Crazy Stop Motion Videos by Thomas Kingsley Troupe. I was fortunate to pick this book up at the SLJ Leadership Summit. I love how this book goes step by step through the movie making process: casting, script writing, storyboarding, prep, filming, editing, and final touches. This is a Capstone 4D book which means it also has videos that accompany certain pages.  Since it was most students’ first time making a stop motion, we tried to get a few ideas from the book and give it a go. In the future, I would love to come back to this book and really spend more time with each step.

For 2 weeks, students worked on their movies. We put their names on the backs of the iPads with tape so that they could continue their project each time. We also stored any lego creations they made on our makerspace shelving. The UGA students sat with groups or individuals and helped with tips on storytelling, keeping the iPad and background stable, and helped keep our legos as organized as possible.

As usual, students were super excited to come to makerspace and they developed many skill sets while having fun. I loved the storytelling that students put together in such a short amount of time and it made me really think about using legos even more in conjunction with writing. We have a long way to go before creating stellar stop motion videos, but it was fun to see what students learned from one another through trial and error, chatting with UGA students, looking at stop motion videos online, and looking at our new book from Capstone. My hope is that students can take the skills they learned in this project and apply it to future projects in class. We saw so many students get excited about their movie creations which could easily spill over into curriculum areas.

Students who wanted to share their movie worked with me to upload videos to Youtube. Please enjoy these first attempts at stop motion videos. If you have any of your own tips to share, leave them in a comment.  We hope to do more stop motion videos as part of curriculum projects in grade levels.