November Makerspace with Doll-E 1.0

Our makerspace is taking a break for the next 2 months while we work on our student book budget project. We wrapped up November with a makerspace inspired by the book Doll-E 1.0 by Shanda Mcloskey. This book is about a girl who receives a doll that only says “mama”. She tries lots of ways to play with the doll but just can’t get past the fact that it only says one thing. Then, she figures out that she can hack the toy using her computer programming skills and a Makey Makey.  As soon as I read this book last year, I wanted to do a makerspace with it. Then, the amazing Colleen Graves put together an instructables with step-by-step instructions on how to create a toy programmed with Scratch and controlled by Makey Makey.  While we didn’t really follow all of Colleen’s instructions, we did have fun creating our own variations.  Here’s a look at what we did.

For context, this took place during our open makerspace time on Tuesdays/Thursdays. Students sign up through their teacher via a Google Doc. We have four 30-minute segments which allows students from grades 1-5 to try out our month-long theme. Students from Gretchen Thomas’s maker class at UGA help facilitate each of the segments alongside me.

Session 1: Tinkering

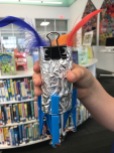
Since students have a variety of experiences with Scratch and Makey Makey, we wanted all students to have some time to tinker with both tools. Our UGA students made some example toys out of toilet paper rolls, aluminum foil, copper tape, and a variety of other objects. We stationed these at tables with Makey Makey piano and Makey Makey kits. Students had an opportunity to tinker with how to hook up the Makey Makey as well as how to use the toy to play the piano on the computer. In another area, students practiced creating blocks of code in Scratch with events and sounds.

Session 2 & 3: Coding

In these sessions, students considered the sounds they would like their toy to make. They could record their own sounds or use the gallery of sounds located in Scratch. Each student made an account in Scratch and worked to code all four arrow keys and the space bar to correspond with the front of the Makey Makey.  More advanced students could try out some of the extra pieces of code from Colleen’s instructions, but most students simply used an event block “when key is pressed” and a sound block “play sound until done”.

This was one of the most frustrating pieces of our project because with such as short time segment and students who couldn’t remember their email addresses and passwords, it took a long time to get accounts setup. Once we got through the initial setup, the coding wasn’t too bad, especially if students took the simple route.

Session 4: Toy Creation

In this session, students used toilet paper and paper towel tubes to create toys. We asked them to think about making up to 5 points of contact to connect their Makey Makey to. This was their first focus before adding details to give their toy character. Students used clothes pins, copper tape, brads, paper clips, aluminum foil, and other miscellaneous conductors.

We had a hot glue gun station with 5 glue guns to attach pieces. A UGA student stayed with the glue guns to facilitate safety.

Then, students used a variety of craft supplies to give their toy character: sequins, googly eyes, pom poms, feathers, etc.

I won’t lie. This was extremely messy and no matter how many hands I had helping or how many ways I tried to keep us organized, we ended up with supplies all over the tables, chairs, and floor.

As students finished their segment, we stored the toys in cardboard boxes by grade level.

Session 5:

This was the session to bring it all together. If students needed to finish coding or their toy, this was the session to do it. Then, their final goal was to hook up their toy to Makey Makey and see if their code worked. Many students realized that they had not created 5 separate contact points but had instead created contact points that touched one another. This resulted in 2-3 different sounds going off at one time. This was a good learning experience because they had to figure out a way to revise their design.  If we had additional sessions this could have been expanded on but most just got to the beginnings of revision.

Our youngest makers in 1st grade didn’t quite make it through all of the steps since they had so much to explore and learn. In this final session, we hooked up the UGA student toys to the 1st graders’ code and also had a computer with pre-made code where they could try out the toys they had made.  This was also true for students who had missed one or more sessions.  We just couldn’t get through all the steps.

There were a lot of moments during this month where I wanted to pull my hair out and moments where I had to stop and take deep breaths. I had to remind students that I didn’t hold all the answers and I couldn’t show them every step to do. I find that this is a constant struggle. Students can figure things out if they just have the space and encouragement. Many of them stepped up, persevered through frustration, and helped their peers when they figured things out.

In the end, I learned a lot about what this might look like as a class or grade level curriculum based project. We could do so much with storytelling and writing with this project in addition to the science standards involved. The purpose of our makerspace wasn’t to have a polished product at the end. We wanted to have fun, problem solve, and invent while learning a lot about coding and circuits. I think we accomplished that, even if there were moments that felt messy and chaotic. I would do it again and try to do a bit more to keep us organized and moving forward. More days would definitely have been beneficial.

Exploring Georgia Habitats with Third Grade

Our 3rd grade is currently learning about the plants, animals, and habitats in the 5 regions of Georgia. The teachers wanted students to have an opportunity to gather some background knowledge prior to their lessons in the classroom, so I worked on a series of centers for students to rotate through and experience these standards in a variety of formats.

S3L1. Obtain, evaluate, and communicate information about the similarities and differences between plants, animals, and habitats found within geographic regions (Blue Ridge Mountains, Piedmont, Coastal Plains, Valley and Ridge, and Appalachian Plateau) of Georgia.

  • a. Ask questions to differentiate between plants, animals, and habitats found within Georgia’s geographic regions.
  • b. Construct an explanation of how external features and adaptations (camouflage, hibernation, migration, mimicry) of animals allow them to survive in their habitat.
  • c. Use evidence to construct an explanation of why some organisms can thrive in one habitat and not in another.

S3E2. Obtain, evaluate, and communicate information on how fossils provide evidence of past organisms.

  • a. Construct an argument from observations of fossils (authentic or reproductions) to communicate how they serve as evidence of past organisms and  the environments in which they lived.
  • b. Develop a model to describe the sequence and conditions required for an organism to become fossilized. (Clarification statement: Types of fossils  (cast, mold, trace, and true) are not addressed in this standard.)

To make instructions easy to access, I put everything on a Google doc with a short link. As each class arrived to the library, I split the class into groups of 3-4 students by having them sit on color dots on the floor. We briefly talked about the main goal of the standards being to compare and contrast the plants, animals, and habitats of the 5 regions of Georgia, and then I sent color dot groups to centers. I kept a timer on my phone for 8-10 minutes per center and students rotated to the next center in number sequence.

Center 1

Georgia Public Broadcasting has an amazing set of virtual tours on a whole range of science and social studies standards. For this center, students explored the physical features of Georgia including the Okefenokee Swamp, fall line, various mountains, Providence Canyon, and the Barrier Islands.  The purpose of this center was for students to explore the physical features through pictures, maps, text, and video and think about what adaptations plants and animals might need in order to live in these areas of Georgia.

Center 2

In addition to regions, students learn about fossils and how those fossils tell us about the past. At this station, I wanted students to see that fossils aren’t just about dinosaurs and that we have fossil discoveries right her in Georgia. Students visited a Georgia fossil site which includes a map of where fossils have been found and what time period they are from.

The site also included lots of text to skim and scan for details about what was learned from the fossils. Students also had access to several books from our library about fossils and how they teach us about the past.

Center 3

This center featured another GPB virtual tour. This one focused on the 5 regions of Georgia. Students could visit as many regions as time allowed and read the text, look at pictures, and watch videos to identify animals and plants that live in each region.  Students could also look at the land and see the possible habitats in each region.


Center 4

Since a piece of the standard is about comparing and contrasting, this book featured print books about the regions and habitats of Georgia. Students chose 2 books, which were about 2 different areas of Georgia.

As they read and looked at photographs, they thought about what was the same and different about the 2 regions.

Center 5

This center had the most pieces but the most popular part of this center was looking at various posters that featured groups of animals in Georgia.  There was a poster for bats, snakes, salamanders, dragonflies, lizards, and butterflies as well as a poster of plants.

On the back of the poster, students could see a highlighted map for each plant or animal that showed where it could be found in Georgia. Students identified plants and animals found in specific regions as well as ones that could be found in all regions. If students found a particular animal they were interested, they could use the computer to research more info on that animal. I included links for various animal groups to get them started.

    1. Butterflies/Moths https://www.butterfliesandmoths.org
    2. Dragonflies https://www.insectidentification.org/
    3. Lizards https://srelherp.uga.edu/lizards/index.htm
    4. Salamanders https://srelherp.uga.edu/salamanders/index.htm
    5. Snakes https://georgiawildlife.com/georgiasnakes

I also included some books about animal adaptations such as camouflage, hibernation, and migration.


Teacher Role

In each session, the teachers and I rotated around to all the centers to have conversations with individuals or groups of students. We helped students focus on the question of each center and asked follow up questions as needed. I loved seeing what each student was discovering and having me plus a couple of teachers helped us have many conversations. This format had structure, but it also gave students freedom to choose what interested them at each center to spend the most time on. The timing was also fast-paced so there was no time to be bored or be “done”.

When students finished visiting all 5 centers, we came back together on the carpet and students had a chance to share some of the most interesting things that they discovered. Overall, this format served its purpose of gathering background information and it held closely to the wording of the standards. I loved that students were able to explore the standards in a variety of formats and there was variety from one center to the next. This is something I would definitely repeat, but I do wonder about what might be added to help students remember some of the interesting nuggets of information they learned along the way. I wouldn’t want to add too much writing because that slows down the gathering of background knowledge, but it would be nice to have some means for remembering a few facts.

If you have ideas or you try this and add something new, please leave a comment.

A Rock Exploration: Researchers, Photographers, and Poets

Our 3rd graders study rocks every year as a part of their science curriculum. This year, we brainstormed some new ideas to support this study and scheduled two 45-minute sessions for each 3rd grade class.

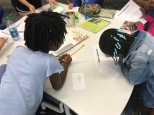
Session one focused on facts and observations. To begin, I asked student to put themselves in the shoes of a researcher and consider what someone researching rocks might do. They named things such as reading books, talking to experts, doing experiments with rocks, going outside and looking for rocks, and visiting websites and videos. For this session, students rotated between 3 stations. Each station lasted for approximately 10 minutes.  I didn’t want them to be slowed down by writing down facts, so this day was just an exploration to mentally gather as many facts as they could. Some students still chose to write things down but most took my advice of making mental notes.

Center 1: Books

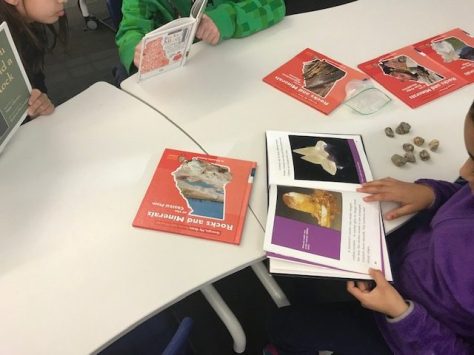
I gathered multiple books from our nature section of library. Prior to this center, I reminded students how they might dive in to multiple books without reading entire books. We reviewed the table of contents, index, and captions. As students explored this station, the teachers and I noticed students talking about photographs that caught their attention so we jumped in to the conversation by directing students to text or captions that supported the conversation. So often, I see students chat about photographs and forget to read the text, so we tried to gently intervene to make sure the conversation was based in fact rather than speculation.  One of the biggest hits at this stations was learning about birthstones and making a personal connection to gemstones.

Center 2: Rocks

When I was growing up, my grandmother and grandfather took me to Cherokee, North Carolina to visit ruby and gem mines. My grandmother would save her money all year and then buy multiple bags of dirt containing gems and we would spend hours sifting through the dirt in a water trough. I saved the rocks from all of those trips and now they have become a part of my educator collection.

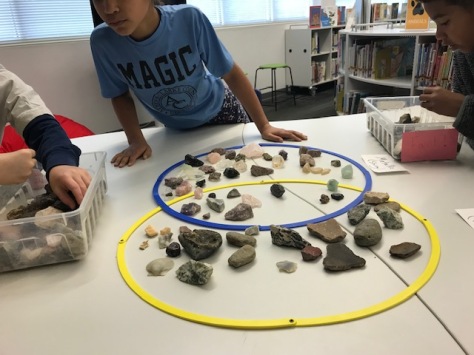
At this station, students used this mix of rocks to make observations and sort rocks in different ways. I included to large circles that students could use as a Venn diagram and compare and contrast rocks based on texture, size, shine, and more. All students worked together to sort as many rocks as time allowed.

Center 3: Websites and Videos

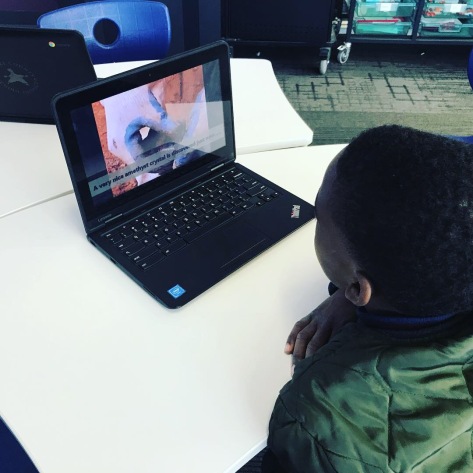
Amethyst is February’s birthstone and also Georgia’s state gem. This station focused on exploring amethyst through websites and videos using a Symbaloo. One of our favorite sites is Gem Kids because it allows students to see gems under a microscope, on a map of the world, and see photos of gems with captions full of info. Students also loved watching the Jackson’s Crossroads video from Georgia to see what amethyst looks like when it is found.

Day 2 of our exploration focused on creativity. We read the book A Rock Can Be… by Laura Purdie Salas and Violeta Dabija. At the conclusion of this poetic book, it says “go a discover what else a rock can be”. This invitation brought us to our next explorations. This time rather than rotating every 10 minutes, students rotated as they finished each step.

Center 1: Artistic Creations

Students once again found boxes of rocks that they could observe. However, this time, their goal was to use the rocks to create something new. They could create a word, shape, object, or anything their creativity sparked. Once they made this creation, they used an iPad to snap a photograph.

This center was fun to watch because every student had a different way of making something. Some had an object in mind already like a football, and they used the rocks to make that shape. Others found one rock that inspired them and they used that rock to form what came to their mind. This was also the station where we saw so many students shine. I loved that whether a student had an English barrier, a reading challenge, etc, this was a visual station that allowed so many voices to be heard in a strong way.

Center 2: Poetry

As students finished photography, they moved to writing in another part of the library. If students had a poem already forming in their mind, they could use a blank piece of paper to create it. However, if students needed some extra support, they used A Rock Can Be… as a mentor text. I had a simple organizer with a structure already formed for them with “a rock can be” and some blanks to create two-word lines in their poem.

The teachers and I did a lot of conferencing at this station to help students focus on the photograph that they created. Most students had their photograph pulled up on their iPad as they wrote. Some chose to focus more on rocks in their poem while others focused on whatever shape they had created.

Center 3: Recording

Students moved to quiet space in the library to put all of their creativity together in Flipgrid. I setup our grid to have a guest code so that students could scan a QR code, enter their first/last name, and start recording. They could record their face on the video or flip the camera and record their poem. During the final step, students imported the photograph of their creation and then used the Flipgrid stickers to add another layer of artistic expression. This final step was tricky because it was tempting to add lots of the fun stickers. However, I encouraged the students to think about what stickers added to their photograph and brought their rock to life. I loved seeing what some of the students chose from the sticker assortment.

Going into these 2 days, I was really unsure of how it would all connect together, but once I saw the flow, I really like what happened. I especially enjoyed day 2 and the creativity that came from our students. I need to do a bit more thinking about day 1. I think it was a great mix of modalities, but I do wonder about what I could do to keep the students more focused in the centers, especially the reading center. It might be as simple as drawing out a card that says “pick a word from the index to read more about” or “flip to a random page and read a caption”.

All in all, I’m excited about the creations we made. I invite you to visit our Flipgrid and view and like the student poetry videos.

Cloudy with a Chance of Meatballs Weather Reports

Back at the beginning of the year, I worked with first grade on weather reports using our green screen.  They learn lots of weather vocabulary, look at meteorologist reports, and create their own weather reports. When we were planning that idea, we talked about how it would be fun to look for books that feature some type of weather that kids could report on. Our minds were first on Cloudy with a Chance of Meatballs, but my mind continued to think of other books we could use as well. We ran out of time during quarter 1 to incorporate this idea, but the first grade team continued it into quarter 2.

The teachers decided to focus on Cloudy with a Chance of Meatballs. Students created images featuring the weather of Chew and Swallow. Then, they wrote out a weather report for what was falling from the sky. In class, they practiced reading over their work before they came to the library to film.

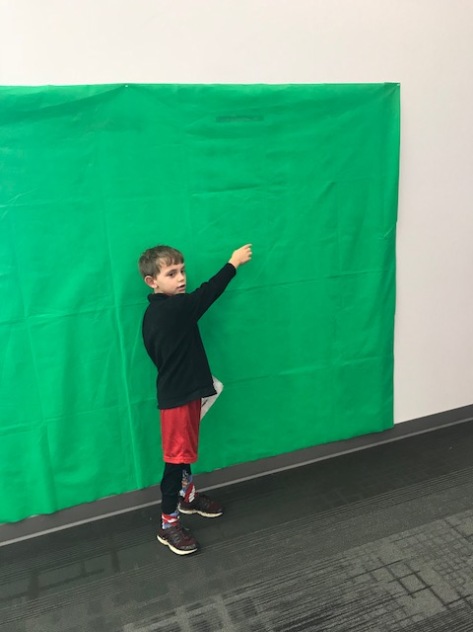
My preference would be to film in small groups, but our limited time before the holidays prevented that from happening. Each class scheduled a 30-minute block. A collaborating teacher came with the class so that we could split the class up. I pulled 5 students at a time to take to the other side of the library to the green screen while the collaborating teacher read aloud some stories with the remainder of the class. As I finished with one group, the classroom teacher helped transition kids from green screen to storytime and bring a new green screen group.

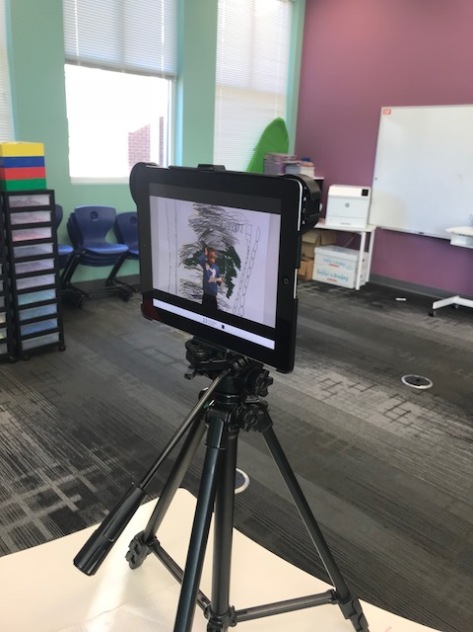
Our first step at green screen was to take a picture of each student’s artwork so that it could become the background image for the weather report. Next, students took turns coming to the green screen. We put their image as the background and faced the iPad toward them so they could see where various pieces of food appeared in their image.

They had practiced pointing to the parts of the weather as they reported, but some students forgot this piece while they were filming. We used the Do Ink green screen app on the iPad to film everything. Students left their piece of art with me so that I could use it to more easily add their names to the videos.

I plugged the iPad into the computer and uploaded each video to my Youtube page. I made a playlist for each class so that teachers could easily share the videos with families.

We have lots of room for improvement.  I would love to work more on the quality of the videos so students could be heard better. If we weren’t so rushed to film, then students could do a practice round and then film so that they could point to more parts of their images. I would also love to incorporate more books with weather instead of just focusing on one book. I’m so glad that the 1st grade team tried this out this year, and I can’t wait to see what we can add on next year.


Kindness Rocks

Third grade studies rocks and minerals in science.  Ms. Hicks, 3rd grade Spectrum teacher, is always dreaming up ways to extend and enrich the study.  We have collaborated together many times, and I always love leaping into something new.  In the past, we’ve Skyped with a jewelry studio and designed our own jewelry.  We’ve thought about climbing wall design and how the hardness of different rocks and minerals would support the design. Students even 3D printed prototypes of their climbing walls.  This year we once again worked together to add a new layer to this science unit.

I’ve been watching lots of people getting involved in kindness rock projects locally and globally. The idea of these projects is to spread words of inspiration in the world through randomly placed rocks and inspire people to create good in the world.

Our local Athens Rock Project

I’ve found a few of these rocks myself and know that it gives you a bright moment in your day just to know that someone cared enough to create a piece of art intended for good.

Gretchen Thomas, UGA instructor, and I have been brainstorming the idea of weaving this project into makerspace, but we held off this semester.  I passed the idea on to Ms. Hicks and we decided to give it a trial run.

We started by showing images of rocks and asking students if they had ever found a rock like these.  I was surprised at how many stories were already in our small group of 15 kids.  From a rock in a stream to a rock in the park, students had stories of words and images they had found on rocks.

Then we watched this video to consider the meaning of a project like this.

We also read an excerpt from If You Find a Rock by Peggy Christian and Everybody Needs a Rock by Byrd Baylor. These books helped us think beyond a rock just being a rock but instead a symbol of something else.

At tables, students used an index card to plan out their rock.  We wanted them to really take their time in planning so that they chose their words with purpose, so Ms. Hicks and I conferenced with students as they worked. They chose a word or phrase, wrote a short explanation of their choice, and sketched a design for their art.  Students also selected a rock. All of this took one class session.

In the next session, students used paint pens and paint to design their rock.  Most started by getting the word(s) onto the rock and then worked on design. If they finished early, they helped one another fan portions of rocks to get them dry enough to keep painting on.

My wonderful computer technician, Allie, added layers of Mod Podge onto the rocks before our 3rd session. Here’s where this project is taking a different turn that many of the kindness rock projects.  We don’t really want to be random.  We want the person who finds our rock to know a bit more about it.

In our 3rd session, we used Flipgrid to record videos to tell the story of our rock.  Students talked about the reason they chose their word and even why they designed it the way they did.  We also brainstormed what someone would need to know in order to get to the video we recorded.

I took this brainstormed and turned it into an information card to put with our rocks.

Instead of randomly placing the rocks, we are putting them all in one container. We’ve talked with Avid Bookshop in Five Points and will be placing this container somewhere outside the shop.  Our hope is that people will select a rock, take an information card, watch the accompanying video, and hopefully leave a response video to the student.

It’s all a big experiment, and I’ve tried to be very open with students about that from the beginning.  Anything could happen.  We of course want every rock to be taken and for every person to leave a response, but we also know that might not happen.  Whatever happens, we’ll know that our rocks have gone into the world and caused at least one person to pause for just a moment and think about kindness.

Before our rocks go to Avid, we’re making a few more.  If your’e in the area, keep your eyes open in Five Points for a clear acrylic container near Avid Bookshop sometime this week!

This slideshow requires JavaScript.

Share Your #Eclipse2017 Stories on This Flipgrid

The Great Eclipse 2017 is coming on Monday August 21, 2017.  It’s going to be epic.  It’s an event we are sharing all across North America.  I made a space that we can all use to share our observations, learning, projects, stories, or really anything eclipse-related.

Before, during, and after eclipse, this Flipgrid is a space we can connect student, teacher, and family voices to share this event. Even if you aren’t in school yet, this Flipgrid can be a place you can find out what your students did while they weren’t in school.

Simply share this link with anyone and everyone.  https://flipgrid.com/f8fc0d 

If you have the most updated version of Flipgrid on your mobile device or tablet, you can also just scan this QR code to instantly go to the topic.

Scan here with Flipgrid to share your eclipse story.

I also made a Google doc that you can print and give to classrooms to scan if they have devices available.

Click to access an easy Google doc

Once you are on the topic, simply touch the + and follow the prompts to record your voice and take a selfie.  Don’t forget to tell us where you are recording from.  I hope we can all learn from one another as we experience this unique event together.  See you on the grid.


Earth Day Environmental Centers

IMG_0771

Our school is a green school, so we do a lot as a whole school to learn about caring for our Earth throughout the year. Our third grade has some specific science standards that explore pollution and effects of humans on the environment. They are beginning a unit on this during science, and the opportunity aligned to allow us to explore the topic during the week of Earth Day. Each class came to the library for a 45-minute exploration of 5 centers. Students began on the carpet for a quick intro to the 5 centers. Students did not have to make it to all of the centers. Instead, I told them to prioritize which ones interested them the most and do their best to make it to those and save the others in case centers were full or they had extra time.

The classroom teacher, gifted teacher, and I all walked around and talked with individual students as they worked to see what they were discovering and assisting them if they had a question. Here’s a look at the 5 centers they explored:


Center 1: Books

I pulled multiple books from our collection about the environment, energy, recycling, water conservation, and more. Students were encouraged to find a book that caught their eye and spend a few minutes reading parts of that book or parts of several books.

IMG_0766


Center 2: Flipgrid

I created a list of authentic environmental problems that exist in our school. These included things like printing to copiers and never picking up the copies, throwing away recyclables, and trash in our parking lot after a UGA football game. Students were encouraged to pick an issue from my list or come up with their own observation. Using Flipgrid, they recorded a brief video identifying the problem and naming possible solutions.


Center 3: Observation and Poetry

IMG_0768

This center included multiple books by Joyce Sidman. She is a master of making observations in the natural world, researching those observations, and then turning them into poetry. Many of her books feature side-by-side poetry and the information that inspired the poem. Students were encouraged pick a book, find a poem, and see how the factual information that Sidman researched made its way into her poetry.


Center 4: Environmental Blackout Poetry

This center was modeled after the blackout poetry of Austin Kleon. It is  kind of found poetry where you find words in magazines, newspaper, websites, or books to arrange into a poem and you blackout the rest of the words on the page. I copied multiple selections from books about the environment and students chose one of those pages to create a blackout poem. It’s always interesting to see how students boil the words down to the ones that stand out the most in the article or page. This year, I made sure that we did our blackout poetry on top of a table cover so that they black crayon and marker didn’t make its way onto our tables.


Center 5: Environmental Online Resources

Using Symbaloo, I pulled together ebooks, websites, interactive sites, and videos about the environment. Students spent time on a few of the sites before moving on to other centers.

Now the students will use the topics and ideas that they discovered in this exploration as they continue to study these topics back in the classroom.


Using Makerspace to Extend Curriculum: A Geology Project

tinkercad rock walls (12)

Third grade studies rocks and minerals as a part of their science standards. In Ms. Hicks class, they have been extending their research of rocks and minerals to create their own Blendspace lessons to teach others facts about rocks and minerals. They are even including pre-tests and post-tests in their lessons. As a part of this Blendspace project, students started thinking about how they might design their own climbing wall for our school based on their research.

tinkercad rock walls (11)

Ms. Hicks asked me what tool we might use to design and prototype of a climbing wall, and I immediately thought of Tinkercad. We have used Tinkercad for other projects and have found it to be one of the better tools for 3d design at the elementary level. Students came to the library to learn a bit about how Tinkercad works.

tinkercad rock walls (10)

I gave them a very quick tutorial which basically showed them things like adding a work plane, dragging over geometric shapes, resizing shapes, and building up.

tinkercad rock walls (8)

I created two generic accounts that students share rather than creating an account for every student. Half of them logged in with one account and half with the other. Their goal was to tinker during the first lesson to see what they could figure out, but their tinkering was a bit more focused than usual. Ms. Hicks really wanted them to already start envisioning their climbing wall as they were tinkering. Some of them latched onto the tool and really got a jumpstart on designing, while others tried something and started over several times.

tinkercad rock walls (7)

One student thought we was being a bit silly by trying to design a chicken instead of a climbing wall, but we turned this into a learning opportunity. I thought about the climbing wall that is at our own Omni Club here in Athens. It is shaped like a giant bulldog, so I pulled it up on the screen to show that he could in fact design his rock all to look like a chicken if he really thought about how people would climb a giant chicken. Instead of shutting him down, his wheels were turning about what he might try, and he is in fact now designing a penguin rock wall.

Other students started thinking about which rocks and minerals would be the best choices for the climbing wall based on their strength and also their color. They referenced their research and the Mohs hardness scale to choose rocks and minerals that would hold up a climber. As they did this, they changed the colors and shapes of the climbing pieces on their walls to represent their different choices. Not all students were ready for this level of thinking, but when we found students who were thinking in this way, we encouraged them to share what they were doing in the hopes of giving other students ideas.


One student even let me record a snippet of his thinking about his own rock wall choices.

The students have worked on these designs for 3 work sessions. As they finish, they are taking screen shots of their designs and adding them to Blendspace with an explanation of their design. In the future, we plan to export their designs as .stl files so that we can actually 3d print their prototypes when they are ready to present.

tinkercad rock walls (1)

I loved this real world application of rocks and minerals because it showed students that there are actually careers where you might consider some of the facts that they are learning in science. There was so much higher order thinking built into this project, especially this design piece. I had some great conversation with students as they referenced their research to find the specific rocks and minerals they wanted to use. One conversation involved a student specifically wanting a rock that was yellow. He kept Googling different rocks he knew to see if they came in yellow. When he finally found one of the feldspar family that was yellow, he noticed that the website description referenced Bob’s Rock Shop. We had a great conversation about the importance of digging into the website to really see where the information was coming from, and he found that the information actually did come from a reliable source within that site.

tinkercad rock walls (6)

I hope that we can find ways to share the work that this class is doing in the hopes of inspiring students at all levels to apply what they are doing to really world experiences. It would be fascinating to actually see this climbing wall come to life and have o

Winter Around the World and in Athens, GA: Original Songs and Personal Narratives

song recording (3)

For the past few weeks, 2 classes have been involved in exploring winter right here in Athens, Georgia.  Even though we might associate cold and snow with winter, it isn’t always like that where we live.  Ms. Kelly’s Kindergarten class and Ms. Ramseyer’s 2nd grade class both participated.  You can read about the beginnings of their projects here.  Our work is all coming together with classrooms from around the world on a collaborative Google slide presentation.

Ms. Kelly’s class has been busy in their classroom dividing into groups and building a song about winter.  As a class, they worked on the base beat using beatlab.  Then different groups worked on parts of the song.  Singers created the words and sang them. Clappers used their hands to add rhythm.  Ukuleles strummed chords for another layer.  Instruments such as coffee can drums added even another layer of rhythm.

song recording (4)

Ms. Kelly wrote the words up onto a big chart paper with plenty of visuals for students to follow.  She saved their class beat in beatlab and pulled it up on the library projector.  I used Screencastomatic to record the beat along with our webcam recording the student performers.  Ms. Kelly used dry erase markers to make notes on the beatlab beat for specific groups of students.  She also used a cowbell and her voice to help students know when to come in.

We gave ourselves plenty of time to record multiple times, but we just loved our first take!

Even though we were in love with that version, we decided to try one more time with just an iPad so that we could get some closeup shots of students performing.  We love this version too, but we are including the 1st one in our global winter project with classrooms around the world.

We had some fun shout outs while we were working on our song, including some retweets from Kishi Bashi who was one of our inspirations for our song.

https://twitter.com/CantataLearning/status/667369239230070785

https://twitter.com/MrsPstorytime/status/667393385318105088

Ms. Ramseyer’s 2nd grade class split into groups of 4.  Two students were author and two were illustrators.  After starting their work in the library, they continued to write and draw in class to tell about personal experience with winter in Athens.  They featured things like food, clothing, school, and events in winter.

Each group came to the library with their finished work.  We spread their pages out on tables and took digital pictures of each page.  We then took these and added them to the collaborative Google presentation.

In Youtube, we pulled up the feature where you can record straight into Youtube with your webcam.  We placed each page in front of the webcam and students read their winter personal narratives and facts.  These videos were also embedded on the Google slides.

We look forward to seeing how the rest of the slides turn out as we learn about winter around the world!


First Grade Wizard of Oz Meteorologists

weather (2) - Copy

Our amazing 1st grade team and students have been working on their Wizard of Oz unit.  I love this unit because they weave in so many content standards with Wizard of Oz as their guiding text. A part of this unit is the weather standards from science.  Students have to know various kinds of weather as well as how to dress in that weather.  Since this is a part of what meteorologists do, we decided to try something new this year by looking closely at the role of meteorologists.  The goal was for students to write a weather report for the Wizard of Oz regarding the cyclone and to record the forecast in front of our green screen.

weather (4) - Copy

Students came to the library and we looked at a few videos of meteorologists reporting on severe weather. As we watched, students noticed things about the posture and speech of the meteorologist.  They also pointed out many of the weather words he/she used.

As weather words were noticed, we added them to a shared Google doc.

weather (3) - Copy

This doc was shared with all classroom teachers to continue to add to and use in class.  We also looked at another student-made video and noticed how the student introduced himself in his weather forecast and pretended to be outside in the story.

weather (5) - Copy

In the library, we also spent some time beginning the writing process of creating a weather report.  Students continued working on this in class during writer’s workshop.  The list of weather words continued to be used and added to. They also did a bit of rehearsing.

Finally, students returned to he library and one by one recorded themselves in front of the green screen with a tornado or other weather behind them.  As students were recording, the rest of the class practiced, looked at weather books, and searched for the current weather in our area using apps on the iPad.

They loved seeing the weather magically appear on our iPad using the DoInk app on the iPad.  We took all of the videos from the iPad and uploaded them to class playlists to share back with the class.

You can enjoy the variety of videos in each of these lists.

One of my favorite parts of this short project was how it tied to a real career and gave students experience with a real-world job related to the standards they were studying in science.  They were each able to be a bit creative in their forecasting, and each student had a chance to use a cool technology to make their voice heard at such an early age.