November Makerspace with Doll-E 1.0

Our makerspace is taking a break for the next 2 months while we work on our student book budget project. We wrapped up November with a makerspace inspired by the book Doll-E 1.0 by Shanda Mcloskey. This book is about a girl who receives a doll that only says “mama”. She tries lots of ways to play with the doll but just can’t get past the fact that it only says one thing. Then, she figures out that she can hack the toy using her computer programming skills and a Makey Makey.  As soon as I read this book last year, I wanted to do a makerspace with it. Then, the amazing Colleen Graves put together an instructables with step-by-step instructions on how to create a toy programmed with Scratch and controlled by Makey Makey.  While we didn’t really follow all of Colleen’s instructions, we did have fun creating our own variations.  Here’s a look at what we did.

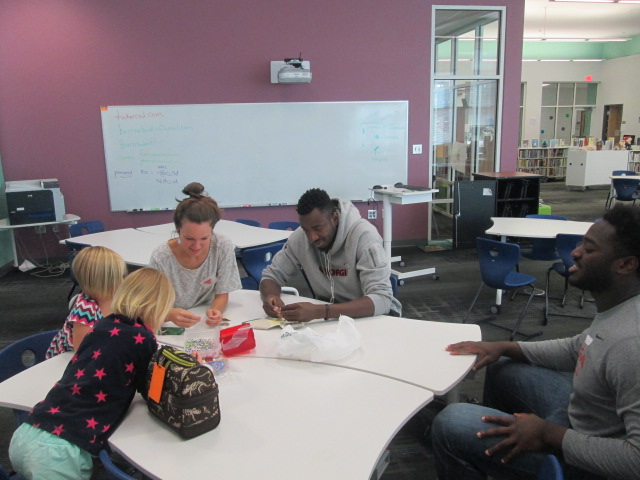
For context, this took place during our open makerspace time on Tuesdays/Thursdays. Students sign up through their teacher via a Google Doc. We have four 30-minute segments which allows students from grades 1-5 to try out our month-long theme. Students from Gretchen Thomas’s maker class at UGA help facilitate each of the segments alongside me.

Session 1: Tinkering

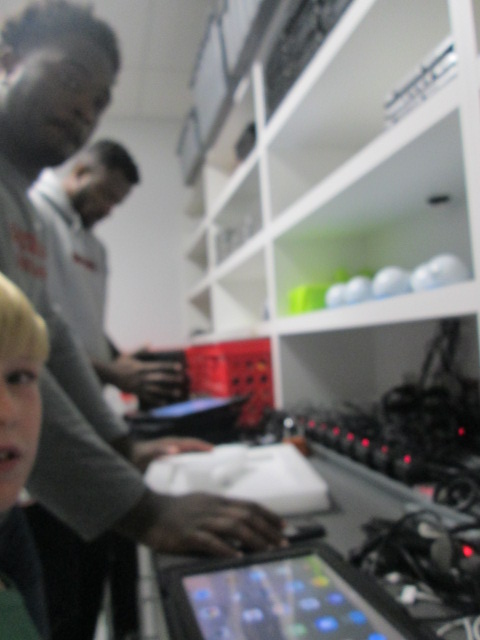
Since students have a variety of experiences with Scratch and Makey Makey, we wanted all students to have some time to tinker with both tools. Our UGA students made some example toys out of toilet paper rolls, aluminum foil, copper tape, and a variety of other objects. We stationed these at tables with Makey Makey piano and Makey Makey kits. Students had an opportunity to tinker with how to hook up the Makey Makey as well as how to use the toy to play the piano on the computer. In another area, students practiced creating blocks of code in Scratch with events and sounds.

Session 2 & 3: Coding

In these sessions, students considered the sounds they would like their toy to make. They could record their own sounds or use the gallery of sounds located in Scratch. Each student made an account in Scratch and worked to code all four arrow keys and the space bar to correspond with the front of the Makey Makey.  More advanced students could try out some of the extra pieces of code from Colleen’s instructions, but most students simply used an event block “when key is pressed” and a sound block “play sound until done”.

This was one of the most frustrating pieces of our project because with such as short time segment and students who couldn’t remember their email addresses and passwords, it took a long time to get accounts setup. Once we got through the initial setup, the coding wasn’t too bad, especially if students took the simple route.

Session 4: Toy Creation

In this session, students used toilet paper and paper towel tubes to create toys. We asked them to think about making up to 5 points of contact to connect their Makey Makey to. This was their first focus before adding details to give their toy character. Students used clothes pins, copper tape, brads, paper clips, aluminum foil, and other miscellaneous conductors.

We had a hot glue gun station with 5 glue guns to attach pieces. A UGA student stayed with the glue guns to facilitate safety.

Then, students used a variety of craft supplies to give their toy character: sequins, googly eyes, pom poms, feathers, etc.

I won’t lie. This was extremely messy and no matter how many hands I had helping or how many ways I tried to keep us organized, we ended up with supplies all over the tables, chairs, and floor.

As students finished their segment, we stored the toys in cardboard boxes by grade level.

Session 5:

This was the session to bring it all together. If students needed to finish coding or their toy, this was the session to do it. Then, their final goal was to hook up their toy to Makey Makey and see if their code worked. Many students realized that they had not created 5 separate contact points but had instead created contact points that touched one another. This resulted in 2-3 different sounds going off at one time. This was a good learning experience because they had to figure out a way to revise their design.  If we had additional sessions this could have been expanded on but most just got to the beginnings of revision.

Our youngest makers in 1st grade didn’t quite make it through all of the steps since they had so much to explore and learn. In this final session, we hooked up the UGA student toys to the 1st graders’ code and also had a computer with pre-made code where they could try out the toys they had made.  This was also true for students who had missed one or more sessions.  We just couldn’t get through all the steps.

There were a lot of moments during this month where I wanted to pull my hair out and moments where I had to stop and take deep breaths. I had to remind students that I didn’t hold all the answers and I couldn’t show them every step to do. I find that this is a constant struggle. Students can figure things out if they just have the space and encouragement. Many of them stepped up, persevered through frustration, and helped their peers when they figured things out.

In the end, I learned a lot about what this might look like as a class or grade level curriculum based project. We could do so much with storytelling and writing with this project in addition to the science standards involved. The purpose of our makerspace wasn’t to have a polished product at the end. We wanted to have fun, problem solve, and invent while learning a lot about coding and circuits. I think we accomplished that, even if there were moments that felt messy and chaotic. I would do it again and try to do a bit more to keep us organized and moving forward. More days would definitely have been beneficial.

Magazine Ornament Makerspace

Our open makerspace is taking a short break while our student book budget team works on new books for the library. We wrapped up our final makerspace session by hosting an ornament makerspace. Students signed up for this time with their teachers via a Google doc.

I have lots of old magazines that used to be in circulation but aren’t used anymore. I decided to pull them out and use them for our ornament materials as a way to promote reusing materials rather than throwing them out or putting them in recycling.

I wanted students to have a mixture of structure and freedom, so I selected 3 options for structured ornaments with a 4th option of designing your own.

Instructions for these 3 ornaments are found below.

Ornament 1 (top center):

  1. Cut 2 pages from a magazine and fan fold each page.
  2. Stack the 2 fan folds on top of one another and tie in the middle.
  3. If you want, trim the ends of the fan into a fancy design with craft scissors or regular scissors.
  4. Fan out each side and connect together to make a circle. Staple if low on time. Glue if you have time for drying.
  5. Use a hole punch to make a hole and tie a string.

Ornament 2 (bottom left):

  1. Cut multiple strips of the same length from a magazine page.
  2. Bring the ends of each strip together to form a loop.
  3. Repeat the process of bringing ends of strips together and begin adding the loops together.
  4. You might want to use a gem clip to hold the loops together if you have trouble holding them in your hand and folding paper at the same time.
  5. Staple the loops together at the top.
  6. Use a hole punch to create a hole and tie a string. (If you have added a lot of strips, it may be difficult to punch a hole)

Ornament 3 (bottom right):

  1. Cut 5 strips from a magazine page. 2 long, 2 medium, 1 short.
  2. Arrange the strips in this order: long, medium, short, medium, long.
  3. At one end of your stack, make sure the ends of the strips are even and staple them together.
  4. Starting in the center with the short strip, connect the two medium strips to the top of the short strip.
  5. Next, connect the two long strips to the short strip. Staple together.
  6. Use a hole punch to create a hole and tie a string.

When students came to the makerspace session, I quickly showed them the 3 options which were all at their own table.  Then, I showed them a 4th table where they could design their own. Since a UGA class collaborates with us in makerspace, there was a UGA student at each table to assist students as needed with the directions. I also had a UGA student help with hole punching and string tying.

Students were welcome to make as many ornaments as they wanted. They could take them all with them, but they were also welcome to add them to our holiday area of the library. At the front of the library, I have pulled out all of our November/December holiday books and created displays to highlight those holidays such as Diwali, Thanksgiving, Hanukkah, Kwanzaa, Christmas, and New Year.

As with every makerspace time, I loved seeing how students took structured ideas and put their own creative spins on them. I also loved seeing what unique ideas students came up with on their own too. It’s always hard to decide how to balance structure with open-ended projects, but I think it’s important to offer both. We all learn in different ways. I’ve seen that some learners have high anxiety when given no structure and others have high anxiety when they have structure and think that their creation has to look exactly like the picture.

Several students did decide to add at least one of their creations to our tree in the library. It’s one more way that we can share ownership of our library.


Holiday Makerspace

ornament-makerspace-13

Our regular makerspace time is on break since UGA is out until spring semester.  However, our students are still eager to come. This week I hosted a special holiday makerspace at a different time than our typical makerspace time.  I created a Google doc and offered two 30-minute sessions for students in any grade to sign up to make holiday-inspired crafts using books weeded from our library collection.

Prior to the makerspace, I took several weeded books and ripped out pages.  Volunteers and people walking into the library thought I had gone crazy, but I loved finding a new use for books that would likely go to recycling or sit unused in a box.  Some pages I put in stacks and other pages I cut into strips.

ornament-makerspace-12

The two crafts offered were paper chains and snowflake ornaments. The paper chains were pretty self explanatory.  I just cut pages into strips so that students could create chains to use for Christmas trees or countdowns to whatever they hoped to countdown toward like Christmas, Hanukkah, a birthday, or something else.

ornament-makerspace-7

The snowflake ornaments took a bit more instruction.

  1.  Students took two pages from books that were close to the same size.
  2. They folded them like you would fold a paper fan.
  3. They tied the middle of the fan fold with string so that it would unfold.
  4. They glued the ends of the folded fan so that it could unfold into the shape of a snowflake half.
  5. They took the two fanned out halves and glued them together
  6. They added a string for hanging on a tree or other special place

ornament-makerspace-1

During the two sessions, I had a mix of 1st, 2nd, 4th, and 5th graders.  The all arrived at different times, so we found ourselves constantly restarting instructions.  The great thing was that in typical makerspace form, the students started to help one another.  I gave instructions as I could, but then the students passed on knowledge to one another.  The 1st graders needed the most support in tying string and folding paper, but other grades were very independent.

ornament-makerspace-5 ornament-makerspace-2

I was really glad that paper chains was a choice because it was easy for students to take on with little explanation.  It was surprising to see how many students had never made a paper chain.  The pages from books made some of the most beautiful chains I’ve seen.  The ones I’ve made have always been from solid construction paper, and these had a bit of fashion and artistic vibes.

Our time was of course noisy, messy, and fun.  We could have done this project for much longer than 30 minutes.  If we hadn’t run out of time, we could have started exploring variations of the designs. Some students naturally started doing this but they just ran out of time.  We also could have individualized the chains and ornaments even more with craft scissors, possibly glitter (if we were that adventurous, or combined some other materials from our maker cart.

ornament-makerspace-3

I’m going to hold onto this idea and see where it takes us in the second half of the year or even next school year.


Making Something New: A Makerspace Activity

coconut makerspace (13)

Recently, the Children’s Theatre Troup directed by Kelsey Brown presented “Another Kid’s Treasure Island” at the State Botanical Garden of Georgia. This play also featured a makerspace activity for attendees to use a variety of objects to make something new.

Gretchen Thomas and her UGA students helped pack hundreds of plastic coconuts with craft supplies to support the play, but several coconuts were left over. Our makerspace was fortunate enough to acquire these leftover coconuts for students to explore.

coconut makerspace (14)

This week, we’ve been reading The Most Magnificent Thing by Ashley Spires. I love the message that this book shares about perseverance and creativity. The character in the book tries multiple ways to make the thing she has in her head, but she just can’t get it quite right. At first, she easily starts over, but as time goes on, she gets pretty frustrated. However, even then, she goes on a walk to clear her mind. While reading the story, we paused along the way to setup some steps for “making”.

  • Have an initial plan after you gather your supplies
  • Try to make something
  • Take a look at what you’ve made and try again if needed
  • If something isn’t working, try to do it in a different way
  • If you start to feel frustrated, take a break or a walk, and come back
  • Don’t quit

We could keep adding to this list, but those were the basic principles we followed.

coconut makerspace (12)


I showed students one of the plastic coconuts filled with supplies and told them that their goal was to take the materials and make something new. We talked about how the girl in the story made something she could actually use, so they certainly could try to make something like a piece of jewelry, a hat, a container for rocks, or whatever else they wanted.

coconut makerspace (6) coconut makerspace (1)

I also put out some scissors, glue, crayons, and markers. Then, students got to work. Each student had a different strategy for how to work. Some got very frustrated and did indeed take a walk around the library. Some students collaborated with people at their table or traded supplies with a friend.  It was loud and messy, but I heard things from students like:

  • Is makerspace always this fun?
  • Do we really get to keep the things that we made?
  • When can I come back?
  • From a teacher: My students talked about what they did with you the whole next day.

coconut makerspace (2) coconut makerspace (4)

You could look at this and say….sure….this is just making a craft, but there’s really so much more there.

Perseverance, problem solving, creativity, inventing, collaboration, and more were all there. Thank you to Gretchen Thomas for giving us an opportunity to bring makerspace to some of our grades who haven’t had a chance to use our makerspace quite as much. We have a lot of new students excited about finding more opportunities to use the tools in our makerspace because of this opportunity.

Cranking Up the Makerspace with Student Voice and Failure

IMG_6701

Since the first day of school, students have been asking me when our makerspace will start up.  Last year, we developed a great collaboration with Gretchen Thomas and her students at UGA to hold an open makerspace that students could visit on a weekly basis.  UGA is now in full swing, so we are finally ready to start our collaboration again.

IMG_6700

IMG_6702

This year, Gretchen has an eager class of students who will be coming in groups of about 4 every Tuesday and Thursday.  Rather than have every piece of the makerspace available right away, we’ve decided to focus on different aspects so that students develop some knowledge about the parts and gradually move to making choices about what they are really passionate about.  Students signup on an open signup sheet hanging outside the library.  There are 10-12 slots in three 30-minute sessions.  Each day has two choices.


Eventually the UGA students will plan activities to bring, but for now, they are introducing things we already have in the space.  For our first session, I was excited to have Carlos and Carlena offer their craft.  Their story has grown so much since my first post about a craft they discovered in a magazine.  Just this week, Carlos and Carlena shared their craft during our Dot Day celebrations by telling Sherry Gick and her 2nd graders how they are making their mark by teaching others how to make this craft that they discovered.  I loved seeing them grow from an uncertainty of their interests to finding something they are excited to read about, make, and share with others.

The UGA students in our makerspace this week brought supplies to do this beading craft with students as one option.  Carlos brought even more beads to use and shared his expertise with students in the makerspace as well as people just visiting the library with their mentors.

This aspect of our makerspace was very successful and calming.

IMG_6710

The other choice was to use the iPads with our Sphero robots.  Students were so excited to try out Sphero this year, but we ran into lots of problems.  First, the Spheros didn’t charge like they were supposed to.  Then, they were all connecting to random iPads instead of the one they were supposed to be connecting to.  Luckily, we had Sterling Bailey with us who had helped in our space last year.  He stay cool and collected through the whole epic failure and continuously thought of things he could try.  He helped the students to push through the frustration and keep trying different things to get their Spheros to connect and work.  While it wasn’t successful on the programming side of things, I think students learned a valuable lesson in maintaining patience in frustration and persevering.

We are ready to try again every Tuesday and Thursday through December!

Discovering Interests, Igniting Passions, and Amplifying Student Voice

IMG_6482

I’ve been doing a lot of work with teachers and students over the past couple of weeks focused on the IPICK strategy.  One of the big pieces of this strategy is “interest”.  The idea is that if we read things we are interested in then we are more likely to enjoy the books we read.  But…what if you don’t know your interests?

In each class I’ve taught, there has been a handful of students that no matter what you ask, what you suggest, or what stories you try to pull out they cannot name a single thing that they like.  This is frustrating, but rather than throw my hands up, it has made me very curious.  Why are these kids just shrugging their shoulders when you ask them what they like?  What can I do (we do as a school) to support all students in exploring their interests?

Ms. Spurgeon, a 4th/5th grade teacher, came to me with this exact same noticing. She had asked students to do an “All About Me” assignment, but when it came to interests, several students came up empty handed.  She wants us to do a project together this year using student interests, but we can’t start because we don’t know their interests.  We decided to try another route.

We were trying to decide what kind of text would immerse students in a variety of topics while still being very accessible to a range of reading levels.  I’m not really sure how we decided it, but we decided to try magazines.  I don’t really subscribe to magazines any more in the library, but we have all of the Ranger Rick, Zoobooks, Sports Illustrated, etc that we’ve subscribed to through the years.  I pulled out the boxes and put them all over the tables.  We did a very quick overview of how we really want to think about our interests and one way we do that is by trying as many things as we can.  Ms. Spurgeon talked about some foods she had tried like zebra and how she would never have known how much she liked the taste if she hadn’t tried it.  We modeled what “trying” a magazine looked like.  We were very specific to not read every page and were honest how we as adults often just flip through a magazine and pick out the pieces we want to read.  I loved this because I saw students perk up.  Knowing that they didn’t have to read the entire magazine was an invitation.  They dove in and started exploring.  They oohed and ahhed over so many pictures they saw, and Ms. Spurgeon and I had casual conversation with them about what they saw.

One moment stood out to me. Carlos and Carlena were looking at Kiki magazine together.  This magazine features a lot of fashion and crafts.  They discovered a page with a great 80’s style craft involving beads and safety pins.  The safety pins were put together on elastic string to create a bracelet.  They were glowing with excitement, so I told them I would take a picture of the page and send it to Gretchen Thomas at UGA to see if we could incorporate it into makerspace.

They looked a little shocked at first like, “You mean we could actually make this?”  Then, right after school I got an email from Carlos asking if I could email him the picture of the instructions.

It was that moment that told me I couldn’t let this momentum go.  This was a chance to empower individual students to explore a genuine interest.  Who cares if it was “just a craft”?  It was something they were suddenly passionate about when they had moments before been shrugging their shoulders.  That weekend, I went out and bought supplies, and I emailed them both first thing Monday morning.

I wasn’t surprised at all when I saw both of them walk in during their recess to get started on their project.

They came in for 3 days in a row during recess and didn’t even want to stop for lunch.

IMG_6481 carlos

As they’ve worked, I ‘ve shared their process via Twitter.  They have watched me documenting the process along the way, and I’ve told them that they are trying something out that they might teach to others or inspire other makerspace projects.

One day while we were working, Gretchen Thomas at UGA tweeted a picture of pins that her students had made.  When I showed it to Carlos and Carlena, they both smiled and said, “They’re doing that because of us?”

Another opportunity started to emerge because I saw how seeing the impact that they could have outside of our school walls was a motivator for them.  Next week for Dot Day, we are connecting with Sherry Gick and her 2nd grade class.  I asked Carlena and Carlos if they would share with this class how they are making their mark by being the first to try a craft in our makerspace and how they hope to pass on what they’ve learned along the way.  Without even blinking, they said yes.

IMG_6483

I have no idea where this is going to go, but I feel like I’ve tapped into something that I can’t let go.  I have to keep asking myself, my students, and our teachers how we can continue to explore interests, seek out individual passions, and amplify student voices beyond the walls of our school.  All of our students deserve to explore so many things to figure out what they are truly interested in.