Rubiks Cube Mosaic Makerspace

Rubiks Cube Makerspace (34)

We love trying new things in our makerspace, so this February we decided to leap into Rubiks cubes. At AASL in Louisville, I visited the You Can Do the Cube booth and checked out their Rubiks cube lending program. You can check out sets of Rubiks cubes to create Rubiks cubes mosaics and simply pay for the shipping and handling each way.

Rubiks Cube Makerspace (19)

I shared this idea for our makerspace with Gretchen Thomas at UGA and she was excited to give it a try.  We collaborate with Gretchen and her students every Tuesday and Thursday in our open makerspace time. Instead of waiting on an available kit in the lending program, she decided she could use some funds to purchase some inexpensive cubes on Amazon. She ordered 120 3×3 cubes and 50 2×2 cubes.

Rubiks Cube Makerspace (29)

In class at UGA, Gretchen’s students watched multiple videos on how to solve Rubiks cubes and worked to learn some strategies that would be helpful to our Barrow students. They also practiced designing their own small mosaics using the 3×3 cubes.

Rubiks Cube Makerspace (32)

At Barrow, we selected some prepared mosaics from the You Can Do the Cube site. We chose Rosa Parks for our 3×3 and a flower for our 2×2. I measured out a grid on a piece of butcher paper and taped the individual mosaic pieces into the grid and numbered them.  I made a second set of pieces that we numbered and cut out and put into an envelope. Students could select a picture out of the envelope, solve that picture, and place it onto the correct square in the grid.

For our open makerspace, teachers sign up students for a 30-minute slot on a Google document. They are signing up for all 6 Tuesday/Thursday sessions of Rubiks Cube. For this first session, students spent time exploring the cubes.  I made a QR code for students to scan to watch tutorial videos about solving. Some followed these videos, while others learned from the strategies of friends and UGA students.

Rubiks Cube Makerspace (33)

It was amazing to see how many students already knew some tips about solving Rubiks cubes because of their own practicing at home.  We also downloaded an app on the iPads called Cube Solver that allows you to put in the colors on the cube and it shows you all the steps to solve the entire cube. Some students used this as a tool for learning more about the different turns required to solve.

Once students felt comfortable with the cube, they started solving actual pieces of the mosaic and adding it to our grid located on a large table in the back corner of the library. With so many students working on cubes during one makerspace and with so many students already talented in solving cubes, the mosaic started to take shape pretty quickly. By the end of the 2nd day of working on the mosaics, we had the Rosa Parks and flower mosaic done.

I had already prepared additional mosaics to work on: a dinosaur and Mona Lisa.  We celebrated our achievement of solving the first mosaics and took some pictures. Then, it was time to start dismantling the mosaics and solving a new one.

Once we created 2 additional mosaics, I gave the students the option of designing their own small mosaics.  They could do this alone or with a group.  They sketched out their mosaic on grid paper first and then worked to solve and assemble the mosaic at tables.  This would be a great way to extend this experience in future sessions because there wasn’t much time left.

The thing I loved most about this makerspace project was being able to see students bringing in a talent and passion they had outside of school and making it something for school.  There are lots of ways this could be incorporated into grade level curriculum so I hope that this is not the end of the Rubiks cube. We have so many students who enjoyed this that I’m sure we could even just make this a center in the library for people to work on over time.

November Makerspace with Doll-E 1.0

Our makerspace is taking a break for the next 2 months while we work on our student book budget project. We wrapped up November with a makerspace inspired by the book Doll-E 1.0 by Shanda Mcloskey. This book is about a girl who receives a doll that only says “mama”. She tries lots of ways to play with the doll but just can’t get past the fact that it only says one thing. Then, she figures out that she can hack the toy using her computer programming skills and a Makey Makey.  As soon as I read this book last year, I wanted to do a makerspace with it. Then, the amazing Colleen Graves put together an instructables with step-by-step instructions on how to create a toy programmed with Scratch and controlled by Makey Makey.  While we didn’t really follow all of Colleen’s instructions, we did have fun creating our own variations.  Here’s a look at what we did.

For context, this took place during our open makerspace time on Tuesdays/Thursdays. Students sign up through their teacher via a Google Doc. We have four 30-minute segments which allows students from grades 1-5 to try out our month-long theme. Students from Gretchen Thomas’s maker class at UGA help facilitate each of the segments alongside me.

Session 1: Tinkering

Since students have a variety of experiences with Scratch and Makey Makey, we wanted all students to have some time to tinker with both tools. Our UGA students made some example toys out of toilet paper rolls, aluminum foil, copper tape, and a variety of other objects. We stationed these at tables with Makey Makey piano and Makey Makey kits. Students had an opportunity to tinker with how to hook up the Makey Makey as well as how to use the toy to play the piano on the computer. In another area, students practiced creating blocks of code in Scratch with events and sounds.

Session 2 & 3: Coding

In these sessions, students considered the sounds they would like their toy to make. They could record their own sounds or use the gallery of sounds located in Scratch. Each student made an account in Scratch and worked to code all four arrow keys and the space bar to correspond with the front of the Makey Makey.  More advanced students could try out some of the extra pieces of code from Colleen’s instructions, but most students simply used an event block “when key is pressed” and a sound block “play sound until done”.

This was one of the most frustrating pieces of our project because with such as short time segment and students who couldn’t remember their email addresses and passwords, it took a long time to get accounts setup. Once we got through the initial setup, the coding wasn’t too bad, especially if students took the simple route.

Session 4: Toy Creation

In this session, students used toilet paper and paper towel tubes to create toys. We asked them to think about making up to 5 points of contact to connect their Makey Makey to. This was their first focus before adding details to give their toy character. Students used clothes pins, copper tape, brads, paper clips, aluminum foil, and other miscellaneous conductors.

We had a hot glue gun station with 5 glue guns to attach pieces. A UGA student stayed with the glue guns to facilitate safety.

Then, students used a variety of craft supplies to give their toy character: sequins, googly eyes, pom poms, feathers, etc.

I won’t lie. This was extremely messy and no matter how many hands I had helping or how many ways I tried to keep us organized, we ended up with supplies all over the tables, chairs, and floor.

As students finished their segment, we stored the toys in cardboard boxes by grade level.

Session 5:

This was the session to bring it all together. If students needed to finish coding or their toy, this was the session to do it. Then, their final goal was to hook up their toy to Makey Makey and see if their code worked. Many students realized that they had not created 5 separate contact points but had instead created contact points that touched one another. This resulted in 2-3 different sounds going off at one time. This was a good learning experience because they had to figure out a way to revise their design.  If we had additional sessions this could have been expanded on but most just got to the beginnings of revision.

Our youngest makers in 1st grade didn’t quite make it through all of the steps since they had so much to explore and learn. In this final session, we hooked up the UGA student toys to the 1st graders’ code and also had a computer with pre-made code where they could try out the toys they had made.  This was also true for students who had missed one or more sessions.  We just couldn’t get through all the steps.

There were a lot of moments during this month where I wanted to pull my hair out and moments where I had to stop and take deep breaths. I had to remind students that I didn’t hold all the answers and I couldn’t show them every step to do. I find that this is a constant struggle. Students can figure things out if they just have the space and encouragement. Many of them stepped up, persevered through frustration, and helped their peers when they figured things out.

In the end, I learned a lot about what this might look like as a class or grade level curriculum based project. We could do so much with storytelling and writing with this project in addition to the science standards involved. The purpose of our makerspace wasn’t to have a polished product at the end. We wanted to have fun, problem solve, and invent while learning a lot about coding and circuits. I think we accomplished that, even if there were moments that felt messy and chaotic. I would do it again and try to do a bit more to keep us organized and moving forward. More days would definitely have been beneficial.

Movie Makerspace: Exploring Green Screen & Stop Motion

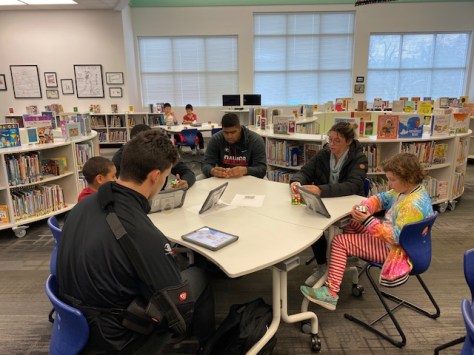
September has come to an end and our 1st month of makerspace is complete.  We hold an open makerspace every Tuesday and Thursday. Students choose to come to makerspace as an alternative to their recess time.  We weave makerspace projects into the curriculum throughout the year, but this Tuesday/Thursday time is more open-ended. Our makerspace is also a collaboration with Gretchen Thomas and her students at the University of Georgia.  This class evolved organically out of some very small collaborations a few years ago. Now, 8 UGA students visit our library every Tuesday & Thursday from 10:45-12:15. Students sign up with their teacher via a Google Doc after watching an introductory video to the month’s topic. Each teacher is allotted a certain number of spots.  If they don’t use all their spots, another teacher can claim them. We have a staggered schedule: 3rd grade 10:45-11:15, 4th grade 11:00-11:30, 1st grade 11:20-11:50, and 5th grade 11:45-12:15.

For September & the first week of October, we focused on making movies. For week 1, students rotated to three stations to tinker. They used Stop Motion Studio on the iPad along with our library Legos to tinker with stop motion animation.  They used Do Ink green screen app on the iPads to experiment with green screen. This included using green gloves, green string, green plates, and the green cushions in our library to create small green screens and green screen effects.  At the final station, students explored iMovie trailers for making regular movies as well as editing movies made in other apps.

During the 2nd week, we asked students to commit to what type of movie they wanted to make.  This could be done alone or in a group. Before students jumped right into filming, we wanted them to storyboard or create a quick script. Most students chose stop motion with just a few choosing green screen.

For the stop motion students, we took a quick look at a new book from Capstone Publishers called Create Crazy Stop Motion Videos by Thomas Kingsley Troupe. I was fortunate to pick this book up at the SLJ Leadership Summit. I love how this book goes step by step through the movie making process: casting, script writing, storyboarding, prep, filming, editing, and final touches. This is a Capstone 4D book which means it also has videos that accompany certain pages.  Since it was most students’ first time making a stop motion, we tried to get a few ideas from the book and give it a go. In the future, I would love to come back to this book and really spend more time with each step.

For 2 weeks, students worked on their movies. We put their names on the backs of the iPads with tape so that they could continue their project each time. We also stored any lego creations they made on our makerspace shelving. The UGA students sat with groups or individuals and helped with tips on storytelling, keeping the iPad and background stable, and helped keep our legos as organized as possible.

As usual, students were super excited to come to makerspace and they developed many skill sets while having fun. I loved the storytelling that students put together in such a short amount of time and it made me really think about using legos even more in conjunction with writing. We have a long way to go before creating stellar stop motion videos, but it was fun to see what students learned from one another through trial and error, chatting with UGA students, looking at stop motion videos online, and looking at our new book from Capstone. My hope is that students can take the skills they learned in this project and apply it to future projects in class. We saw so many students get excited about their movie creations which could easily spill over into curriculum areas.

Students who wanted to share their movie worked with me to upload videos to Youtube. Please enjoy these first attempts at stop motion videos. If you have any of your own tips to share, leave them in a comment.  We hope to do more stop motion videos as part of curriculum projects in grade levels.


First Grade 3D Jewelry Design with Makers Empire

Each year, the art teacher and I collaborate on a 3D design and 3D printing project to accompany her art standards in 1st grade. Blokify has been a trusty 3D design tool that has served this project well due to its simplicity on the iPad. However, this year we hit a road block. Blokify is no longer available in the app store, and this was the year that our iPads finally quit supporting its functionality.

I began exploring alternatives.  There are so many 3D design apps and web tools out there, but the tricky part is finding one that is developmentally supportive to 1st graders.  The app I decided on was Makers Empire. This app has a lot of options for 3D design and also has some gaming built in, but it has a block based design tool called Blocker that works very similar to Blokify. This app is free to use but it’s not free to access the teacher dashboard and be able to download the STL files for 3D printing. It’s also not cheap, so we decided to test it out with a free 14-day trial and see how it served our project.

After tinkering with the app on my own, I decided on some steps it would take to get our 1st graders designing. Makers Empire is not an app you can just open up and start. There’s some setup involved, which I felt like was a bit of a barrier to our 1st graders. Ms. Foretich and I made a slideshow of steps to get students started, and we all sat in front of the screen to do these setup steps together.

First, students tapped on “new” to create new accounts. First, they create a hero. This is their avatar, but we didn’t want to spend much time on this so we just told them to tap each button and make a quick selection.

Next, students let Makers Empire assign them a random name and skipped the password step.

Prior to their arrival, I went into the dashboard and setup a class for each 1st grade homeroom. Students were able to select their class, grade, and type their real name so that I could easily identify their account in the teach dashboard.

This finally brought students to the screen where they were ready to create in Blocker.

At this point, we had students turn over their iPads so that they could see the steps needed to create a jewelry pendant for 3D printing. Since Makers Empire has so many things to click on, I really wish we had time for them to tinker first. However, we decided to focus them on a few buttons and promise them that when they finished their design that they could tinker with any of the other parts of the app.

In Blocker, we only needed students to use the add, delete, and view buttons to create their design, so we showed them these 3 buttons. We also talked to them about the requirements for a pendant. It needed to be one level tall. All pieces had to be connected by at least one side. There had to be a hole for string to go through. Students could design a specific shape or something abstract.

We sent them to tables with iPads and then rotated around to support students with any design questions or confusions they had. Once students were actually in Blocker, most of them had little to no trouble figuring out how to design. When students felt their design was done, they raised a hand for us to come and double check it. Then, they named the file with their name and moved on to tinkering with any part of the app.

Once students left, there were several steps for me to do. I loved that I could log in to the dashboard in Makers Empire and pull up each class, see their files, and download the STL file. This was such an easy step that was so much better than my experience with Blokify. I imported each filed into the Makerware software for our Makerbot and put about 8 files on each plate. On paper, I labeled each plate with student names so I knew which file belonged to which student.

Then, the printing began. Each plate took about an hour to print and there were about 3 plates per class. In all, it took about 12 hours to print the whole first grade’s files across a few days. As each plate printed, I put pendants in individual ziploc bags with the teacher and student name written on the outside.

When classes were finished printing, Ms. Foretich took the pendants to the art room for the final steps. Students colored their pendants with sharpie markers, placed string through the pendant, and added decorative beads to finalize their jewelry piece.

I loved seeing students wearing their necklaces around the school. They were so proud to show them off to me in the hallways.

Now, Ms. Foretich and I need to think through this tool, how often we might actually use it through the next school year, and whether it’s worth the lofty price tag. If you know of other 3D design tools that might be a good fit for this project and first graders, comment below.


Book Character Costumes on Parade: Our February Makerspace

Each year, we hold a Storybook Parade to celebrate our favorite books. This is a long-standing tradition at our school. Students choose a favorite book, dress up as that character, and parade down the sidewalks near our school to advertise their books to the community.

Classroom teachers do a wonderful job of supporting students in making costumes if they are unable to do that at home, but this year, I thought our February makerspace theme could be about costumes so that students could get a jump start on preparing for the parade.

Ahead of makerspace, Gretchen Thomas had her UGA students practice making their own costume pieces based on book characters to get warmed up. I made an introduction video for February’s costume theme and a Google doc signup for teachers to signup students at 11, 11:30, and 12:00 on Tuesdays & Thursdays.

I also went through our makerspace and gathered possible materials that students might use for costumes: felt, fabric scraps, yarn, cardboard, plastic tablecloths, various glue, pom poms, beads, and more.

I pulled several costume and fashion books from our makerspace genre section of the library as well as a few possible examples of books that could become character costumes.

When students signed up, they were signing up for a 3-week session on costume making to meet on Tuesdays & Thursdays. If students finished early, they could take their name off the list to allow others to come, but if they needed all 3 weeks, they could come. Each week, a different group of UGA students came to support our makers in grades 1-5.

During week 1, I met with all students on the carpet to set the stage for our time together. We looked at past storybook parade photos to see the wide variety of costumes people had. I also held up some of the picture books I had pulled and we brainstormed together some possible costume pieces that could be made for each character as well as what we could use that might already be in our closets.

At our tables, I put paper and pencils for students to do some planning as well as all of our costume/fashion books for ideas. Our goal was for each student to have a costume idea before gathering materials from the material table. From past experience, we’ve seen students just grab everything they see because they like it rather than think about what they truly need. We wanted students to be conscious of our makerspace materials and not creating excess waste.

As students gathered their materials with help from our UGA students, they spread out in the library at tables to start working. It took a lot of energy from all adults in the room because every student was creating something completely different. However, it was amazing to look around and see the collaborative creativity between our young makers and our UGA helpers. Many hidden talents and problem solving skills began to emerge.

We watched as cardboard became hats, ladybug wings, ninja swords, and candy bars.

Plastic tablecloths became dresses, skirts, and shirts.

Scraps of fabric were tied together into ninja clothes.

Felt and construction paper became cheetah spots and Little Elliot polka dots.

Cardstock, construction paper, and pipe cleaners became masks.

We all learned how to be resourceful with the materials we had and all worked together to figure out how to be costume designers with limited experience.

With so many works-in-progress, our storage room is a bit of a mess. We have costume pieces drying and stored on every shelf, table, and corner. As students return each day, they locate their own items with assistance from adults and continue the process. Students are allowed to take their costume pieces home, but I’m encouraging them to keep them here at school until our parade on March 8th so that they don’t get lost.

This was our first try at a costume making makerspace. It could use some fine tuning. It’s always a challenge to have so many different projects going at once where every student needs different materials and skill sets to create. However, our extra hands from UGA helps this part a lot. I would love to have a better plan for getting students started and gathering the materials that they each need.  Maybe each student needs a box or a tray where they could keep their items. Then these could be stacked on top of one another. I’m not sure, but I would love to debrief the experience with our students and the UGA students to get ideas for next year.

We can’t wait to see these costumes on parade very soon!


Magazine Ornament Makerspace

Our open makerspace is taking a short break while our student book budget team works on new books for the library. We wrapped up our final makerspace session by hosting an ornament makerspace. Students signed up for this time with their teachers via a Google doc.

I have lots of old magazines that used to be in circulation but aren’t used anymore. I decided to pull them out and use them for our ornament materials as a way to promote reusing materials rather than throwing them out or putting them in recycling.

I wanted students to have a mixture of structure and freedom, so I selected 3 options for structured ornaments with a 4th option of designing your own.

Instructions for these 3 ornaments are found below.

Ornament 1 (top center):

  1. Cut 2 pages from a magazine and fan fold each page.
  2. Stack the 2 fan folds on top of one another and tie in the middle.
  3. If you want, trim the ends of the fan into a fancy design with craft scissors or regular scissors.
  4. Fan out each side and connect together to make a circle. Staple if low on time. Glue if you have time for drying.
  5. Use a hole punch to make a hole and tie a string.

Ornament 2 (bottom left):

  1. Cut multiple strips of the same length from a magazine page.
  2. Bring the ends of each strip together to form a loop.
  3. Repeat the process of bringing ends of strips together and begin adding the loops together.
  4. You might want to use a gem clip to hold the loops together if you have trouble holding them in your hand and folding paper at the same time.
  5. Staple the loops together at the top.
  6. Use a hole punch to create a hole and tie a string. (If you have added a lot of strips, it may be difficult to punch a hole)

Ornament 3 (bottom right):

  1. Cut 5 strips from a magazine page. 2 long, 2 medium, 1 short.
  2. Arrange the strips in this order: long, medium, short, medium, long.
  3. At one end of your stack, make sure the ends of the strips are even and staple them together.
  4. Starting in the center with the short strip, connect the two medium strips to the top of the short strip.
  5. Next, connect the two long strips to the short strip. Staple together.
  6. Use a hole punch to create a hole and tie a string.

When students came to the makerspace session, I quickly showed them the 3 options which were all at their own table.  Then, I showed them a 4th table where they could design their own. Since a UGA class collaborates with us in makerspace, there was a UGA student at each table to assist students as needed with the directions. I also had a UGA student help with hole punching and string tying.

Students were welcome to make as many ornaments as they wanted. They could take them all with them, but they were also welcome to add them to our holiday area of the library. At the front of the library, I have pulled out all of our November/December holiday books and created displays to highlight those holidays such as Diwali, Thanksgiving, Hanukkah, Kwanzaa, Christmas, and New Year.

As with every makerspace time, I loved seeing how students took structured ideas and put their own creative spins on them. I also loved seeing what unique ideas students came up with on their own too. It’s always hard to decide how to balance structure with open-ended projects, but I think it’s important to offer both. We all learn in different ways. I’ve seen that some learners have high anxiety when given no structure and others have high anxiety when they have structure and think that their creation has to look exactly like the picture.

Several students did decide to add at least one of their creations to our tree in the library. It’s one more way that we can share ownership of our library.


Punkin’ Chunkin’: A Halloween Makerspace Event

Our makerspace sessions this year have been following a month-long theme, but for Halloween, we decided to have a one-time special makerspace.  In the past, we’ve done a “design something spooky” challenge where kids designed haunted houses, ghosts, etc and used littlebits to give them lights, sound, and movement.

This year, Gretchen Thomas from UGA suggested pumpkin catapults, and it was the perfect suggestion. Ahead of the session, students signed up on a Google doc with their teacher for a 30-minute slot.  As students arrived, they checked in with a UGA student and sat on the carpet in front of the projector.  While we waited on arrivals, they watched a video of the Punkin Chunkin event in Delaware.

We chatted about observations. Many students noticed the different styles of catapults that were made and we wondered about how many times they had to work on their inventions before they worked the way they wanted them to.

Next, I muted a video showing students working on a smaller scale pumpkin catapult.

While the video played, we talked about the day’s challenge. Students were challenged to design a catapult that could launch a candy pumpkin across the library. They used the video to name some of the materials they would need: plastic spoon, popsicle sticks, rubber bands, tape, and a pumpkin. Students also saw in the video that there were many designs of catapults and that adjustments were constantly being made to improve the catapults.

When they were ready to take on the challenge, students gathered their initial materials from a supply table and made their first attempt at a pumpkin catapult. Some jumped right in while others went back to watch the video again. Some chose to work together, while others chose to work alone.

As first attempts were finished, students picked up a candy pumpkin and moved to our launch zone. This was a crucial piece of the experience. I wanted a designated area for launching in order to contain the mess but also to keep students safe from flying projectiles. We launched pumpkins in the back of the library toward our green screen wall.

Most students had mediocre first launches, so we chatted with them about what they thought might improve their design.  Students went back and forth from the launch zone to the building areas.  UGA students spent most of their time at tables assisting students who were stuck or needed an extra hand. Some of them also helped with keeping students safe from flying pumpkins in the launch zone.

Even with pumpkins flying in the back of the library, this was a surprisingly peaceful makerspace. Students were very focused on their designs, especially as we moved higher in grades. Pairs of students worked well together and students were for the most part safe when launching pumpkins. I loved seeing the many different designs. Some were very simple and some attempted to make very elaborate catapults.

This experience could have many extensions if we had more time. I would love to add a measurement component to see which catapult threw pumpkins the farthest. We kept things very open-ended, but you could also establish some boundaries as to what elements of the catapult were required, how many materials could be used, etc.

With the time we had, this was the perfect setup. Students had plenty of time to make a catapult that had some type of success and they were able to take what they made with them to continue working on or exploring.

Making with a Cause: Cardboard Awards

One thing I’ve been very interested in with our makerspace is “making with a cause”. I see so many posts on social media where someone has done something amazing for someone else by using skills and materials often found in makerspaces. From 3D-printed shells for turtles to scarves for the homeless shelter, there are so many ways we can give back to our community through making.

I love that my friend, Gina Seymour, has created a whole book on “making with a cause” and I look forward to my copy arriving in the mail.  Her book, Makers with a Cause: Creative Service Projects For Library Youth, has a whole section on getting started and another section with examples of projects from animal welfare to health/wellness to community service.

For this month’s theme of cardboard, we asked students to think about someone who deserved an award. What would the award be? What would it look like? Why would the person receive the award?  Students designed their awards out of cardboard.  Some made medals to hang around necks.  Others made trophies or even booklets. The only requirement was to use cardboard.

We asked students to start by brainstorming ideas on paper, and then they transferred those ideas onto cardboard. Using Makedo saws, scissors, and canary cardboard cutters, students worked with UGA mentors to cut out their award designs.  They embellished these with duct tape, string, washi tape, and other supplies from our makerspace supply cart.

As students completed their cardboard awards, they came to me at the computer to print a certificate to accompany the award. I found an easy certificate generator called Certificate Magic.

It allows you to choose the type of award you want to print and then fill in the details in a very simple form.  Then, you can download your award as a PDF and print. Students named their award, identified who they were giving it to, and chose a reason for the award. I loved hearing who they were giving the awards to and why.

A few examples included:

  • A T-rex award given to someone’s sister for acting like a dinosaur
  • A Golden Bracelet award given to someone’s sister for being a good sister
  • A Golden Butterfly award given to someone’s whole family for supporting her
  • A Football Trophy given to a dad for being a supporter of the Georgia Bulldogs
  • A Butterfly Necklace award given to a friend for being a good friend

There was even a special surprise award for me.  Somehow this student kept his award details a secret until he gave me the award.  He even asked if he could have privacy while he filled in the Certificate Magic form.  My award was called “Read More Books” for being a great librarian.  He even made the cardboard award look like a book with the award details inside.

I’m loving this component of our makerspace so far this year and I look forward to seeing what people end up creating for others in the coming months.


Makerspace Begins: Themes and Options

Our makerspace has once again cranked up for the 2018-19 school year. Once again, I’m collaborating with Gretchen Thomas and her class of over 30 undergraduates from the University of Georgia. Every year, Gretchen and I meet to think about what our open makerspace time might look like, ,and every time we make some changes and try something new.

Our idea for this year is offer specific themes around materials or tools rather than try to squeeze in so many different things in a short amount of time.

For September, we’ve chosen cardboard as our material.  Across 3 weeks, we hope to offer 3 short-term challenges using cardboard.  One of those challenges will be a “making with a cause” challenge.

  • Week 1: Design a hat. This can be interpreted however students want.
  • Week 2: Making with a Cause. Make an award. Students will choose someone who deserves an award. Make the award. Give the award to that person with an explanation of why they deserve the award.
  • Week 3: Make a puppet. Use cardboard tubes to create unique puppets and hopefully begin storytelling with them.

For the second open makerspace, we know that there will be students who aren’t interested in the short-term options and want to branch out to their own projects that take longer than 1 or 2 sessions. For these students, we will offer them a space to plan, design, and create their own inventions that have a purpose.  We wanted to keep this option open ended, but encourage students to develop something using cardboard that actually has some sort of function/purpose.

In each Tuesday/Thursday session, groups of UGA students come to work alongside students. They come in 30-minutes waves so that each round of students has me and UGA students to support them. I’ve put a bit more structure on the front end of makerspace this year. Students check-in with a UGA student and then sit on the carpet. I offer a quick intro to what we are making and connect it to a book. For cardboard, we used Cardboard Kingdom by Chad Sell. Then, students move to tables to do some planning before they start grabbing cardboard and cutting.

This week, we launched into the first challenge of making a hat. Students had access to cardboard, Makedo safe saws, scissors, duct tape, and coloring supplies. Students sketched hats onto cardboard and started sawing.  There was a learning curve on the best strategies for sawing. Some students were more patient than others with the cutting process. Be warned! It was very loud and very messy. All adults circulated around to support as many students as possible.

At the end of session 1, students labeled all of their pieces of cardboard and we stored them in the makerspace.

For session 2, we spread all of the pieces out so that students could locate their cardboard to start again.

I loved seeing the hats that students came up with in such a short amount of time. At dismissal, I could see the cardboard hats parading down the halls and lots of students were curious about where they came from. Many students needed more than 2 sessions to finish. Some chose to take the materials with them to finish at home. Others left their hats behind to continue working on next week.

I have a lot of questions about how this is all going to work. It’s fast-paced and a challenge to get one group finished and cleaned up before the next group comes in. It’s also a mess of cardboard dust and bits, and I hate leaving that for our custodians. However, we’re pressing forward, expecting the miraculous, and making changes as needed along the way.

2018 Barrow Maker Fest

In addition to having regular makerspace sessions every Tuesday and Thursday in the spring, students also have the opportunity to work on an individual project to showcase at our annual maker fest.  To participate, students fill out a Google form sharing their possible project topics and whether they will complete the project at home or in our makerspace during school hours.  They also have the option of working alone or having a UGA mentor to help them.

I collaborate with Gretchen Thomas at UGA College of Education. I love seeing the relationships that my students develop with the UGA students, and they thrive knowing that they have a mentor to visit with and work with while they make their creations.  In the spring, she divides part of her UGA students to support our Tuesday/Thursday makerspace sessions while the other part supports students working on individual projects. My maker students don’t always meet with the same UGA student, but they have someone every Tuesday/Thursday who can support their work.

When students begin preparing for Maker Fest, we meet with them individually to see what type of project they are thinking about.

This year, I offered several categories for them to think about:

  • robots
  • cardboard
  • makey makey
  • littlebits invention
  • duct tape creation
  • 3d design
  • Scratch program
  • finger knitting
  • origami
  • strawbees structure
  • stop motion video
  • magic tricks
  • puppet/puppet show
  • magic tricks
  • something else! (This category meant students might explore our many craft books for ideas on projects to create)

Once students decided, we gathered the materials they needed and stored each project on the shelves in our makerspace storage room. This part is hard to manage and it feels a bit chaotic until we have the materials that each student needs.  Each Tuesday/Thursday they come for a 30-minute work session, gather their materials from the shelves, and work with me or a UGA student.  Some students complete their projects at home.

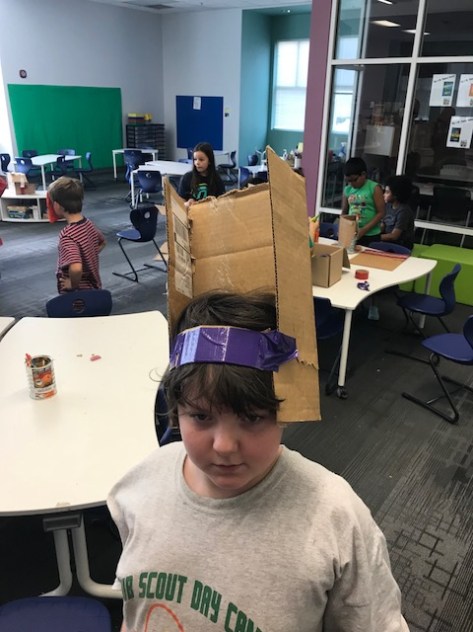
During the actual Barrow Maker Fest, we created a schedule so that every student who made something had two 30-minute windows to showcase their work.  There was also a schedule for classes to sign up and come to view the projects.  The entire UGA class came as well so that they could view the final projects as well as help students at tables.

In the end, 26 students showcased creations on a variety of topics which included:

  • a cardboard Earth robot
  • mason jar lights
  • a robotic arm
  • a cardboard pirate game with secret codes and a spyglass
  • a Python computer program similar to Google Translate which translated English to Pig Latin
  • a shadow puppet theater
  • a Littlebits throwing arm and car
  • Lego scenes and building station
  • 3D slinkies, Rubik’s cube, and Minecraft swords made with 3D pens
  • 3D action figure designed in Tinkercad
  • a cardboard robot suit
  • a cardboard tower
  • a car made from a mail tube
  • a stackable jewelry holder
  • magic tricks
  • Merge cubes
  • Osmo

They were so excited to share their work, have an authentic audience to entertain and ask questions, and see that their work inspired other makers.  Several students who came said they wanted to make something next year.

You can see many of these projects along with projects from other K-12 schools in the Clarke County School District at our CCSD Maker Fest.  It will be Saturday April 14 2-4PM at Clarke Central High School.  It is free and open to the public.  We hope to see you there.