Making with a Cause: Cardboard Awards

One thing I’ve been very interested in with our makerspace is “making with a cause”. I see so many posts on social media where someone has done something amazing for someone else by using skills and materials often found in makerspaces. From 3D-printed shells for turtles to scarves for the homeless shelter, there are so many ways we can give back to our community through making.

I love that my friend, Gina Seymour, has created a whole book on “making with a cause” and I look forward to my copy arriving in the mail.  Her book, Makers with a Cause: Creative Service Projects For Library Youth, has a whole section on getting started and another section with examples of projects from animal welfare to health/wellness to community service.

For this month’s theme of cardboard, we asked students to think about someone who deserved an award. What would the award be? What would it look like? Why would the person receive the award?  Students designed their awards out of cardboard.  Some made medals to hang around necks.  Others made trophies or even booklets. The only requirement was to use cardboard.

We asked students to start by brainstorming ideas on paper, and then they transferred those ideas onto cardboard. Using Makedo saws, scissors, and canary cardboard cutters, students worked with UGA mentors to cut out their award designs.  They embellished these with duct tape, string, washi tape, and other supplies from our makerspace supply cart.

As students completed their cardboard awards, they came to me at the computer to print a certificate to accompany the award. I found an easy certificate generator called Certificate Magic.

It allows you to choose the type of award you want to print and then fill in the details in a very simple form.  Then, you can download your award as a PDF and print. Students named their award, identified who they were giving it to, and chose a reason for the award. I loved hearing who they were giving the awards to and why.

A few examples included:

  • A T-rex award given to someone’s sister for acting like a dinosaur
  • A Golden Bracelet award given to someone’s sister for being a good sister
  • A Golden Butterfly award given to someone’s whole family for supporting her
  • A Football Trophy given to a dad for being a supporter of the Georgia Bulldogs
  • A Butterfly Necklace award given to a friend for being a good friend

There was even a special surprise award for me.  Somehow this student kept his award details a secret until he gave me the award.  He even asked if he could have privacy while he filled in the Certificate Magic form.  My award was called “Read More Books” for being a great librarian.  He even made the cardboard award look like a book with the award details inside.

I’m loving this component of our makerspace so far this year and I look forward to seeing what people end up creating for others in the coming months.


2018 Barrow Maker Fest

In addition to having regular makerspace sessions every Tuesday and Thursday in the spring, students also have the opportunity to work on an individual project to showcase at our annual maker fest.  To participate, students fill out a Google form sharing their possible project topics and whether they will complete the project at home or in our makerspace during school hours.  They also have the option of working alone or having a UGA mentor to help them.

I collaborate with Gretchen Thomas at UGA College of Education. I love seeing the relationships that my students develop with the UGA students, and they thrive knowing that they have a mentor to visit with and work with while they make their creations.  In the spring, she divides part of her UGA students to support our Tuesday/Thursday makerspace sessions while the other part supports students working on individual projects. My maker students don’t always meet with the same UGA student, but they have someone every Tuesday/Thursday who can support their work.

When students begin preparing for Maker Fest, we meet with them individually to see what type of project they are thinking about.

This year, I offered several categories for them to think about:

  • robots
  • cardboard
  • makey makey
  • littlebits invention
  • duct tape creation
  • 3d design
  • Scratch program
  • finger knitting
  • origami
  • strawbees structure
  • stop motion video
  • magic tricks
  • puppet/puppet show
  • magic tricks
  • something else! (This category meant students might explore our many craft books for ideas on projects to create)

Once students decided, we gathered the materials they needed and stored each project on the shelves in our makerspace storage room. This part is hard to manage and it feels a bit chaotic until we have the materials that each student needs.  Each Tuesday/Thursday they come for a 30-minute work session, gather their materials from the shelves, and work with me or a UGA student.  Some students complete their projects at home.

During the actual Barrow Maker Fest, we created a schedule so that every student who made something had two 30-minute windows to showcase their work.  There was also a schedule for classes to sign up and come to view the projects.  The entire UGA class came as well so that they could view the final projects as well as help students at tables.

In the end, 26 students showcased creations on a variety of topics which included:

  • a cardboard Earth robot
  • mason jar lights
  • a robotic arm
  • a cardboard pirate game with secret codes and a spyglass
  • a Python computer program similar to Google Translate which translated English to Pig Latin
  • a shadow puppet theater
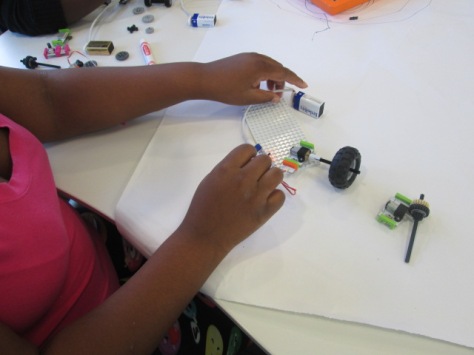
  • a Littlebits throwing arm and car
  • Lego scenes and building station
  • 3D slinkies, Rubik’s cube, and Minecraft swords made with 3D pens
  • 3D action figure designed in Tinkercad
  • a cardboard robot suit
  • a cardboard tower
  • a car made from a mail tube
  • a stackable jewelry holder
  • magic tricks
  • Merge cubes
  • Osmo

They were so excited to share their work, have an authentic audience to entertain and ask questions, and see that their work inspired other makers.  Several students who came said they wanted to make something next year.

You can see many of these projects along with projects from other K-12 schools in the Clarke County School District at our CCSD Maker Fest.  It will be Saturday April 14 2-4PM at Clarke Central High School.  It is free and open to the public.  We hope to see you there.


The Makerspace Is Open with a New Badging System

img_8887UGA is back in session which means our makerspace is cranking up again.  We already have some curriculum connections planned for special projects, but our students look forward to the weekly open makerspace times on Tuesdays and Thursdays from 11-12:30.

Gretchen Thomas and her UGA class collaborate with us to provide a weekly time where students can signup to explore various tools and projects in our makerspace.  Four UGA students come each time and lead up to 15 students every 30 minutes in the makerspace so that I can also teach classes at the same time.

img_8875

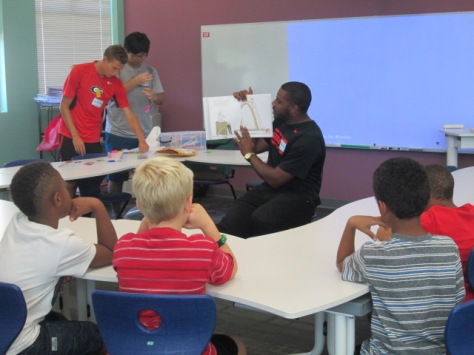
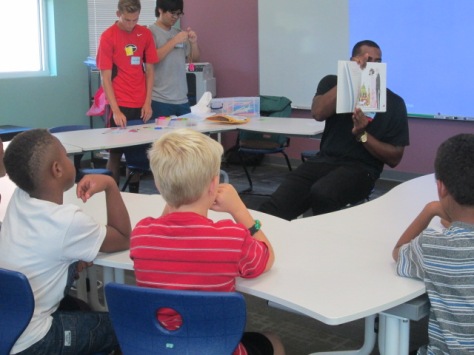
Gretchen and I are have learned a lot during our collaboration together, and I love that she’s always pushing her class to try something new.  For our first few sessions this year, the UGA students are presenting a maker-related book to the students and an activity to accompany that book.  There’s not really enough time to read the entire book and still make something, but they at least are able to show the book, talk a bit about it, and then make something with the students.

img_8874

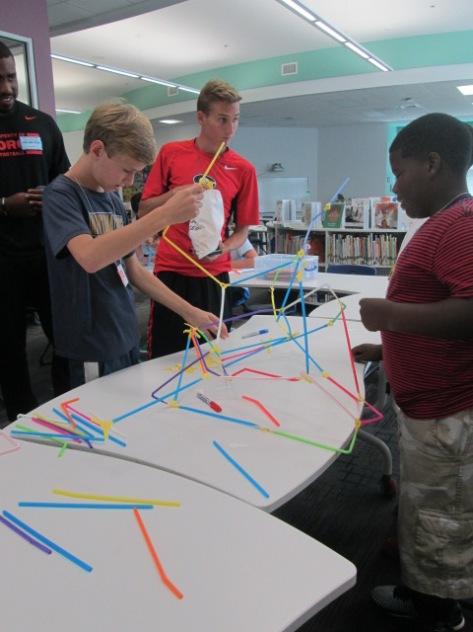
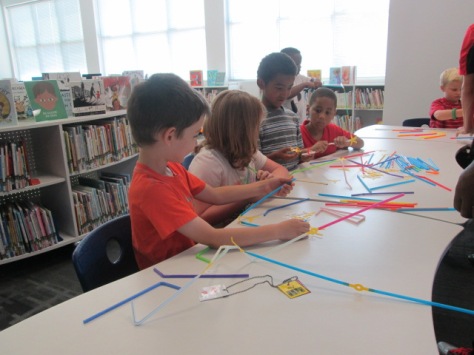
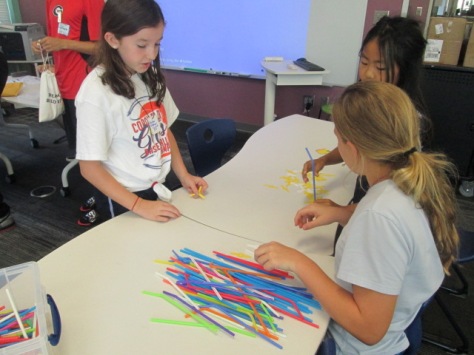
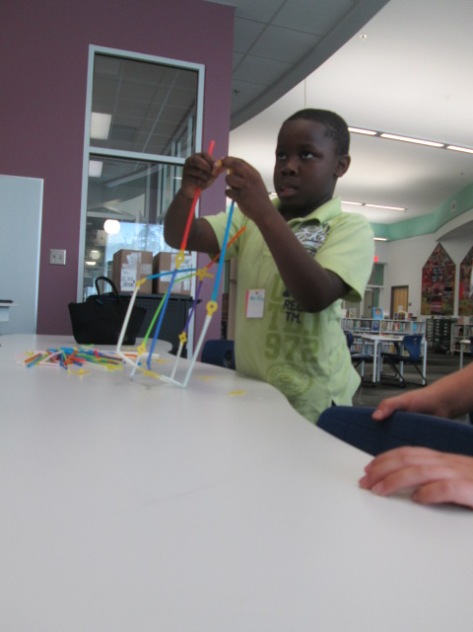
For our first session, the UGA students read or showed Iggy Peck Architect.  At the end of the book, they invited our students in 1st, 3rd, 4th, and 5th grades to become an architect and use Strawbees to build the tallest free standing tower.

img_8873

I loved watching the UGA students decide how much information to give the students versus when to let them discover things on their own.  In one group, they just gave them the Strawbees and straws and said “build”.

Then, in another group they gave some examples of how the straws and Strawbees could connect to one another.  The amount of guidance definitely impacted the type of structures made.

img_8881

I don’t know that we have a firm answer on how much structure to offer to the students, but I’m glad that we are always thinking about how much is too much.  I think we certainly stayed conservative on how much we told the students.  Every structure was different and students found things that worked really well and things that failed miserably.  In the end, the important thing is that we really didn’t have students who gave up or who even got extremely upset because they didn’t “win”.  That’s the true spirit of making.

img_8895

One new addition this year is something we’ve talked about for a long time.  So many students come to the makerspace, that it’s hard to track who has learned what tool or skill.  I really wanted a badging system but didn’t think I had time to make it.  Gretchen and I have talked through this many times and discussed the idea of badges for specific tools like Sphero, Duct Tape, LittleBits, etc and badges for skills such as problem-solver, thinking outside the box, teamwork, etc.

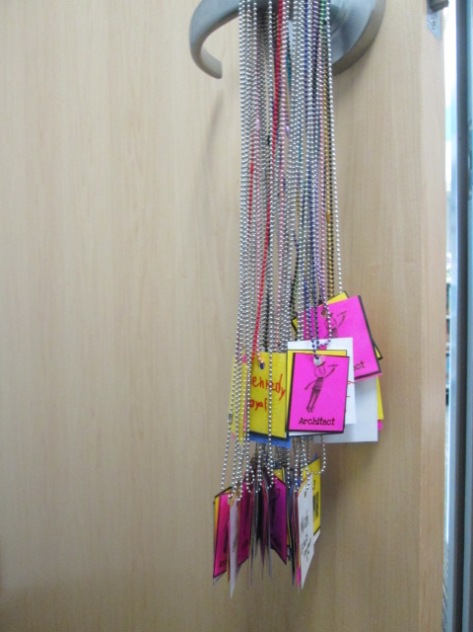
Gretchen took it upon herself to make this happen for us.  She started making badges that students would attach to chain necklaces.  Students would earn a badge for the tool they explored and the group they worked with as well as have an opportunity to earn rare badges for skills or qualities.  Gretchen and her students will continue to design badges and add them to the collection.  They will be stored in plastic drawers in the makerspace.  Students will hang their necklaces on a hook in the space and grab them when they come to makerspace.

img_8896

We’ll easily be able to look at badges and see which students have learned which tools and which students have demonstrated the skills of a maker.

I can’t wait to see where this goes, and I’m so thankful for Gretchen and her class making this happen!

What kind of reading makes you feel curious and fills you with wonder? #WRAD16

LitWorld 7 Strengths

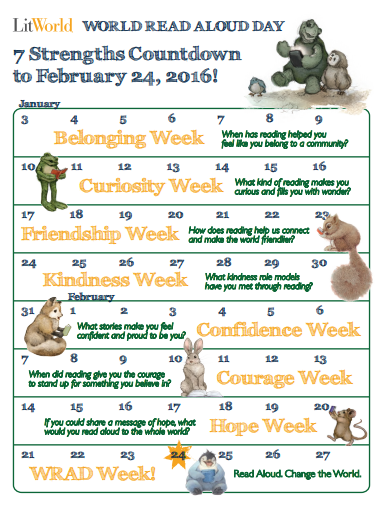
Each week leading up to World Read Aloud Day (February 24th) we want to join our voices around the world to celebrate one of the strengths of reading aloud.  During the week of January 10-17, we celebrate how reading makes us curious about our world.

We have created a Flipgrid for you to share your responses to the following question:

What kind of reading makes you feel curious and fills you with wonder?

We hope you will share this Flipgrid with other educators, students, and families around the world and record your responses which can last up to 90 seconds.  Wouldn’t this be a great way to practice some informational writing in classrooms?  Wouldn’t you love to hear stories from the families that you serve?  Aren’t you curious about the perspectives on this question from around the world?  Let’s join our voices and contribute responses all week long.

http://flipgrid.com/#47700909

One of the things we plan to do at Barrow Elementary is weave the theme of curiosity into the 4th grade PACT time (Parent And Child Together).  We will use a book such as Rosie Revere Engineer that embodies curiosity, have the families explore something together inspired by the book, and then have families reflect together on the Flipgrid question this week.

In addition, you might also consider coming up with your own posts in response to this week’s theme on your own blog or site.  You might write about 3 things you are currently curious about and invite your friends and followers to do the same in order to expand your list of wonderings.  You might share pictures of books that embody the theme of curiosity.  Whatever additional ways you choose to celebrate “Curiosity Week”, please tag your posts with #wrad16 and #curiosityweek as well as mention @litworldsays (Twitter) and @litworld (Instagram, Facebook).

It’s not too late to share your schedule for World Read Aloud Week on our shared Google Doc and find someone to connect with around the world.

Let’s share how we are all curious readers who are part of a global community.

Tinkering in Our Open Makerspace

artbot (2)

It’s been awhile since I’ve shared what has been going on in our open makerspace time, but there has definitely been a lot.  Through our collaboration with Gretchen Thomas at UGA, we have been able to offer an open time on Tuesdays and Thursdays for students to come and explore various parts of our makerspace.  Students sign up for a 30-minute segment to come and explore a pre-chosen topic.  Last year, we tried just letting students decide what they wanted to do, but we found that most of them were either unsure of what to try or all wanted to try something different and didn’t know how to start.  It was hard to manage and it was hard to accomplish anything in 30 minutes.  This year, we decided that for the first half of the year we would offer 2-3 opportunities at each makerspace session.  One of the experiences is technology-focused and the other is more craft-focused.  Sometimes these experiences compliment one another. For example, students might get to make a figure out of pipe cleaners, clay, or Playdoh as the craft and then use that figure to create a stop motion video with the iPad.

artbot (1)

At each session, 3-4 UGA students come to support students.  They often lead the work while I assist other students in the library or teach classes. However, I also participate in the makerspace and learn alongside the students.  This is a great time for me to see how students are using the tools in a smaller setting.  I can think about management pieces to make the process more accessible to students. I can also reflect on how various tools or activities fit into grade level curriculum.

In today’s makerspace, students created stop motion animation using clay figures. For some of them, it was the second time using stop motion animation, so they had a better understanding of how it worked. They were able to get to a point that they could actually upload a short video that they created in a 30-minute window.  Some of them even worked together to use pieces that they had each created in order to make a collaborative video.

It was a busy time and the UGA students worked so hard to get students creating figures and encouraging them to give the video a try.  I love hearing how the elementary students and college students talk to one another.  They both amaze one another with some of the things they come up with and share.

As usual, voices emerged with artistic talents or technology expertise. One of our students, Anarian, who we learned is an expert at making figures with pipe cleaners is also very talented at making figures out of clay.  There’s so much potential for his work to develop into a stop motion video for any of his content areas.

While the UGA students supported the stop motion, I pulled out our Finch robots, which are on loan to us this year from Birdbrain Technologies.  We opened the basic version of Snap, and student tinkered with programming these robots with simple block coding.  We are going to do a lot with these robots this year and open makerspace is a great time for me and the students to learn a few of the basics so that our content work can be more productive.

By the end of the first semester, we hope that many students have gotten a small taste of all of the tools in our makerspace, so that the second half of the year can be spent focusing on how these tools can work together to create something great.  We have no idea where the makerspace will take us, but we know that miraculous things will happen along the way.


Exploring Makerspace through Alternative Recess

makerspace recess (7)Since the beginning of the year, students have been itching to get into our library makerspace to use the many tools housed there.  As the librarian, I try to weave as many of these maker tools into curriculum as I can, but the truth is that it’s just not fast enough for our students.  Telling them, “I’m waiting to find the right piece of the curriculum to use the littlebits with”, is not acceptable.  They want to tinker and explore and see how things work.

makerspace recess (6)

Recognizing this, I had to find a way to give them more access.  I can’t say that I’ve found the perfect solution, but I’m working on it.  I’m blessed to have the University of Georgia right next to our school.  I’m even more blessed that the College of Education is within walking distance and Gretchen Thomas teaches in the instructional technology department.  Gretchen is an educator who truly gets the realities and challenges of school.  She wants her students to have experiences with what instructional technology really looks like in a school rather than guess about it in the college setting.  She and I have been brainstorming about challenges that I face in the library and the makerspace has come up a lot in our conversations.  We’re trying to create a plan to have adult support in the makerspace on a regular basis for students to explore during their recess time.  This alternative to going outside isn’t the only solution, but it’s one that many of our students are willing to do in order to get their hands on the makerspace tools.

Even though we don’t have details worked out for Gretchen’s students to be in the makerspace, she has volunteered her own time once per week to come in and help.  For the past 3 weeks, we have offered makerspace recess to our 4th graders.  A whole range of students have shown up.  I was very excited to see such a mix of boys and girls as well as several other kinds of diversity within the group as well.

makerspace recess (5) makerspace recess (8)

During the 1st recess, Gretchen and I quickly showed the tools in the space: Sphero, littlebits, and MaKey MaKey.  Students chose a starting place and jumped in.  It didn’t take long until the Sphero was being driven around the library, being programmed to drive and jump over a ramp of books, and a maze of books, shoes, and legs was being created on the floor.

makerspace recess (4)

Students used the littlebits cards to snap together several suggested circuits, but it didn’t take long for students to start snapping random bits together to see what would happen.

makerspace recess (9)

Students at the MaKey MaKey got out balls of Playdoh and started plugging in alligator clips.  Gretchen showed them how they could type using the balls of Playdoh, and they also explored how to play the piano on the MaKey MaKey site.

This alternative recess is certainly supporting my library goal of allowing students to dream, tinker, create, and share.  This free time to dream and tinker will only strengthen the curriculum work we do within the makerspace in grade level projects.

At some point, I’m sure we’ll create some structure to our alternative recess, but for now it just seems right to explore.

Creating Star Charts with LittleBits

Star Charts (13)

Last week, Mr. Coleman, 4th grade teacher, asked me if I had any extension lessons to support 4th grade’s study of stars and constellations.  Specifically, their standard is:

S4E1. Students will compare and contrast the physical attributes of stars, star patterns, and
planets.

I suddenly remembered that a part of he littleBits workshop kit that I purchased this summer was a free space module.  As I flipped through the book, I saw that you could use littleBits to make a start chart.  This was the perfect opportunity for students to explore littleBits in a standards-based lesson with enough structure to give them a goal but still have an opportunity to do a bit of tinkering.

Star Charts (1)

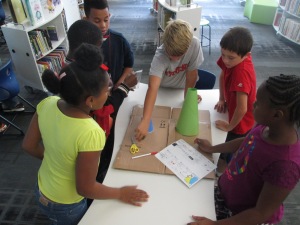
Because some of the steps involved using a box cutter to cut holes in a cup and a cardboard circle, I did a few steps ahead of time for them.  On a large piece of cardboard, I gathered materials for each group:

  • a ziploc bag of the littleBits needed, including the battery
  • a littleBits screwdriver
  • scissors
  • tape
  • a toothpick
  • a pen
  • a cone made out of construction paper (many thanks to Gretchen Thomas for helping me figure out how to make a cone!)
  • a plastic cup with the bottom cut out
  • a cardboard circle the size of the mouth of the cup
  • a strip of cardboard
  • a set of instructions
  • a copy of a star chart

We started the lesson together on the carpet.  We watched a short intro video:

I told them that our goal was to make a device that lit up when it was in a dark room and projected stars onto the ceiling.

Star Charts (6)

We talked about failure.  I emphasized that this class was the first class in the school to use littleBits.  We talked about failing, taking a deep breath, backing up, and trying again when something didn’t work.  I also talked about teamwork and time management.  This was to emphasize that the more they worked together and didn’t give up the more likely they were to be successful in making their chart.

I also made suggestions about how teams might think about dividing up the work load.  For example,

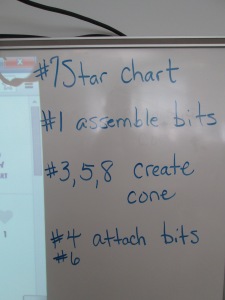
  • 1 person might try step #7 and prepare the star chart
  • 1 or 2 people might try step #1 to assemble the bits
  • 1 or 2 people might try steps #3, 5, and 8 to create the cone
  • 1 or 2 people might try step #4 & 6 to attach the bits and test the device

This was only a suggestions.  Teams were welcome to do every step together or divide the work up in other ways.

Notice that I didn’t say anything about explaining littleBits, what each bit was called, what their function was, or how to put them together.  I knew that the kids were perfectly capable of figuring this out on their own, and they proved me right.

Mr. Coleman helped divide the students into groups and they got right to work.  I was amazed by how the groups took time in the beginning to assign roles before working.  It was a rare moment to look at a table and not see someone working on some aspect of the star chart.

Star Charts (8)

Mr. Coleman and I walked around and encouraged groups to read directions, try new things, work together, and gave a few helpful nudges as needed.  However, we did not create the star charts for any group because we wanted students to experience tinkering, failure, and the power of reading and following directions.

Star Charts (7)

There was a definite energy in the room and it was by no means quiet.  Each time something started working, the energy level increased.  Groups started taking their devices into our makerspace and equipment room so that they could turn off the light and test their invention.  As pieces worked, they screamed with excitement, but as they failed they hurried out, disassemble their work, and started over.

Star Charts (17)

Once again, I was amazed by how no students stopped working and no students reached a point of frustration where they shut down.

We even had a group who were still working when we were debriefing the whole experience because they wanted to make their star chart work.  They didn’t give up for a second.

Star Charts (11) Star Charts (12)

When the charts worked, students spent a bit of time looking at their constellations on the wall and ceiling.

During our debrief, we talked about what we learned about littleBits as well as what next steps students might take to learn about constellations.  I encouraged them to learn some of the stories of the constellations and to actually look for them in the night sky.

For the littleBits, students figured out that you could adjust the sensitivity of the light sensor to come on when it was light or dark.  This was a point of failure for some groups.  Others talked about reading the words on the bit including the power bit that says “on” or “off”.  Missing that one simple word “on” could be the difference between failure and success, and many groups forgot to turn their power on before testing their device.

Before students left, I told them that this was only a small taste of what littleBits can do, and I encouraged them to think about other inventions they might create during the year and to come and explore the other bits and their possibilities.

Coders, Innovators, Makers…Please donate to our Donors Choose Project to build our library makerspace

FireShot Screen Capture #019 - 'Coders, Innovators, Makers_ Creating a Library Makerspace' - www_donorschoose_org_project_coders-innovators-makers-creating-a-l_1253089__rf=link-siteshare-2014-07-teacher_accoun

Update:  This project was fully funded in less than 24 hours.  Thank you to all who contributed and shared!

View our project here!

(Don’t forget to use the code “INSPIRE” at checkout!)

Here are the details of where this project is coming from:

Our library has always been a space where we value creating and sharing just as much as consuming information.  Last year because of a Donors Choose project, our library received a 3D printer and it allowed our students to create things that they had never even thought of.  The makerspace culture is alive and well in our library, but we have  a long way to go to exploring makerspaces and how the culture of a makerspace supports students, teachers, and families.

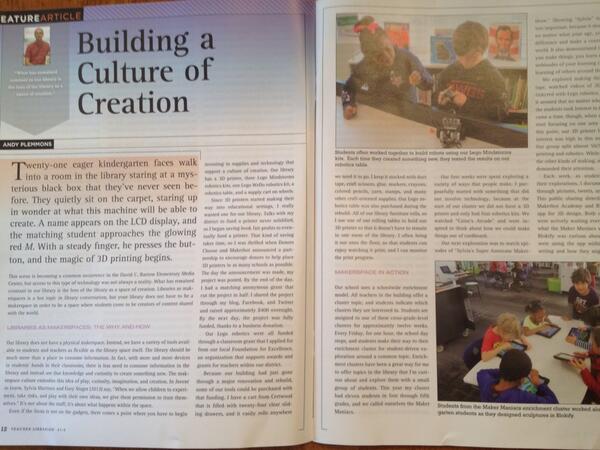
Over the summer, I had an article published in Teacher Librarian about the culture of creation that we are developing in our library and school.  In that article, I talk about the culture, but at some point you have to get some “stuff” to create with.

“Building a Culture of Creation” in the June 2014 issue of Teacher Librarian

This year, one of our library goals is to give students, teachers, and families opportunities to dream, tinker, create, and share.  A part of this is developing the tools that are available for creating in our library.  Our space which we thought was going to be a studio is now going to be a makerspace within our library.  A portion of our library funding this year will be dedicated to developing our makerspace.  After attending an Invent to Learn workshop and focusing on makerspaces at ISTE this summer, I have chosen some next steps for our makerspace.

Our library budget this year will fund:

A littleBits workshop set:


A litteBits Space kit:


4 MaKey MaKey kits:


A Hummingbird robotics kit:


This Donors Choose project will extend our budget and give students even more access to maker materials by adding.

littleBits Cloud:

4 additional MaKey MaKey kits:

Sphero:


I hope that you will consider supporting our project.  It will impact numerous students, teachers, and families within our school through projects, alternative recess activities, enrichment clusters, and afterschool workshops. Even if you can’t contribute financially, please consider sharing this project within your own networks. I will be sure to blog about our explorations throughout the year.  Thank you in advance!

Banding Together with Rainbow Loom, Makerbot, and Libraries

Back at the beginning of the new year, my friend Shannon Miller in Van Meter, IA told me she was planning to do a research project that involved Rainbow Loom bracelets.  When she started implementing the project in her library, it organically grew into something much larger.  Through connections with In This Together Media , the project developed into “Banding Together”.  You can read the full details of the project here:  https://www.smore.com/n65m

Here are the basics:

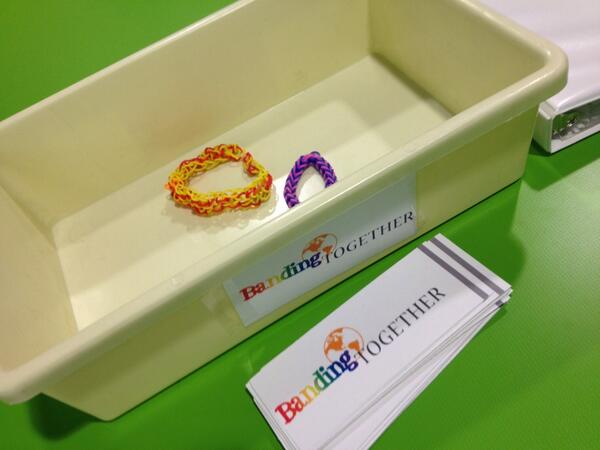
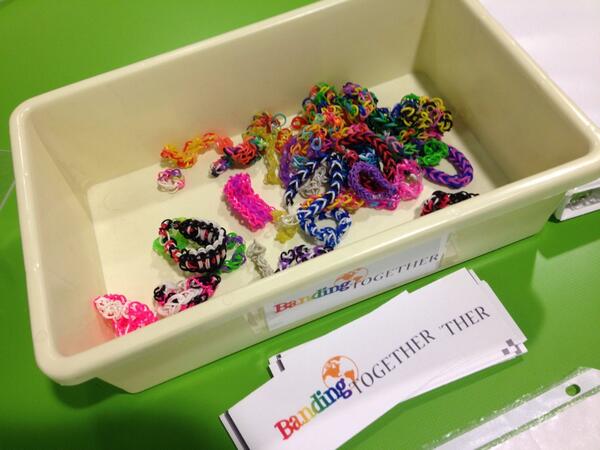
  • Students at Van Meter, Barrow, and multiple schools around the country are making Rainbow Loom bracelets.
  • The bracelets will be sent to a school in Mangalore, India
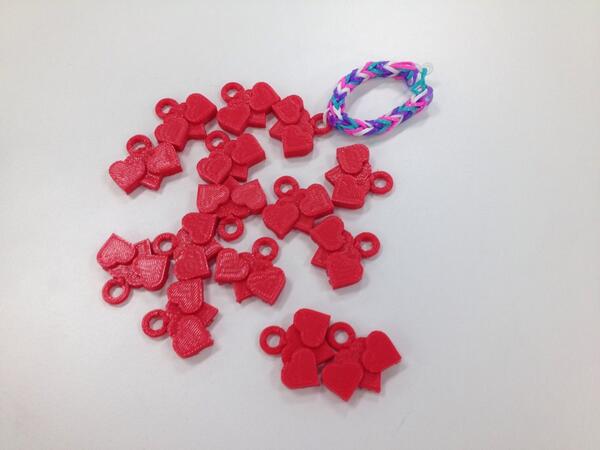
  • Along with the bracelets, we will send poetry written by students, 3D printed charms designed by students, and a disposable camera to take pictures to send back

I announced the project this week on our morning BTV.  I placed a collection box for Rainbow Loom bracelets on our circulation island, and by the end of the day, a few bracelets had already been donated.  Students asked me about the project all day.  By the next day, several kids were bringing bracelets in.  I was so surprised by the generosity and enthusiasm from the students to send their bracelets across the miles.

First Day

Second Day


Next, we started designing charms for 3D printing.  I had already experimented some on my own, and I sent Shannon Miller a file that I made so that her students could print it and learn from the file too.  Her students took my file and modified it or examined it in order to design their own.

Shannon’s students in Iowa being inspired by the file I sent them

I have a group of 5th graders who have been exploring different technology and how they might support other classes trying to use that technology.  They have already been exploring Tinkercad to design objects for 3D printing, so I knew they would catch on fast to the idea of making charms.

charm design (2) charm design (3) charm design (4)

Since the Banding Together project has a lot to do with spreading the joy in our hearts, we have focused our charm design on that theme.  We decided that each charm should have some kind of heart.  Dmitri designed a heart with a heart hole in the center.  Walker designed a charm with the word “love”.  Instead of an “o” he used a heart.  I designed a triple heart to symbolize India and the US uniting together with our shared joy.  We took these first 3 designs and made sure that they printed correctly.  Once we saw how they worked, we started mass production.

charm design (5) charm design (7)

As charms were ready, parent volunteers helped put them on bracelets.  Dmitri and Walker also became quality control and made sure that all of the Rainbow Loom bracelets we were sending had joy-filled quality.  They continued attaching charms.

quality

We are waiting on a few more designs to be completed and we will ship our first batch of bracelets and charms.

Next week, we are adding a new layer onto the project with poetry, so look for an update soon about this exciting development that our 2nd graders will be involved in.

I love how this is a project that students in all grades can be a part of whether they made bracelets, wrote poetry, designed charms, or helped with packaging and quality.  We truly are banding together in more ways than one.

charm design (1)


Makerspace Maniacs Enrichment Cluster

first robots (10)For about 4 weeks, a group of 2nd-5th graders have been meeting with me on Fridays from 8:15-9:15AM.  This time is called enrichment clusters at our school which basically means that kids select a group based on their interest and spend a period of time learning and creating around that topic.  Our cluster is called Makerspace Maniacs.  Our first sessions have been about exploring the world of making.

first robots (3)

So far we have:

  • Watched Caine’s Arcade and explored the idea of making interactive creations with cardboard.

  • Watched Sylvia Super Awesome Maker Show and explored how we can take our creations and create instructional videos about them.

  • Watched Landfill Harmonic and explored how makers take other people’s trash or unwanted items and turn them into functional creations.

  • Watched how a 3D printer works and imagined what we would create on it.

  • Tinkered with Lego robotics and programming.
  • Explored making things out of duct tape.

Now, students are beginning to think about what they are interested in spending more time with.  Right now, we have a lot of interest in robotics.  Today, one student spent time exploring the directions to build a mindstorm NXT robot and began the building process.  Another group of students looked at the Lego WeDo kit and followed instructions to build an alligator.  Other students spent time, exploring how the various lego pieces fit together.  Since their interests are so drawn to robotics, Christa Deissler from UGA will be helping me coordinate a guest speaker to talk to students and demonstrate programming of robots.

first robots (9)Seeing something tangible really inspires the students.  Today a student figured out how to use the WeDo software to make the alligator open and close its mouth.  When students saw this happen, they immediately wanted their creations to do something too.  Once we get past the exploration stage, I think students are going to want to get into the workings of the programming software and figure things out.

In other news, our Donors Choose project to get a 3D printer is fully funded!  This will give these students access to even more tools for making.  Two other classes already have ideas for how the printer might be used in their own projects.  Once it’s here, I’m sure that there will be lots of exploring, learning, and sharing between classes to figure out how this tool can support the learning in classrooms.

first robots (7) first robots (5) first robots (2) first robots (1)