First Grade 3D Jewelry Design with Makers Empire

Each year, the art teacher and I collaborate on a 3D design and 3D printing project to accompany her art standards in 1st grade. Blokify has been a trusty 3D design tool that has served this project well due to its simplicity on the iPad. However, this year we hit a road block. Blokify is no longer available in the app store, and this was the year that our iPads finally quit supporting its functionality.

I began exploring alternatives.  There are so many 3D design apps and web tools out there, but the tricky part is finding one that is developmentally supportive to 1st graders.  The app I decided on was Makers Empire. This app has a lot of options for 3D design and also has some gaming built in, but it has a block based design tool called Blocker that works very similar to Blokify. This app is free to use but it’s not free to access the teacher dashboard and be able to download the STL files for 3D printing. It’s also not cheap, so we decided to test it out with a free 14-day trial and see how it served our project.

After tinkering with the app on my own, I decided on some steps it would take to get our 1st graders designing. Makers Empire is not an app you can just open up and start. There’s some setup involved, which I felt like was a bit of a barrier to our 1st graders. Ms. Foretich and I made a slideshow of steps to get students started, and we all sat in front of the screen to do these setup steps together.

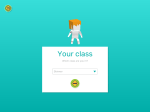
First, students tapped on “new” to create new accounts. First, they create a hero. This is their avatar, but we didn’t want to spend much time on this so we just told them to tap each button and make a quick selection.

Next, students let Makers Empire assign them a random name and skipped the password step.

Prior to their arrival, I went into the dashboard and setup a class for each 1st grade homeroom. Students were able to select their class, grade, and type their real name so that I could easily identify their account in the teach dashboard.

This finally brought students to the screen where they were ready to create in Blocker.

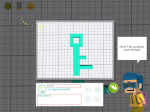
At this point, we had students turn over their iPads so that they could see the steps needed to create a jewelry pendant for 3D printing. Since Makers Empire has so many things to click on, I really wish we had time for them to tinker first. However, we decided to focus them on a few buttons and promise them that when they finished their design that they could tinker with any of the other parts of the app.

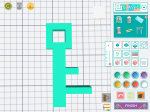
In Blocker, we only needed students to use the add, delete, and view buttons to create their design, so we showed them these 3 buttons. We also talked to them about the requirements for a pendant. It needed to be one level tall. All pieces had to be connected by at least one side. There had to be a hole for string to go through. Students could design a specific shape or something abstract.

We sent them to tables with iPads and then rotated around to support students with any design questions or confusions they had. Once students were actually in Blocker, most of them had little to no trouble figuring out how to design. When students felt their design was done, they raised a hand for us to come and double check it. Then, they named the file with their name and moved on to tinkering with any part of the app.

Once students left, there were several steps for me to do. I loved that I could log in to the dashboard in Makers Empire and pull up each class, see their files, and download the STL file. This was such an easy step that was so much better than my experience with Blokify. I imported each filed into the Makerware software for our Makerbot and put about 8 files on each plate. On paper, I labeled each plate with student names so I knew which file belonged to which student.

Then, the printing began. Each plate took about an hour to print and there were about 3 plates per class. In all, it took about 12 hours to print the whole first grade’s files across a few days. As each plate printed, I put pendants in individual ziploc bags with the teacher and student name written on the outside.

When classes were finished printing, Ms. Foretich took the pendants to the art room for the final steps. Students colored their pendants with sharpie markers, placed string through the pendant, and added decorative beads to finalize their jewelry piece.

I loved seeing students wearing their necklaces around the school. They were so proud to show them off to me in the hallways.

Now, Ms. Foretich and I need to think through this tool, how often we might actually use it through the next school year, and whether it’s worth the lofty price tag. If you know of other 3D design tools that might be a good fit for this project and first graders, comment below.


2018 Barrow Maker Fest

In addition to having regular makerspace sessions every Tuesday and Thursday in the spring, students also have the opportunity to work on an individual project to showcase at our annual maker fest.  To participate, students fill out a Google form sharing their possible project topics and whether they will complete the project at home or in our makerspace during school hours.  They also have the option of working alone or having a UGA mentor to help them.

I collaborate with Gretchen Thomas at UGA College of Education. I love seeing the relationships that my students develop with the UGA students, and they thrive knowing that they have a mentor to visit with and work with while they make their creations.  In the spring, she divides part of her UGA students to support our Tuesday/Thursday makerspace sessions while the other part supports students working on individual projects. My maker students don’t always meet with the same UGA student, but they have someone every Tuesday/Thursday who can support their work.

When students begin preparing for Maker Fest, we meet with them individually to see what type of project they are thinking about.

This year, I offered several categories for them to think about:

  • robots
  • cardboard
  • makey makey
  • littlebits invention
  • duct tape creation
  • 3d design
  • Scratch program
  • finger knitting
  • origami
  • strawbees structure
  • stop motion video
  • magic tricks
  • puppet/puppet show
  • magic tricks
  • something else! (This category meant students might explore our many craft books for ideas on projects to create)

Once students decided, we gathered the materials they needed and stored each project on the shelves in our makerspace storage room. This part is hard to manage and it feels a bit chaotic until we have the materials that each student needs.  Each Tuesday/Thursday they come for a 30-minute work session, gather their materials from the shelves, and work with me or a UGA student.  Some students complete their projects at home.

During the actual Barrow Maker Fest, we created a schedule so that every student who made something had two 30-minute windows to showcase their work.  There was also a schedule for classes to sign up and come to view the projects.  The entire UGA class came as well so that they could view the final projects as well as help students at tables.

In the end, 26 students showcased creations on a variety of topics which included:

  • a cardboard Earth robot
  • mason jar lights
  • a robotic arm
  • a cardboard pirate game with secret codes and a spyglass
  • a Python computer program similar to Google Translate which translated English to Pig Latin
  • a shadow puppet theater
  • a Littlebits throwing arm and car
  • Lego scenes and building station
  • 3D slinkies, Rubik’s cube, and Minecraft swords made with 3D pens
  • 3D action figure designed in Tinkercad
  • a cardboard robot suit
  • a cardboard tower
  • a car made from a mail tube
  • a stackable jewelry holder
  • magic tricks
  • Merge cubes
  • Osmo

They were so excited to share their work, have an authentic audience to entertain and ask questions, and see that their work inspired other makers.  Several students who came said they wanted to make something next year.

You can see many of these projects along with projects from other K-12 schools in the Clarke County School District at our CCSD Maker Fest.  It will be Saturday April 14 2-4PM at Clarke Central High School.  It is free and open to the public.  We hope to see you there.


Using Makerspace to Extend Curriculum: A Geology Project

tinkercad rock walls (12)

Third grade studies rocks and minerals as a part of their science standards. In Ms. Hicks class, they have been extending their research of rocks and minerals to create their own Blendspace lessons to teach others facts about rocks and minerals. They are even including pre-tests and post-tests in their lessons. As a part of this Blendspace project, students started thinking about how they might design their own climbing wall for our school based on their research.

tinkercad rock walls (11)

Ms. Hicks asked me what tool we might use to design and prototype of a climbing wall, and I immediately thought of Tinkercad. We have used Tinkercad for other projects and have found it to be one of the better tools for 3d design at the elementary level. Students came to the library to learn a bit about how Tinkercad works.

tinkercad rock walls (10)

I gave them a very quick tutorial which basically showed them things like adding a work plane, dragging over geometric shapes, resizing shapes, and building up.

tinkercad rock walls (8)

I created two generic accounts that students share rather than creating an account for every student. Half of them logged in with one account and half with the other. Their goal was to tinker during the first lesson to see what they could figure out, but their tinkering was a bit more focused than usual. Ms. Hicks really wanted them to already start envisioning their climbing wall as they were tinkering. Some of them latched onto the tool and really got a jumpstart on designing, while others tried something and started over several times.

tinkercad rock walls (7)

One student thought we was being a bit silly by trying to design a chicken instead of a climbing wall, but we turned this into a learning opportunity. I thought about the climbing wall that is at our own Omni Club here in Athens. It is shaped like a giant bulldog, so I pulled it up on the screen to show that he could in fact design his rock all to look like a chicken if he really thought about how people would climb a giant chicken. Instead of shutting him down, his wheels were turning about what he might try, and he is in fact now designing a penguin rock wall.

Other students started thinking about which rocks and minerals would be the best choices for the climbing wall based on their strength and also their color. They referenced their research and the Mohs hardness scale to choose rocks and minerals that would hold up a climber. As they did this, they changed the colors and shapes of the climbing pieces on their walls to represent their different choices. Not all students were ready for this level of thinking, but when we found students who were thinking in this way, we encouraged them to share what they were doing in the hopes of giving other students ideas.


One student even let me record a snippet of his thinking about his own rock wall choices.

The students have worked on these designs for 3 work sessions. As they finish, they are taking screen shots of their designs and adding them to Blendspace with an explanation of their design. In the future, we plan to export their designs as .stl files so that we can actually 3d print their prototypes when they are ready to present.

tinkercad rock walls (1)

I loved this real world application of rocks and minerals because it showed students that there are actually careers where you might consider some of the facts that they are learning in science. There was so much higher order thinking built into this project, especially this design piece. I had some great conversation with students as they referenced their research to find the specific rocks and minerals they wanted to use. One conversation involved a student specifically wanting a rock that was yellow. He kept Googling different rocks he knew to see if they came in yellow. When he finally found one of the feldspar family that was yellow, he noticed that the website description referenced Bob’s Rock Shop. We had a great conversation about the importance of digging into the website to really see where the information was coming from, and he found that the information actually did come from a reliable source within that site.

tinkercad rock walls (6)

I hope that we can find ways to share the work that this class is doing in the hopes of inspiring students at all levels to apply what they are doing to really world experiences. It would be fascinating to actually see this climbing wall come to life and have o