Students as Teachers: Exploring Text Structure with Flipgrid

text-structure-17

At the beginning of the year, I started talking with Melissa Freeman, 5th grade teacher, about exploring text structure in the library.  The very 1st unit in 5th grade language arts starts with text structure which explores the following standard.

ELAGSE5RI5  Compare and contrast the overall structure (e.g., chronology, comparison, cause/effect, problem/solution) of events,ideas, concepts, or information in two or more texts.

Melissa was wondering how to make the topic more engaging and wondered about the possibility of a library scavenger hunt.  We really weren’t sure where to go with the idea so we kept bouncing around possibilities over email and in person. She even came to the library and worked with me to pull books out of the nonfiction section and start sorting them into stacks.

text-structure-16 text-structure-15

I continued this process so that we knew we had examples of compare/contrast, description, sequence/order, cause/effect, and problem/solution.  Then, I mixed them all up.  We knew that even though we personally picked a book for a specific structure that students might find other examples of text structure within the book.  We were also excited that students would have some one-on-one time looking through some nonfiction books that they might not know that the library has.

text-structure-14 text-structure-13

In one of our brainstorms, I thought about the possibility of students recording their findings in a digital way that could be shared with one another and also other grade levels. I originally thought it would be a good way for them to agree or disagree with examples that were discovered, but we expanded the idea to be a way that students could teach other students in our school and other schools about ways text can be organized.

We decided to use Flipgrid for this task.  I created 5 separate questions: one for each type of text structure.  Then, I linked them all on a Symbaloo that Ms. Freeman could share with her students via Google Classroom.

In class, Ms. Freeman introduced each kind of text structure and students started exploring books on Tumblebooks for each structure.

text-structure-12 text-structure-10

Each class came to the library for a 50-minute session.  We did a quick mini-lesson to review the structures, show how to use Flipgrid, and share what we hoped students would include in their video. This included things like the book title, author, text structure, and a concrete example from the text to justify the structure chosen.  We also setup the idea that these videos could be a teaching tool for the rest of 5th grade, the school, and other schools.

text-structure-8 text-structure-7

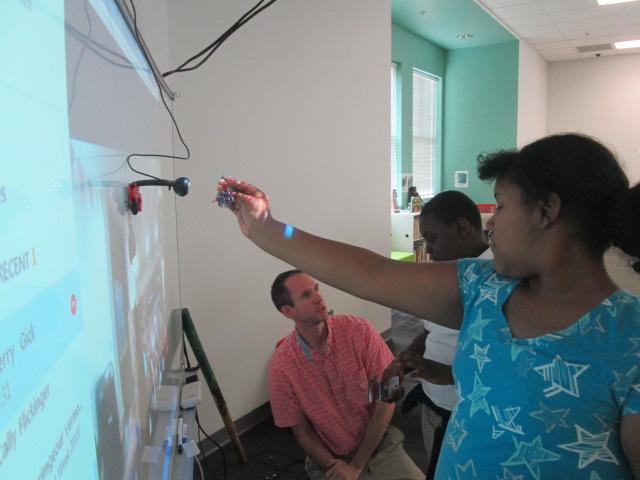
I spread the books out at tables and students worked in partners to browse the tables for a book to start with. As they discovered one of the 5 text structures, they prepared to make a video.  Students used their own computers to record a Flipgrid, and then continued exploring for their next book example.

Ms. Freeman, Ms. Mullins (gifted teacher), and I all walked around and chatted with students as they searched through books.  One of our immediate noticings was that students were guessing the structure simply based on the title, topic, or cover of the book.

They weren’t even opening the book to read the text.  While this was a great predictor of what kind of structure might be inside, students were missing the point about looking at the organization. We clarified this in conferences and adjusted our mini-lesson with each class to put a stronger emphasis on explaining.

To close each class, we showed a few of the videos and had student offer noticings about what they heard. I love that in the new Flipgrid, you can actually respond to each video response.  I showed students how the comments they were making could actually be added right onto our Flipgrid.  I also encouraged each person who made a video to think about how they might add to their original video by posting a new video as a response.

The plan is for students to continue using these Flipgrids in class to post additional examples and respond to one another. We hope that eventually there will be some strong examples that can be shared with other classes in our school as well as with schools we collaborate with.

In the meantime, it’s a work in progress.

text-structure-4 text-structure-3


Exploring Chefs and Food Trucks with Cantata Learning’s Harmony Project

chef-jason-4

We love getting involved in global projects that connect us with different careers, cultures, and people. Last year, we shared what winter is like in our community of Athens, Georgia by contributing to an interactive ebook.

This fall, Cantata Learning’s Harmony Project is called “Give a Shout Out to Your Community“.  It will feature live connections with several community helpers such as chefs, authors, doctors, and farmers.  As students learn from these live connections, they are encouraged to explore their own communities and create videos that showcase their communities.

Students can also get involved in a service learning project in their community.  All of these products can be shared with Cantata Learning on their Harmony Project page so that they can be shared with the world and we can all learn about one another’s communities.

Today, Ms. Kelly’s Kindergarten class connected with Jason De Baca who is a chef and owner of a food truck in Denver, CO.  Through a Google Hangout facilitated by Shannon McClintock Miller, we were able to go inside the food truck, see a recipe prepared, and learn how a food truck works.

Ms. Kelly’s class also got to ask questions which was a very special part of our connection.  Students asked about how to become a chef, where to get recipes, where ingredients come from, what tools are used in cooking, who drives the food truck, and how much it costs to get started with a food truck business.

Jason was happy to answer all of their questions.

After we disconnected, we were able to look at a map to learn where Denver, CO is and how long it would take to get there.

Another exciting thing that happened was that a student in Ms. Kelly’s class shared that his dad owns a food truck. We hope this might lead to an opportunity for us to actually go inside a food truck or sample some food truck food.  It was also a special connection to see how food trucks are a part of our community in Athens, Georgia and Denver, Colorado too.

chef-jason-1

This connection also allowed me to highlight our cooking and food section of the library.  This section includes cookbooks as well as books on where food comes from and how kids can get involved in growing their food.

chef-jason-8 chef-jason-7

Ms. Kelly’s class is always dreaming up something exciting, so I look forward to what they will dream up after exploring food trucks with Jason and Cantata Learning.

Take a look at our whole connection.

Athens, GA & Seodaemun, South Korea: A Global Art Collaboration

korea-flipgrid-6

In June 2015, the mayors of Athens, GA and Seodaemun, South Korea signed a Memorandum of Understanding.  This MOU calls for both cities to exchange leadership programs in private and public sectors that promote economic development.  That basically means that our cities have a friendship to exchange ideas.


As a part of this collaboration, the 2nd graders at our school are engaging in a collaborative art project with students in Seodaemun.  This has been an exciting and challenging undertaking for our students and teachers, but it has been full of rewarding experiences.  The classroom teachers, art teacher, and media center all supported the students at Barrow in carrying out the project.

korea-research-4 korea-research-1 korea-research-3

In class, students read the book Same, Same but Different by Jenny Sue Kostecki Shaw.  This set the stage for students thinking about how our city of Athens is the same as Seodaemun and how it’s different.  My wife, Denise Plemmons, in the Athens-Clarke County Economic Development Department, shared several websites with us to learn more about Seodaemun. I added some additional sites for students to visit that included resources from our state-funded Galileo databases. These were all housed on a Symbaloo page for students.

Teachers paired students within their rooms to research and create art together.  Students used a Venn diagram to write brief notes on what was the same and different between our cities. For example, students learned that we have an arch at UGA and Seodaemun has an arch at Independence Park. They saw that we go to school for 7-8 hours per day and Seodaemun may go up to 16 hours per day.  Research was done in the library, and prior to letting students search on their own via the Symbaloo, I provided some tangible examples like these to put into the diagram.

korea-flipgrid-9

The research was a challenge.  One reason was just the lack of resources on a 2nd grade level. The other big challenge was that students are 7 and 8 years old. There are currently studying regions of Georgia, so adding in a country on the other side of the world was hard to grasp within that context. We found that some students thought they had been to South Korea when in fact they were thinking of South Carolina. It may seem humorous, but it was valid conversation that we worked to clarify in the library, art room, and classroom.

After an hour-long session of research, students took their work to Ms. Foretich in the art room.  They used their Venn diagram to decide what art they would create that would show something that was the same or different between our cities.  One of the partners painted the Athens side of the art, and the other partner painted the Seodaemun side.


In classrooms, teachers continued to share maps and facts about our two cities. Mrs. Yawn, the 2nd grade team leader, worked to plan a morning of rotations for all of the 2nd graders. Some of our students are from South Korea, so she invited the parents of those students along with support from UGA to offer rotation topics on culture, games, and food.

Another part of the rotations was for each class to come to the library and record a Flipgrid video explaining what each pair of students learned about Athens and Seodaemun and what they created in their art.

Our goal is to send these Flipgrid links to Seodaemun so that the Korean students can respond back when they create their own art.

To celebrate the end of our portion of the project, the mayor of Seodaemun visited our whole 2nd grade along with members of the Athens Clarke County government.

Dr. Ellen Sabatini, principal, welcomed everyone.

athens-seodaemun-8

Ms. Yawn, 2nd grade team leader, explained the project to our visitors and families.

athens-seodaemun-9

Students shared pieces of the project that they worked on.

Commissioner Harry Sims spoke about how the students’ art work would now be a world traveler as it goes across the ocean to South Korea.

athens-seodaemun-14 athens-seodaemun-15

Finally, Seok-Jin Mun, the mayor of Seodaemun, spoke to students about how we are all connected to one another because we are all mankind. Even though we have different beliefs or different skin color, we are all connected.

athens-seodaemun-19 athens-seodaemun-18

To conclude the visit, Mayor Mun, teachers, and all guests explored the student artwork on display in the 2nd grade collaborative space.

athens-seodaemun-26

Mayor Mun pointed out his observations of what stood out to our students and clarified some facts from our research.

It was inspiring to think with him and the members of our Clarke County government about how we can continue to build upon this friendship between our two communities.

Now, our artwork is preparing to make its journey, and we look forward to seeing what our new friends in South Korea learn and draw about Athens, Georgia.  We thank the Athens Clarke County Economic Development Department for this opportunity to connect our students with our global community.


Make Your Mark for Dot Day 2016…Let the Planning Begin

One of our favorite times of the year is Dot Day and September 15 will be here before we know it!  It’s a day to celebrate connecting, collaborating, and creating and seeing where our creativity takes us. Can you believe that it’s less than 2 months away?

Now is the time to start brainstorming ideas for celebrating creativity and supporting your students in making their mark in the world. You can read all about this special day and sign up here.  There is a wonderful educator’s handbook that you will receive as part of the registration.

Then head over to the Get Involved…Making a Mark page to be inspired to Read, Create, Learn and Visit on Dot Day too.

There are tons of ideas on Shannon McClintock Miller’s International Dot Day Pinterest Board

In our own library, we’ve enjoyed reading lots of stories related to dots and creativity as well as connecting Dot Day to core subject areas.

Check out these examples:

  • After reading the book, Going Places, with Sherry Gick’s students in Indiana, two of our students made their mark by teaching Sherry’s students how to create a beading craft from our makerspace

Dot Day 2015 (4)

  • We’ve enjoyed countless storytimes with classes around the globe reading dot-related stories and stories of creativity including Ish, The Dot, Press Here, Mix It Up, Let’s Play, Rose’s Garden, Little Elliot Big City, and more.

For the last several years, hundreds of us have used our Google Doc as a place to make and plan lots of special connections on September 15 and throughout the week of Dot Day. When we put our minds together, we come up with amazing new ways to celebrate the day with our students.

You can add your schedule, connect with others, and start making your mark with others around the world. Check out the doc here: http://bit.ly/dotday2016 

Please include your information including name, location, grade level and subject, Twitter handle and whatever else you’d like to share.  As you start planning, add your schedule and ideas.  Others can then look at your profile and connect if they’d like to on the Google Document with you. If you have any questions, feel free to reach out and ask.

Let’s Make Our Mark on the World! Happy Connecting!

Many thanks to Shannon McClintock Miller for co-writing this post.


3D Jewelry Artists in 1st Grade Using Blokify

art jewelry

In my latest collaboration with our superstar art teacher, Rita Foretich, we are crafting with 1st graders.  One of her art standards has to do with students creating a craft, which is defined as an art creation that serves a purpose.  Rita is always pushing herself as a teacher to try new things and stretch the boundaries of what kids have experiences with. Along with this standard she wanted students to work with technology and to design in 3D.  What resulted was an art project where 1st graders are designing pendants in a 3D design tool called Blokify, 3D printing those pendants, and then using them in art to create a functional necklace.

When Rita first told me about her ideas for this project, my first reaction was whether or not Blokify was the right tool.  I had made pendants and charms in other tools like Tinkercad, but I knew that Tinkercad would be very tricky to do with a 1st grade class in the time frame we had.  Blokify is very user-friendly for very early learners, but I had trouble envisioning a pendant.  I even tweeted out to ask other people what they thought.

What helped me in the end?  Tinkering.  During our book fair, I pulled out an iPad and just tinkered at making a charm.  I can’t say that I came up with anything brilliant, but I did come up with some examples to help students see. The most helpful thing was for them to be able to visualize what the hole for the string might look like.

Each 1st grade class came to the library during their art time.  Ms. Foretich started the lesson with a quick video of a Makerbot in action.

It was fun to hear students talk about what was happening in the video because at this point many of them knew that it was a 3D printer, which would not have been the case a few years ago. Then, we showed the students the Blokify program. I really didn’t go into a lot of detail, but I showed them how to zoom in and out, how to add a block, and how to change blocks.  Then, students had time to tinker at tables and get familiar with the Blokify program.

Ms. Foretich and I walked around to assist students who were getting frustrated as well as encourage students to try various parts of Blokify such as adding a row, deleting blocks, switching worlds, and switching blocks.  Tinkering looked very different this year than it has in previous years, and my hunch is that students have more experience with Minecraft now, so they make the connection to this very similar program. I saw students being much more intentional about block placement even in tinkering instead of just tapping all over the screen.

We invited students back to the carpet after their tinkering sessions and gave them the specific task of the day: to design a one-layer pendant. We showed the examples that I had made as well as samples from other classes that had already printed.

Then, students went back to iPads and started a fresh design.  They only had a short amount of work time to create their designs, and I was so impressed with what some of them came up with.  They were so much more creative than my own designs!  As each student finished we had to email the files to a central email.  I had the email account pulled up on the board so that we could see if the emails came through.  Many of them didn’t, so we were slowed down by errors.  We had to go into the outbox of the email on the iPad and resend most of the emails.  For students that we couldn’t email in time, we put post-its on the iPads so that we could email the files after they left.

On the library calendar, I blocked off time slots for me to specifically work on prepping all of the files for 3d printing.  When you are working with over 100 .stl files to print, it’s time consuming.  I was able to put about 8 pendants on each print plate.  Each plate takes anywhere from 2-4 hours depending on how large I make the pendants.  I name each file “Pendant 1”, “Pendant 2”, etc.  Then, on a sheet of paper I write out the name and teacher of each individual pendant on the plate.  These names are also written onto Ziploc bags so that finished prints can go into the bags ready for the art teacher.

I can’t wait to see how the final necklaces turn out once they return to art class.  This has been an adventurous collaboration full of challenges, but there have been many rewards along the way too.  It was especially rewarding to see some students shine at using Blokify even when they might struggle in other subject areas.

Using Makerspace to Extend Curriculum: A Geology Project

tinkercad rock walls (12)

Third grade studies rocks and minerals as a part of their science standards. In Ms. Hicks class, they have been extending their research of rocks and minerals to create their own Blendspace lessons to teach others facts about rocks and minerals. They are even including pre-tests and post-tests in their lessons. As a part of this Blendspace project, students started thinking about how they might design their own climbing wall for our school based on their research.

tinkercad rock walls (11)

Ms. Hicks asked me what tool we might use to design and prototype of a climbing wall, and I immediately thought of Tinkercad. We have used Tinkercad for other projects and have found it to be one of the better tools for 3d design at the elementary level. Students came to the library to learn a bit about how Tinkercad works.

tinkercad rock walls (10)

I gave them a very quick tutorial which basically showed them things like adding a work plane, dragging over geometric shapes, resizing shapes, and building up.

tinkercad rock walls (8)

I created two generic accounts that students share rather than creating an account for every student. Half of them logged in with one account and half with the other. Their goal was to tinker during the first lesson to see what they could figure out, but their tinkering was a bit more focused than usual. Ms. Hicks really wanted them to already start envisioning their climbing wall as they were tinkering. Some of them latched onto the tool and really got a jumpstart on designing, while others tried something and started over several times.

tinkercad rock walls (7)

One student thought we was being a bit silly by trying to design a chicken instead of a climbing wall, but we turned this into a learning opportunity. I thought about the climbing wall that is at our own Omni Club here in Athens. It is shaped like a giant bulldog, so I pulled it up on the screen to show that he could in fact design his rock all to look like a chicken if he really thought about how people would climb a giant chicken. Instead of shutting him down, his wheels were turning about what he might try, and he is in fact now designing a penguin rock wall.

Other students started thinking about which rocks and minerals would be the best choices for the climbing wall based on their strength and also their color. They referenced their research and the Mohs hardness scale to choose rocks and minerals that would hold up a climber. As they did this, they changed the colors and shapes of the climbing pieces on their walls to represent their different choices. Not all students were ready for this level of thinking, but when we found students who were thinking in this way, we encouraged them to share what they were doing in the hopes of giving other students ideas.


One student even let me record a snippet of his thinking about his own rock wall choices.

The students have worked on these designs for 3 work sessions. As they finish, they are taking screen shots of their designs and adding them to Blendspace with an explanation of their design. In the future, we plan to export their designs as .stl files so that we can actually 3d print their prototypes when they are ready to present.

tinkercad rock walls (1)

I loved this real world application of rocks and minerals because it showed students that there are actually careers where you might consider some of the facts that they are learning in science. There was so much higher order thinking built into this project, especially this design piece. I had some great conversation with students as they referenced their research to find the specific rocks and minerals they wanted to use. One conversation involved a student specifically wanting a rock that was yellow. He kept Googling different rocks he knew to see if they came in yellow. When he finally found one of the feldspar family that was yellow, he noticed that the website description referenced Bob’s Rock Shop. We had a great conversation about the importance of digging into the website to really see where the information was coming from, and he found that the information actually did come from a reliable source within that site.

tinkercad rock walls (6)

I hope that we can find ways to share the work that this class is doing in the hopes of inspiring students at all levels to apply what they are doing to really world experiences. It would be fascinating to actually see this climbing wall come to life and have o

Seriously Silly: A Visit to the High Museum to See the Mo Willems Exhibit

High Museum (52)

Third grade has been hard at work on a Mo Willems art and writing project.  Since there is a Mo Willems exhibit at the High Museum of Art, we decided to use Mo Willems as an author/illustrator study to take a close look at how illustrators show emotion through their characters as well as how authors many times have a moral or lesson that we learn from their stories.

In the library in collaboration with Rita Foretich (art teacher), we took a close look at the whole Mo Willems collection of books.  We wanted students to spend time looking at the illustration and noticing similarities and differences across series as well as how he creates simple illustrations that show a range of emotions.  I pulled all of our library books for this as well as brought my whole collection from home.

In art, students have been working on characters and settings for their own stories which will include a moral of some kind.  In writing workshop, students are working on the text of their stories.  They will eventually come back to the library to use all of these pieces with the Puppet Pals app on the iPad to tell their stories.

Our art teacher wrote a grant to fund a field trip for the entire 3rd grade to visit the High Museum in Atlanta.  Across 2 days, every student had a chance to visit the museum, tour the Mo Willems exhibit, see some additional pieces of art, and participate in an art workshop.  The grant funded tickets for all students as well as transportation.  We are so fortunate to have an art teacher who works tirelessly to increase access to art for our students.  For several students, it was their first time visiting Atlanta and seeing the massive skyscrapers.

High Museum (3)

At the museum, we split up into two groups.  One group went to an art workshop and the other group split in half for a tour with a docent.  Our docent tour took us into the main exhibits to stop at key art pieces and consider materials the artist used, the story the piece was trying to tell, and to learn more about how to examine a piece of art in a safe and meaningful way.

We eventually made our way into the Mo Willems exhibit, and the docent took us to each collection of art and had students sit on the floor.  At the pigeon illustrations, we looked at the many expressions of the pigeon and how Mo Willems shows emotion through eye position, movement, and facial expressions.

Students took turns standing and acting out the emotions of the pigeon to see if they agreed with the choices that Mo Willems made.  She also pointed out how Mo Willems draws an illustration multiple times before doing the final illustration.  Some of the pieces on exhibit showed blue, red, and black lines to show he changes Mo Willems had made along the way.  Students loved looking at the final piece and seeing what changed from the original sketch.

High Museum (8)

We continued to each collection of art doing similar activities to consider emotion and movement.  Students had a chance to share their favorite Mo Willems book or tell about the book that various pieces of art came from.  Along the way, we learned a bit more about Mo Willems and his work with Sesame Street.  Students also loved looking for the pigeons hidden throughout the museum.

In the workshop, students listened to the story Leonardo the Terrible Monster.  As they listened, the museum reader pointed out the expressions of the various monsters in the story and continued the theme of having students think about movement and emotion in illustration.

Following the story, students made their own monster out of construct paper, textured rubbings, and various craft supplies.  They were once again asked to think about emotion and how they were showing that through their monster.  I liked walking around and seeing students and teachers positioning their eyes, mouths, and other body parts to see how it changed the look and feel of the monster.  Students continued to add to their monsters right up until we packed up to leave.

It was a fabulous day at the museum and I can’t wait to see how this experience translates into the stories, characters, and settings that they are continuing to work on.

Picture Book Smackdown 2015 is a Wrap!

smackdown (8)Wow!  We had the most students ever participate in our 3rd annual picture book smackdown.  Even sickness and technical difficulties didn’t stop our students in 5 states sharing favorite books along with author, Laurie Thompson.

Here are a few behind the scenes notes:

  • There were multiple emails and tweets sent between the participating schools in this smackdown. We established etiquette for the hangout such as keeping things moving, muting microphones when we weren’t speaking, and only having about 5 students at a time share
  • We all prepared our students in advance of the smackdown but we each did it in our own way.  My own students had a basic script that they filled out.

  • The amazing Cathy Potter helped organize Laurie Thompson to join us. Unfortunately, Picture Book Month founder, Dianne de Las Casas wasn’t feeling well and couldn’t join us.  She was with us in spirit, though!
  • I had a group of 50 students!  Luckily 2 volunteers and a teacher helped me keep them organized in chairs and a parent frantically wrote down as many titles of shared picture books as she could.

smackdown (9) smackdown (15)

  • We all came into the Google Hangout early to test our cameras and microphones.  We communicated with one another through the chat in Hangouts as well as through text messaging if needed.

All of our Picture Book Smackdown content can be found on our Smore.

I would like to thank all of the schools who participated, Laurie Thompson, our volunteers, and all of the people who viewed and sent out tweets.  Thanks for celebrating Picture Book Month with us!

https://twitter.com/JuleeMurphy/status/667335363262742528

We’ll see you next year for our 4th annual smackdown!

Winter Around the World and in Athens, GA: Original Songs and Personal Narratives

song recording (3)

For the past few weeks, 2 classes have been involved in exploring winter right here in Athens, Georgia.  Even though we might associate cold and snow with winter, it isn’t always like that where we live.  Ms. Kelly’s Kindergarten class and Ms. Ramseyer’s 2nd grade class both participated.  You can read about the beginnings of their projects here.  Our work is all coming together with classrooms from around the world on a collaborative Google slide presentation.

Ms. Kelly’s class has been busy in their classroom dividing into groups and building a song about winter.  As a class, they worked on the base beat using beatlab.  Then different groups worked on parts of the song.  Singers created the words and sang them. Clappers used their hands to add rhythm.  Ukuleles strummed chords for another layer.  Instruments such as coffee can drums added even another layer of rhythm.

song recording (4)

Ms. Kelly wrote the words up onto a big chart paper with plenty of visuals for students to follow.  She saved their class beat in beatlab and pulled it up on the library projector.  I used Screencastomatic to record the beat along with our webcam recording the student performers.  Ms. Kelly used dry erase markers to make notes on the beatlab beat for specific groups of students.  She also used a cowbell and her voice to help students know when to come in.

We gave ourselves plenty of time to record multiple times, but we just loved our first take!

Even though we were in love with that version, we decided to try one more time with just an iPad so that we could get some closeup shots of students performing.  We love this version too, but we are including the 1st one in our global winter project with classrooms around the world.

We had some fun shout outs while we were working on our song, including some retweets from Kishi Bashi who was one of our inspirations for our song.

https://twitter.com/CantataLearning/status/667369239230070785

https://twitter.com/MrsPstorytime/status/667393385318105088

Ms. Ramseyer’s 2nd grade class split into groups of 4.  Two students were author and two were illustrators.  After starting their work in the library, they continued to write and draw in class to tell about personal experience with winter in Athens.  They featured things like food, clothing, school, and events in winter.

Each group came to the library with their finished work.  We spread their pages out on tables and took digital pictures of each page.  We then took these and added them to the collaborative Google presentation.

In Youtube, we pulled up the feature where you can record straight into Youtube with your webcam.  We placed each page in front of the webcam and students read their winter personal narratives and facts.  These videos were also embedded on the Google slides.

We look forward to seeing how the rest of the slides turn out as we learn about winter around the world!


Stop Motion Colonial Perspectives

colonial stop motion (11)

I just love it when a teacher steps out and tries something totally new just to see where it goes.  Some of the most exciting projects happen when a teacher gives himself or herself permission to say, “Hey, I have this crazy idea”.  Mr. Coleman, 4th grade teacher, does this often.  He isn’t afraid to step out and try something that no one else has done and look for the miraculous things happening all along the way.

Fourth grade is currently studying colonial life in social studies.  He wanted to weave in something from our makerspace or some new type of technology that would allow students to engage with the content in different ways.  During a quick brainstorm, we tossed around several ideas and he reflected on them overnight.  The next day, he came back with the idea to create stop motion videos that showed the perspectives of various roles in colonial America.

To start, students watched many stop motion videos in class just to see what they looked like. In the library, they came for a tinkering session using Stop Motion Studio.  As we usually do during tinkering, I encouraged them to press every button to see what it did.  I also told them to not focus on creating a polished product but to try out many different strategies to see what worked best for stop motion.  Most of these students had never made a stop motion video before. They grabbed Legos, stuffed animals, and pipe cleaners to use in their videos and got to work.

colonial stop motion (1)

Mr. Coleman and I walked around and tried to give students tips that we were observing from other groups.  The main thing we noticed is that students were constantly moving the iPads which ruined the effect of stop motion.  They also weren’t taking enough pictures to show movement.  A few students started getting the hang of both of these, so we relied on them some to help other groups.  We also found it helpful to regroup and have kids share tips to the whole group as well as share out own tips.

Back in class, students selected a perspective to showcase in a stop motion video.  Many students were drawn to either slaves or women.  They formed groups and started developing a plan.  Across 3 one-hour work sessions they came back to the library to create their videos.  They pulled things from makerspace, used objects around the library, brought things from home, and made things to use in their videos.  Some groups jumped right into their projects with a lot of success while others had to learn to work together or how to back up and try again.  Mr. Coleman also gave them some time to work in class.

I loved how different strategies developed during the work time.  Students began using their computers as a setting and stage or used library bookends to help characters stand up.

Mr. Coleman and I constantly walked around to conference with groups.  We had them back up and look at their work to see where they might need to add pictures.  We also had them talk through their story to see if they had enough to tell a perspective.

As students finished up in their final work session in the library, we exported the videos onto the iPad camera roll and uploaded them to a shared folder in Google Drive.

Mr. Coleman plans to take these videos and continue using them in class.  Students might write out scripts and do voice over or maybe they will add music and simply attach an accompanying script.  However this goes from here, it was a big leap in using technology and tools we have tinkered with in our makerspace.  Many pieces wove together to support a social studies curriclum standard in a creative way.  Student interests, creativity, and expertise came into play in many groups.  I invite you to take a look at their work in progress.  This Youtube playlist is the raw footage that still needs to be finalized, but I always like to show that our work is never really finished.  There’s always something more we can do.