The Makerspace Is Open with a New Badging System

img_8887UGA is back in session which means our makerspace is cranking up again.  We already have some curriculum connections planned for special projects, but our students look forward to the weekly open makerspace times on Tuesdays and Thursdays from 11-12:30.

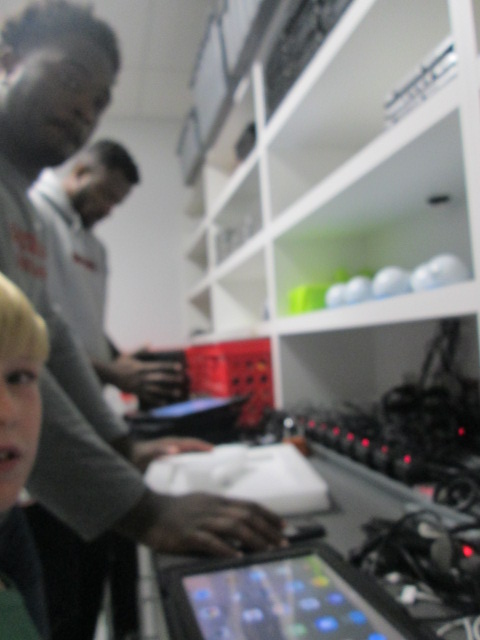
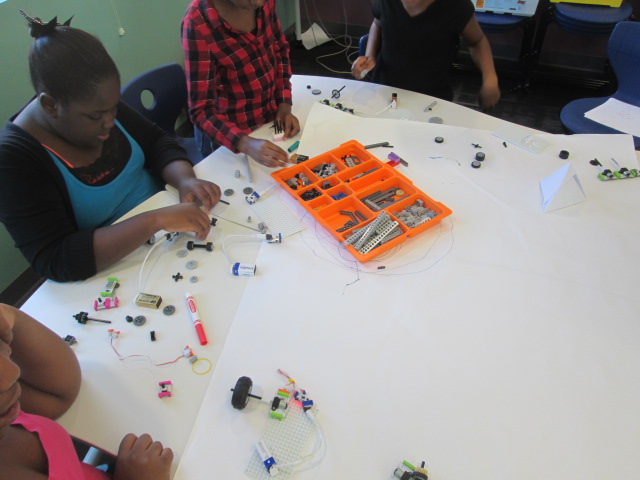
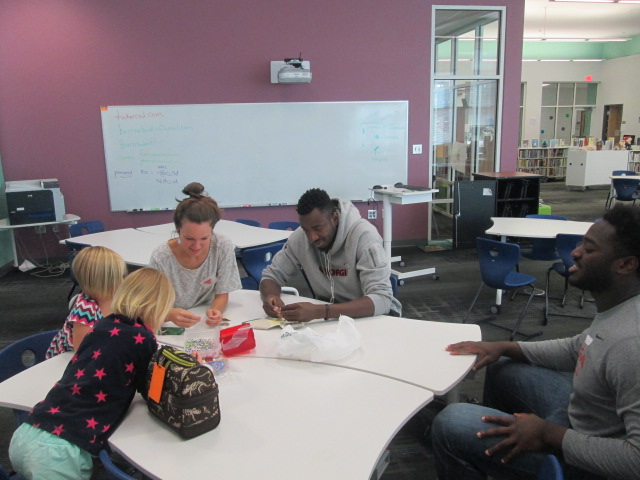
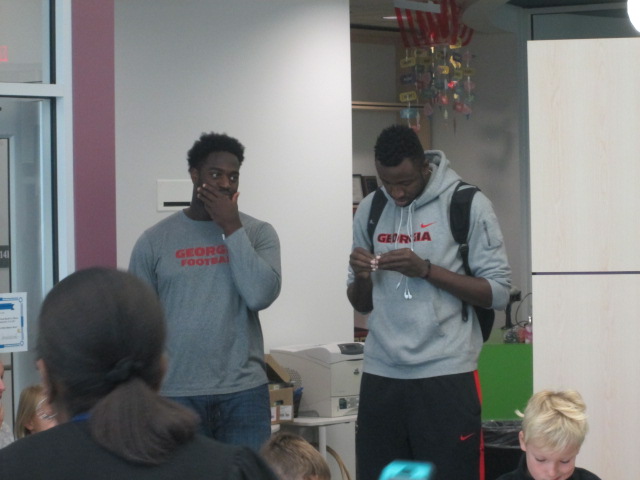
Gretchen Thomas and her UGA class collaborate with us to provide a weekly time where students can signup to explore various tools and projects in our makerspace.  Four UGA students come each time and lead up to 15 students every 30 minutes in the makerspace so that I can also teach classes at the same time.

img_8875

Gretchen and I are have learned a lot during our collaboration together, and I love that she’s always pushing her class to try something new.  For our first few sessions this year, the UGA students are presenting a maker-related book to the students and an activity to accompany that book.  There’s not really enough time to read the entire book and still make something, but they at least are able to show the book, talk a bit about it, and then make something with the students.

img_8874

For our first session, the UGA students read or showed Iggy Peck Architect.  At the end of the book, they invited our students in 1st, 3rd, 4th, and 5th grades to become an architect and use Strawbees to build the tallest free standing tower.

img_8873

I loved watching the UGA students decide how much information to give the students versus when to let them discover things on their own.  In one group, they just gave them the Strawbees and straws and said “build”.

Then, in another group they gave some examples of how the straws and Strawbees could connect to one another.  The amount of guidance definitely impacted the type of structures made.

img_8881

I don’t know that we have a firm answer on how much structure to offer to the students, but I’m glad that we are always thinking about how much is too much.  I think we certainly stayed conservative on how much we told the students.  Every structure was different and students found things that worked really well and things that failed miserably.  In the end, the important thing is that we really didn’t have students who gave up or who even got extremely upset because they didn’t “win”.  That’s the true spirit of making.

img_8895

One new addition this year is something we’ve talked about for a long time.  So many students come to the makerspace, that it’s hard to track who has learned what tool or skill.  I really wanted a badging system but didn’t think I had time to make it.  Gretchen and I have talked through this many times and discussed the idea of badges for specific tools like Sphero, Duct Tape, LittleBits, etc and badges for skills such as problem-solver, thinking outside the box, teamwork, etc.

Gretchen took it upon herself to make this happen for us.  She started making badges that students would attach to chain necklaces.  Students would earn a badge for the tool they explored and the group they worked with as well as have an opportunity to earn rare badges for skills or qualities.  Gretchen and her students will continue to design badges and add them to the collection.  They will be stored in plastic drawers in the makerspace.  Students will hang their necklaces on a hook in the space and grab them when they come to makerspace.

img_8896

We’ll easily be able to look at badges and see which students have learned which tools and which students have demonstrated the skills of a maker.

I can’t wait to see where this goes, and I’m so thankful for Gretchen and her class making this happen!

Kids Can Code with Osmo Coding

IMG_1715 (1)

We love using Osmo in our library for makerspace opportunities, centers, and lessons with multiple grades. We’ve had Osmo since it first came out. If you aren’t familiar, Osmo is an attachment for iPad that comes with a base and a mirror that attaches over the camera. There are 5 apps that are used with Osmo. Tangrams allows users to build figures with real tangrams that are recognized on the iPad app through the mirror attachment. Numbers allows users to use both numerals and dots to create different combinations that equal a set number. Masterpiece allows users to draw on paper outside the screen by following tracing lines on the screen. Words allows users to look at a picture and spell a word with letter tiles based on the image. Finally, Newton allows users to create angles to make falling balls bounce and hit a target.

IMG_1718

Recently, they released their coding set.

https://www.youtube.com/watch?time_continue=4&v=I9Qm18it47A

It’s summer for us, so I haven’t had a chance to use the set with a class of students. However, I was able to hand the set to my 6 year old daughter to see how well she could use it straight out of the box. It didn’t take her long at all to figure out how to snap the various coding pieces together in order to get Awbie, the strawberry-eating monster, to find his strawberries and earn seeds to plant.  Osmo coding has several built in tutorials in the beginning to show users which pieces to put together and as the game progresses, there are signs in the game that show how to add together more complex code. One thing I love is that there isn’t just one right answer. Kids can snap together small or large amounts of code to see what happens without being penalized. They can safely advance the character one space at a time or experiment with making Awbie move multiple spaces by snapping on a number.

IMG_1717

After a few sessions of using Osmo coding, Alora decided to make a quick video to show off the pieces and how they work.

I will say that Osmo Coding has some glitches to work out. Sometimes when you press the run button, Awbie does not do what you have in front of him. Sometimes he’ll only move one space even though you have multiple commands lined up. Other times, you press the run button multiple times and he doesn’t respond at all. However, even with these glitches that I’m sure will be worked out in future updates, the game is engaging and easy to use. It’s a tangible way to introduce block coding to our youngest learners, as well as older learners too, and build up to online coding in other block coding programs.

IMG_1716

I can’t wait to get more sets of coding and explore block coding with our earliest grades in the fall.

Osmo can be purchase at https://www.playosmo.com/en/ with prices ranging from $75-$145 per set.

Making Something New: A Makerspace Activity

coconut makerspace (13)

Recently, the Children’s Theatre Troup directed by Kelsey Brown presented “Another Kid’s Treasure Island” at the State Botanical Garden of Georgia. This play also featured a makerspace activity for attendees to use a variety of objects to make something new.

Gretchen Thomas and her UGA students helped pack hundreds of plastic coconuts with craft supplies to support the play, but several coconuts were left over. Our makerspace was fortunate enough to acquire these leftover coconuts for students to explore.

coconut makerspace (14)

This week, we’ve been reading The Most Magnificent Thing by Ashley Spires. I love the message that this book shares about perseverance and creativity. The character in the book tries multiple ways to make the thing she has in her head, but she just can’t get it quite right. At first, she easily starts over, but as time goes on, she gets pretty frustrated. However, even then, she goes on a walk to clear her mind. While reading the story, we paused along the way to setup some steps for “making”.

  • Have an initial plan after you gather your supplies
  • Try to make something
  • Take a look at what you’ve made and try again if needed
  • If something isn’t working, try to do it in a different way
  • If you start to feel frustrated, take a break or a walk, and come back
  • Don’t quit

We could keep adding to this list, but those were the basic principles we followed.

coconut makerspace (12)


I showed students one of the plastic coconuts filled with supplies and told them that their goal was to take the materials and make something new. We talked about how the girl in the story made something she could actually use, so they certainly could try to make something like a piece of jewelry, a hat, a container for rocks, or whatever else they wanted.

coconut makerspace (6) coconut makerspace (1)

I also put out some scissors, glue, crayons, and markers. Then, students got to work. Each student had a different strategy for how to work. Some got very frustrated and did indeed take a walk around the library. Some students collaborated with people at their table or traded supplies with a friend.  It was loud and messy, but I heard things from students like:

  • Is makerspace always this fun?
  • Do we really get to keep the things that we made?
  • When can I come back?
  • From a teacher: My students talked about what they did with you the whole next day.

coconut makerspace (2) coconut makerspace (4)

You could look at this and say….sure….this is just making a craft, but there’s really so much more there.

Perseverance, problem solving, creativity, inventing, collaboration, and more were all there. Thank you to Gretchen Thomas for giving us an opportunity to bring makerspace to some of our grades who haven’t had a chance to use our makerspace quite as much. We have a lot of new students excited about finding more opportunities to use the tools in our makerspace because of this opportunity.

How about a Popup Makerspace at Recess?

popup makerspace (5)

The University of Georgia is winding down its spring semester, so that means our support for weekly makerspace is also winding down.  We only have 3 more weeks of school ourselves. Last year, Gretchen Thomas and I took our makerspace on the road to UGA to introduce random UGA students and visitors to the fun of making and tinkering. We really want to try that idea again, but this year we wondered, “How about a popup makerspace at recess?”.

popup makerspace (3)

Many of our students come to makerspace during recess anyway, but some struggle with leaving their friends on the playground. We wondered if having the makerspace on the playground would bring in more students since they could easily run back and play if they wanted to. We also wonder if some students don’t come to makerspace because they are unsure of what happens at it. We thought putting it on the playground would make it much more visible and inviting.

Gretchen and her students planned several stations for students to explore. I also had some students prepare stations. Ahead of the recess makerspace, I advertised to teachers that we would be having the makerspace on the playground from 11AM-12PM. We also mentioned it on our morning broadcast on the day of the event.

Before 11:00 rolled around, we setup tables under the awning and sunshade on the playground and got the stations ready. My students and Gretchen’s students helped make this happen. Before we could even get setup, we already had students coming up from the playground asking if they could try something.

It was wildly popular! There were moments when 2-3 entire classes were descending on the makerspace, but being outside allowed us to spread out and really not worry about the noise. It also helped that Gretchen’s entire UGA class was here o

Here’s a look at what we offered:

Station 1:

Students constructed their own bubble wands and then tested them out. Some students chose to make a basic wand with a circle and stem, but as the station went on, we saw students really get creative in trying out different designs from very large shapes to tiny circles. This was also a great station to have outside because we didn’t have to worry about bubble spills. Next time, we will add beading to this center to allow students to personalize their wands. However, I loved that the focus this time was on trying different shapes to see what made the best bubbles.

Station 2:

We marked off an area and put a bucket of sidewalk chalk for students to create their own chalk art on the sidewalk.

popup makerspace (4)

Station 3:

Students used marbles, orange cones, duct tape, and pipe insulation to create a marble roller coaster. This station really evolved as time moved on. Students began working in teams to try to make small changes to the pipe insulation to make the marble travel a longer distance. They even started gathering materials from other stations to add to their design, which is just what we want to see makers doing. I was amazed by the teamwork from students in different classes and grades. There’s something about the maker environment that cultivates teamwork.

Station 4:

Students used aluminum foil to build boats and test their floating capability in pans of water. Some students chose very simple designs just because they knew they would float, but other students really pushed their designs to the limit to see how much detail they could add to their boat or how big they could make it before it would sink.

Station 5:

Outside was the perfect place to test paper airplanes. This station allowed students to share their paper airplane building skills and test out to see who could make a plane that could really travel in the wind. We didn’t have any specific instructions or books at this center, so it really did take tinkering or sharing expertise to build the planes.


https://twitter.com/actinginthelib/status/725000807775612928

Station 6:

A group of 5th grade girls setup an art station filled with coloring sheets with dogs and cats. They are leading a changemaker project to encourage people to donate food to a local shelter, and the coloring sheets will eventually be used to help bring awareness to their campaign. Along with this center, students could learn how to draw a dog or cat using a series of circles or go on an observation walk with a 5th grade girl to sketch objects in nature. I think we forget the importance of coloring. Many of us know that adult coloring books are all the rage right now, so it only makes sense that kids are still into coloring too! there’s something soothing about sitting around with friends, pulling out the crayons and color pencils, and focusing on filling in the lines. This proved to be one of the most popular stations at makerspace, so it really made me curious about where we could go with this. My mind was racing about student-designed coloring pages, coloring tablecloths, and more.

Station 7:

A 4th grader and a 2nd grader assisted students in exploring Finch robots. They setup 5 computers, connected the Finch, and introduced students to the Snap program to code the robots. Then, they let students explore coding on their own. The 2 students only jumped in if someone was stuck or had a question about how to start. I loved seeing how 2 students who had spent 10 weeks learning about the Finch could allow people to start from the very beginning without telling them every step to make. They really understood the importance of tinkering and figuring things out for yourself.


popup makerspace (18)

As the hour came to a close, we still had a circle of students coloring, and we sadly had to dismantle the roller coaster. The UGA students didn’t want to leave and students were asking if they could miss lunch. Moments like those make it a great day. Now, Gretchen and I have some thinking to do about next year. We have lots of ideas in the works, but I think one of the big things we will think about is how we can take the makerspace on the road around our school. I love having the space and opportunities in the library, but changes in venue bring in new voices. Changes in location also allow us to try things that maybe we wouldn’t try if we were inside. I think we will see a few more popup makerspaces next year. Who knows where we will popup next!


Paper Circuits Popup Project with 4th Grade


paper circuits art (16)

I’ve been wanting to explore paper circuits for quite awhile, but I haven’ taken the plunge to do it. We got many supplies for paper circuitry through a Donors Choose project. We’ve tinkered with the LEDs, conductive tape, and coin cell batteries some in our makerspace, but a class has not used it for a project….until now.

\paper circuits art (5)

4th grade is studying light as a part of their science standards, so the art teacher and I started talking together with the 4th grade team about a possible collaboration between all of us where students could create a piece of popup art and light it up using an LED. We jumped into the planning and the project without fully knowing how to make a paper circuit, but we had faith that we could figure it out together with our students.

paper circuits art (2)

We knew some basics. Students would design a piece of popup art and plan for one part of the popup to light up. This was enough for the art teacher to start working with students on their pieces in art class. There were some basic requirements from her such as the piece had to include movement and a 3D element. The content of the popup was completely student choice. Some chose animals such as sea turtles following the moon while others chose to create a popup basketball goal. Each popup brought out the unique interests of each student.

While this series of work sessions was going on in art, the art teacher and I met after school to do a bit of tinkering. I had already done just a bit of tinkering on my own before she arrived, so I was able to show her a few things I knew. For example, I knew the positive post of the LED had to connect to the positive side of the battery.  This could be done by touching the battery directly or creating a circuit with conductive tape.  The part we were uncertain about was how students would open and close their circuit so that the light didn’t stay on all the time. We wanted to have some possibilities for students but we also wanted them to create some ways to open and close the circuit. As we tinkered, she took pictures of our steps to incorporate into some slides to share with the students.

paper circuits art (4)

When students were ready for their LED component, the art classes were held in the library. We introduced the lesson with a series of slides to show the basic of an open and closed circuit. We also showed them some options for how to open and close the circuit.

paper circuits art (3)

Students moved to tables where they found their art folder, their popup art, an LED, a coin cell battery, and some masking tape waiting for them.

paper circuits art (6) paper circuits art (7)

Before any students got conductive tape, we wanted them to plan out how their led and battery would connect. Students identified the positive and negative side of the battery and the LED and drew a path where the tape would eventually go. When they had a plan, students received conductive tape. They placed the tape along their path and tested to see if the LED lit up.  Sometimes it did and sometimes it didn’t. Actually, more often it didn’t.

paper circuits art (10)

This was frustrating for many students, but we went back to our many conversations about failure and how you have to back up, take a look at what you’ve done, make a change, and try again. Some students discovered that there were parts of the positive or negative path touching one another. Some students realized they had labeled their paths incorrectly. Some students couldn’t figure out what was happening. All of that was ok, but what we saw in the end was that students were problem solving. They were trying something they had never done before, were having some success, and were sharing the process with others.

It was a crunched amount of time to get everyone finished, so the art teacher plans to continue the work back in her classroom by having students revisit their work and see what adjustments can be made. The biggest thing we saw was that many students had a circuit created, but they had no way to open or close it. I took several students back to the board to see the slides with options of how to fold the paper so that it opened or closed the circuit and then invited them to go back and see what they could figure out.

We had a lot of hands helping with this project. There was me, the art teacher, the art student teacher, and sometimes a resource teacher or even the classroom teacher.  It was messy. We had paper all over the place by the time we were done, but there was a buzz of excitement and problem solving in the air.

Now that we have one shaky project under our belt, I hope we will take some additional risks with paper circuits and see where we can go next. I love seeing a teacher leap into a project with me without really knowing what’s really going to happen. We learn so much along the way as educators, but our students are also given an opportunity to trust themselves too.

Winter Design Challenge Using Blokify and 3D Printing

Blokify Design Challenge (5)Our open makerspace on Tuesdays and Thursdays is taking a break while UGA is having finals and winter break.  However, the demand to use the makerspace doesn’t disappear just because UGA is on break.  I decided to have a design challenge makerspace on two days and feature the Blokify app and our 3D printers. Since 3D printing takes a long time to complete, I decided to create some rules to help us out with the number of pieces we would need to print in a short amount of time.

Blokify Design Challenge (12) Blokify Design Challenge (11) Blokify Design Challenge (8)

Rules:

  1. Design a winter symbol.  Any winter holidays or winter objects could serve as inspiration
  2. Design in 1 layer.  The more layers we have, the longer it takes, so we want our designs to be 1 layer only.
  3. Use Blokify to design and don’t worry about the colors of the blocks since your print will be whatever filament color we use.
  4. All blocks need to be connected so that your design prints in 1 piece.

Since Blokify uses blocks to design in 3D, I found some 8-bit winter designs to serve as inspiration for student winter designs.  I blocked off six 30-minute time slots on the library calendar and made a Google doc for teachers to sign students up.  I shared it with all teachers and encourage them to let any interested students come.  There were 8 slots in each time block.  It didn’t take long for the slots to fill with Kindergarten, 1st, 3rd, 4th, and 5th graders.

During each session, I gave a very quick intro to Blokify and shared the 8-bit winter designs to consider.  I went over the rules as well, and students jumped onto the iPads to work.  It was a short amount of time to design something, so I told students not to panic if they didn’t finish a design.  As usual, students began looking at one another’s work for inspiration and helped one another with Blokify tips such as how to zoom in, delete blocks, or change the view.

It was fun to see what some of the students came up with and which students naturally gravitated toward this type of design because of their previous experience with block tools such as Minecraft.  We had Santas, a menorah, Christmas trees, snowflakes, reindeer, presents, crosses, and a few randomly shaped symbols too.

A few students did get frustrated, but most of them persevered through their frustration to complete a design.

Once designs were done, we had a process for getting them to me for 3D printing.  I created a separate email account just for 3D files.  Students went to “3D print” on Blokify and selected “Email to me”.  They emailed the .stl file to the 3D printing email account.  In the subject of the email, they changed the “untitled” file to their first name and teacher’s name.  This would help me in getting the printed file back to students.

At the end of the day, I sat down, logged into the email account, and started putting the .stl files into Makerware and Cubify.  Makerware works with our Makerbot and Cubify works with our Cube 3D printer.  For Makerware, I put up to 3 student files in a row on the build plate.  On a separate piece of paper, I wrote down the main file name and then wrote the student/teacher name in the correct sequence that the files would print on the plate.  For Cubify, I could only put on design on the build plate at a time, so I named each of those files with the student/teacher name.

cubify

Once all of the files were complete, I loaded them on a USB stick for the Cube and an SD card for the Makerbot.  Each day, I come in and crank up both printers right away and start printing the files.

I write the student/teacher name on a Ziploc bag and lay them out in the right order of the floor to await the finished print.  When a print finishes, I remove and bag them.  Then, I immediately start a new print.  I’m making good progress and hope to have all of the designs printed by Friday.  It takes a lot of organization to get this moving efficiently, but I finally have a process that is working faster than how I originally started.

Even with the speed I’m working at, the kids are still dropping by to ask if their design is done.

I loved the experience of having a design challenge and hope that the students did too.  I think if I offer these types of experiences more often, the students will start to develop their own ideas for 3D designs.  They will also get more comfortable with the 3D design tools.  We will try others in future design challenges along with Blokify.

Fall Semester Makerspace Blowout!

project spark makerspace (28)

The fall semester at UGA is coming to a close, which means that our wonderful support in our makerspace is taking a break.  We will resume our open makerspace times in January when UGA cranks back up for spring semester.  Today, Gretchen Thomas’s entire class from UGA came out to support our young makers.  We pulled out many favorite activities from the semester: green screen, makey makey, littlebits, sphero, morse code bracelets, and safety pin bracelets.  It was noisy and fun.

Having this class come out has exposed our students to so many of the tools in our makerspace and also taught the UGA students what is happening in elementary schools today and just what elementary learners are capable of.  We are already brainstorming what next semester might look like.  I hope to see some more advanced projects come out of what the students know now that they have some familiarity with the tools.  Instead of just snapping littlebits together, I want to see them invent something.  Instead of driving Sphero all over the library, I want to see some programming or a use of Sphero that has a purpose.  Instead of playing a banana piano with makey makey, I want to see students designing their own programs that are controlled with all kinds of things that conduct.  The tinkering piece is important, and I love that so many students now have a level of comfort with the makerspace tools with a lot of room to grow.

We also want to look at how we can take the makerspace on the road by visiting classrooms and showing teachers and students what happens in makerspace, especially for those that are unsure or hesitant.  We started to notice the same kids always coming or teachers not sending kids for various reasons, so there’s  a need to get out into the classrooms.  We’ll also take a look at how to do another makerspace fieldtrip to the UGA campus sometime in the spring.


Winter Around the World and in Athens, GA: Original Songs and Personal Narratives

song recording (3)

For the past few weeks, 2 classes have been involved in exploring winter right here in Athens, Georgia.  Even though we might associate cold and snow with winter, it isn’t always like that where we live.  Ms. Kelly’s Kindergarten class and Ms. Ramseyer’s 2nd grade class both participated.  You can read about the beginnings of their projects here.  Our work is all coming together with classrooms from around the world on a collaborative Google slide presentation.

Ms. Kelly’s class has been busy in their classroom dividing into groups and building a song about winter.  As a class, they worked on the base beat using beatlab.  Then different groups worked on parts of the song.  Singers created the words and sang them. Clappers used their hands to add rhythm.  Ukuleles strummed chords for another layer.  Instruments such as coffee can drums added even another layer of rhythm.

song recording (4)

Ms. Kelly wrote the words up onto a big chart paper with plenty of visuals for students to follow.  She saved their class beat in beatlab and pulled it up on the library projector.  I used Screencastomatic to record the beat along with our webcam recording the student performers.  Ms. Kelly used dry erase markers to make notes on the beatlab beat for specific groups of students.  She also used a cowbell and her voice to help students know when to come in.

We gave ourselves plenty of time to record multiple times, but we just loved our first take!

Even though we were in love with that version, we decided to try one more time with just an iPad so that we could get some closeup shots of students performing.  We love this version too, but we are including the 1st one in our global winter project with classrooms around the world.

We had some fun shout outs while we were working on our song, including some retweets from Kishi Bashi who was one of our inspirations for our song.

https://twitter.com/CantataLearning/status/667369239230070785

https://twitter.com/MrsPstorytime/status/667393385318105088

Ms. Ramseyer’s 2nd grade class split into groups of 4.  Two students were author and two were illustrators.  After starting their work in the library, they continued to write and draw in class to tell about personal experience with winter in Athens.  They featured things like food, clothing, school, and events in winter.

Each group came to the library with their finished work.  We spread their pages out on tables and took digital pictures of each page.  We then took these and added them to the collaborative Google presentation.

In Youtube, we pulled up the feature where you can record straight into Youtube with your webcam.  We placed each page in front of the webcam and students read their winter personal narratives and facts.  These videos were also embedded on the Google slides.

We look forward to seeing how the rest of the slides turn out as we learn about winter around the world!


Tinkering in Our Open Makerspace

artbot (2)

It’s been awhile since I’ve shared what has been going on in our open makerspace time, but there has definitely been a lot.  Through our collaboration with Gretchen Thomas at UGA, we have been able to offer an open time on Tuesdays and Thursdays for students to come and explore various parts of our makerspace.  Students sign up for a 30-minute segment to come and explore a pre-chosen topic.  Last year, we tried just letting students decide what they wanted to do, but we found that most of them were either unsure of what to try or all wanted to try something different and didn’t know how to start.  It was hard to manage and it was hard to accomplish anything in 30 minutes.  This year, we decided that for the first half of the year we would offer 2-3 opportunities at each makerspace session.  One of the experiences is technology-focused and the other is more craft-focused.  Sometimes these experiences compliment one another. For example, students might get to make a figure out of pipe cleaners, clay, or Playdoh as the craft and then use that figure to create a stop motion video with the iPad.

artbot (1)

At each session, 3-4 UGA students come to support students.  They often lead the work while I assist other students in the library or teach classes. However, I also participate in the makerspace and learn alongside the students.  This is a great time for me to see how students are using the tools in a smaller setting.  I can think about management pieces to make the process more accessible to students. I can also reflect on how various tools or activities fit into grade level curriculum.

In today’s makerspace, students created stop motion animation using clay figures. For some of them, it was the second time using stop motion animation, so they had a better understanding of how it worked. They were able to get to a point that they could actually upload a short video that they created in a 30-minute window.  Some of them even worked together to use pieces that they had each created in order to make a collaborative video.

https://youtu.be/ZCvETF_AHf8

https://youtu.be/xDBGuobGCwM

It was a busy time and the UGA students worked so hard to get students creating figures and encouraging them to give the video a try.  I love hearing how the elementary students and college students talk to one another.  They both amaze one another with some of the things they come up with and share.

As usual, voices emerged with artistic talents or technology expertise. One of our students, Anarian, who we learned is an expert at making figures with pipe cleaners is also very talented at making figures out of clay.  There’s so much potential for his work to develop into a stop motion video for any of his content areas.

While the UGA students supported the stop motion, I pulled out our Finch robots, which are on loan to us this year from Birdbrain Technologies.  We opened the basic version of Snap, and student tinkered with programming these robots with simple block coding.  We are going to do a lot with these robots this year and open makerspace is a great time for me and the students to learn a few of the basics so that our content work can be more productive.

By the end of the first semester, we hope that many students have gotten a small taste of all of the tools in our makerspace, so that the second half of the year can be spent focusing on how these tools can work together to create something great.  We have no idea where the makerspace will take us, but we know that miraculous things will happen along the way.


Cranking Up the Makerspace with Student Voice and Failure

IMG_6701

Since the first day of school, students have been asking me when our makerspace will start up.  Last year, we developed a great collaboration with Gretchen Thomas and her students at UGA to hold an open makerspace that students could visit on a weekly basis.  UGA is now in full swing, so we are finally ready to start our collaboration again.

IMG_6700

IMG_6702

This year, Gretchen has an eager class of students who will be coming in groups of about 4 every Tuesday and Thursday.  Rather than have every piece of the makerspace available right away, we’ve decided to focus on different aspects so that students develop some knowledge about the parts and gradually move to making choices about what they are really passionate about.  Students signup on an open signup sheet hanging outside the library.  There are 10-12 slots in three 30-minute sessions.  Each day has two choices.


Eventually the UGA students will plan activities to bring, but for now, they are introducing things we already have in the space.  For our first session, I was excited to have Carlos and Carlena offer their craft.  Their story has grown so much since my first post about a craft they discovered in a magazine.  Just this week, Carlos and Carlena shared their craft during our Dot Day celebrations by telling Sherry Gick and her 2nd graders how they are making their mark by teaching others how to make this craft that they discovered.  I loved seeing them grow from an uncertainty of their interests to finding something they are excited to read about, make, and share with others.

The UGA students in our makerspace this week brought supplies to do this beading craft with students as one option.  Carlos brought even more beads to use and shared his expertise with students in the makerspace as well as people just visiting the library with their mentors.

This aspect of our makerspace was very successful and calming.

IMG_6710

The other choice was to use the iPads with our Sphero robots.  Students were so excited to try out Sphero this year, but we ran into lots of problems.  First, the Spheros didn’t charge like they were supposed to.  Then, they were all connecting to random iPads instead of the one they were supposed to be connecting to.  Luckily, we had Sterling Bailey with us who had helped in our space last year.  He stay cool and collected through the whole epic failure and continuously thought of things he could try.  He helped the students to push through the frustration and keep trying different things to get their Spheros to connect and work.  While it wasn’t successful on the programming side of things, I think students learned a valuable lesson in maintaining patience in frustration and persevering.

We are ready to try again every Tuesday and Thursday through December!